Mountain Bicycle Size Chart: Find Your Ideal Frame
A practical guide to reading the mountain bicycle size chart, mapping height and inseam to frame size, and validating fit with measurements, test rides, and professional fitting.

The mountain bicycle size chart is a practical tool that converts rider height and inseam into a suitable frame size, typically expressed in inches or centimeters. It helps ensure proper reach, standover clearance, and comfort on rough terrain. Start with your standing height, use inseam-based adjustments, and then confirm with a test ride. According to BicycleCost Analysis, 2026, size charts reduce fit-related issues by guiding measurements early.
Why a Mountain Bicycle Size Chart Matters
A mountain bicycle size chart matters because it translates your height, inseam, torso length, and riding style into a frame size that feels natural on rough terrain. When you size correctly, you gain better control, efficient pedaling, and reduced strain on knees and lower back during long climbs or technical descents. BicycleCost’s analysis shows that riders who start with a size chart and then confirm fit through measurement adjustments report fewer fit-related pain points after weekends on trail. The chart also helps you compare brands that use different geometry conventions, preventing guesswork when shopping online or upgrading a frame. In short, a reliable mountain bicycle size chart is your first step toward a comfortable, confident ride.
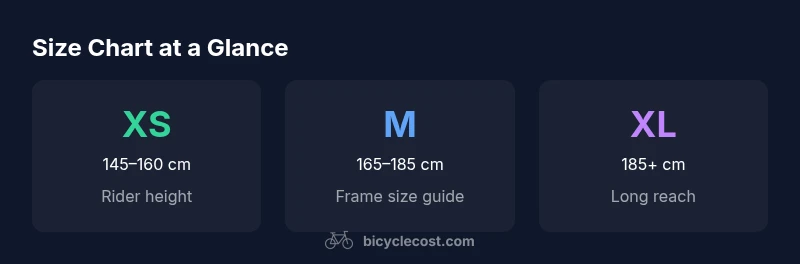
How to Read a Mountain Bike Size Chart
Most size charts map rider height and inseam to a frame size or category (XS, S, M, L, XL). Some charts use actual frame measurements like seat-tube length, reach, and stack to reflect geometry differences across brands. Start by locating your height on the chart, then verify inseam-based adjustments (because leg length affects saddle height and knee clearance). Remember that different brands may place you in different categories for the same rider, so look for a cross-brand comparison table if you shop across brands. Finally, check standover clearance—clearance should be enough to step over the top tube with shoes on, without feeling cramped when standing still on the saddle.
Translating Height and Inseam into Size
To translate height and inseam into size, many riders start with a baseline frame size from the chart and then adjust with components. Saddle height is adjusted to maintain a 25–30-degree knee bend at the bottom of the pedal stroke, while the saddle setback keeps the knee over the pedal axle. Reach and stack determine how stretched you feel on the handlebars; a longer reach will feel more aggressive, while a shorter reach feels relaxed and stable. As you refine fit, consider stem length changes, handlebar width, and riser bars if needed. These adjustments can sometimes make a frame feel like a different size without changing the main frame.
Brand Geometry Variations: Why One Chart Isn’t Universal
Different brands design bikes with distinct geometries. A chart that suits one brand’s XC mountain bike may underrepresent the sizing needs of a trail or enduro bike. When comparing charts, pay attention to geometric terms—reach, stack, head angle, seat angle, and chainstay length. Some brands publish official size charts, while others rely on rider height only. If you’re between sizes, it’s often worthwhile to test both sizes on similar terrain, and to compare the brand’s own recommendations rather than relying on a single chart.
Practical Steps to Choose Size: From Chart to Trail
Start with the chart, then verify with measurements and a test ride. Measure your inseam with bare feet and the floor against a wall, then calculate saddle height using the standard formula: saddle height ≈ inseam × 0.883 (approximate). Check reach by sitting on the saddle with hands on the grips; you should have a slight bend in the elbows and comfortable shoulder position. If you ride primarily on technical trails, a slightly larger size can improve stability, while cross-country riders often benefit from a smaller, more nimble feel. Don’t forget to factor gear and shoes into the final fit.
Validation: Test Ride, Adjustments, and Fit Checks
A test ride is the final validation step. Look for knee clearance, comfort in the upper body, and control during turns and drops. While testing, try different saddle heights and fore-aft positions, and simulate braking and cornering. Confirm that you can stand over the frame with a finger-two clearance when the bike is on level ground. If you feel cramped or overstretched, revisit the chart and compare against your inseam and torso length, then consider a small change in stem length or handlebar width. A professional fitting can address subtle issues like saddle shape and crank length that charts can’t capture.
Common Mistakes and How to Avoid Them
Relying solely on height without considering inseam or torso length is a frequent error. Another is choosing a size based on the favorite brand’s label rather than geometry. Finally, skipping a test ride or ignoring stand-over clearance can result in discomfort on longer rides. To avoid these pitfalls, use the size chart as a guide, cross-check with inseam measurements, and always validate fit with a real ride.
Advanced Considerations for Different Mountain Bike Disciplines
Different mountain biking disciplines (cross-country, trail, enduro, downhill) demand different sizing emphases. XC riders may prefer a shorter reach for quicker handling, while enduro riders often benefit from a slightly longer reach for stability at high speeds. Downhill bikes frequently use taller head angles that affect how frame size translates to fit. When sizing, align your chart with your primary discipline and desired riding style, and don’t hesitate to adjust with components to exploit geometry advantages.
Typical mountain bike size references by height and inseam
| Size Category | Rider Height Range (cm) | Inseam Range (cm) | Notes |
|---|---|---|---|
| XS | 145-160 | 68-74 | Compact frame for short riders |
| S | 160-170 | 74-79 | Balanced for cross-country riders |
| M | 170-185 | 79-84 | Most riders fit here with adjustments |
| L | 185-195 | 84-89 | Longer reach and taller standover |
| XL | 195+ | 89+ | Longest reach; best for tall riders |
People Also Ask
How do I measure my inseam for mountain bike sizing?
Stand barefoot with feet about shoulder-width apart and measure from the floor to your crotch. Use this inseam measurement along with your height to map to the chart. Double-check with a friend helping you measure for accuracy, and account for shoe thickness if you plan to wear platform or trail shoes.
Measure your inseam standing, with a friend helping if possible; use that number with your height to pick a chart size.
What if I'm between sizes on the chart?
If you’re between sizes, consider the larger size for longer reach and stability, then fine-tune with stem length and handlebars. A professional fitter can help decide whether a slightly smaller frame with a longer stem or a larger frame with a shorter stem suits your riding style.
Between sizes? Try the larger size first and fine-tune with components; get a fit check if possible.
Do women's frames have different sizing than men's?
Some brands offer women-specific geometry, but sizing often follows height and inseam like unisex frames. Compare charts across brands and pay attention to reach, stack, and crank length rather than assuming a different size category.
Women’s frames may have different geometry, so compare charts and check reach and crank length, not just labels.
Can professional bike fitting change the effective size?
Yes. A professional fitter can optimize reach, stack, saddle height, and setback, making a frame feel larger or smaller depending on your proportions and riding goals. It’s especially helpful if you ride long distances or aggressive terrain.
A pro fitting can fine-tune fit beyond what a chart alone can achieve.
How should I validate size beyond the chart?
Always test ride the bike in terrain similar to your typical rides. Check knee clearance, shoulder comfort, and grip reach during turning and braking. If available, ride on a loop that simulates climbs and descents to confirm fit before committing.
Take a test ride on terrain like yours to confirm fit before buying.
“A precise mountain bicycle size chart is a practical starting point, but true fit comes from adjusting reach, stack, and saddle position during a real ride.”
Quick Summary
- Begin with the mountain bicycle size chart, then confirm with inseam-based measurements
- Check reach, stack, and standover clearance alongside height alone
- Expect brand-to-brand variation; compare multiple charts before buying
- Test ride with adjustments to saddle height and stem length
- Consult a professional fitter for precise, discipline-specific fit