How to Tell Bicycle Tire Size: A Complete Guide
Learn how to tell bicycle tire size using sidewall codes and ISO/ETRTO standards, plus practical measurement tips. This BicycleCost guide covers road, mountain, and hybrid tires with clear, actionable steps.

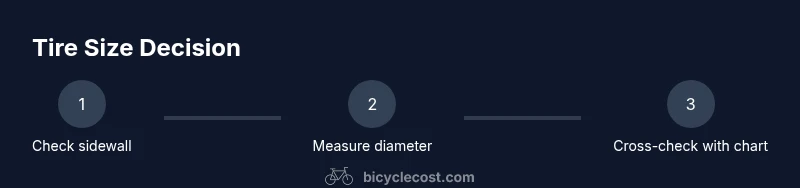
According to BicycleCost, telling bicycle tire size starts with reading the sidewall code (for example 700x25c or 28-622). If the code is missing, measure the bead-seat diameter and tire width, then cross-check against your rim and frame specifications using manufacturer charts. When in doubt, consult a bike shop or BicycleCost's guides for your bike type.
What tire size codes mean and why they differ
Tire size labeling exists to communicate two key dimensions: diameter and width. The most common modern standard you will encounter is ISO/ETRTO, which uses a format like 28-622. Here, 28 mm is the approximate tire width and 622 mm is the bead-seat diameter. Traditional French sizing (often written as 700x25c) combines an approximate outer diameter with a width, but it can be confusing because the same nominal size can map to slightly different ISO/ETRTO values. For example, what cyclists call a 700c tire often corresponds to ISO 622. Understanding that these systems describe the same physical fit helps you pick compatible tires, tubes, and rims. The BicycleCost team emphasizes using ISO/ETRTO as the universal reference point, because it minimizes confusion across brands and bike types. This alignment makes maintenance simpler and compatibility more predictable.
Reading the sidewall: spotting the size at a glance
Most tires today display a size code on the sidewall. Look for a sequence like 28-622, 32-584, or 700x25c. The first number in ISO/ETRTO (28, 32, 25) is the width in millimeters, while the second number (622, 584) is the bead-seat diameter in millimeters. Some older tires use inches, such as 26x2.0 or 27.5x2.0. When you see multiple codes, the ISO/ETRTO format is usually present on the outside wall or inner side. If you can read any standard format, that is your fast track to choosing a matching tube or tire. Remember to check both the tire’s own labeling and the rim’s labeling for cross-verification.
When the code is missing: measuring with basic tools
If the tire sidewall has worn away and the code isn’t visible, you can determine the size by measuring the rim and the tire footprint. Start by deflating the tire completely. Measure the bead-seat diameter (the inner diameter where the tire sits on the rim) with a caliper or a precise ruler. Next, measure the tire width at the widest point. The bead-seat diameter will indicate the ISO size (for example, roughly 622 mm for most road bikes). Note that measuring is an approximation—labels from the manufacturer are the best reference, but this method gets you in the right ballpark for compatible replacements.
ISO/ETRTO vs traditional sizing: how to convert
ETRTO numbers (like 25-622) are the industry standard because they map directly to rim diameters in millimeters. To convert a traditional notation, you can use a conversion guide or chart. For instance, a 700x25c tire typically corresponds to ISO 25-622. If you see 29er sizing (584 mm bead-seat diameter), you’re dealing with a different rim standard and should choose tires labeled 29x2.0 or ISO 60-584 depending on width. When shopping, always choose ISO size first, then confirm the width matches your riding style and tire width tolerance.
Tire width, rim width, and safety compatibility
Tire width must fall within a compatible range for the rim width. A narrow tire on a very wide rim may feel unstable, while an overly wide tire on a narrow rim risks rim/tire interference. General guidance suggests staying within the manufacturer’s recommended tire width range for your rim width. If you plan to mix tires across a broad width spectrum, consult the rim’s compatibility charts and, if in doubt, seek professional advice. Tubeless setups add another layer of compatibility checks: bead type, sealant, and rim compatibility matter as much as the ISO size.
Practical examples by bike type
Road bikes most commonly use ISO 622 bead-seat diameters with widths between 23–32 mm (for endurance, 28–32 mm is common). Mountain bikes frequently use ISO 584 bead-seat diameters with widths ranging from 2.0–2.4 inches (roughly 50–60 mm). Hybrids often sit between road and mountain sizing, commonly using 622 rims with 28–40 mm tires. These examples illustrate how the same outer label can map to different ISO sizes depending on the type and intended use. Checking the rim label and your frame clearance helps prevent fitting issues.
Common mistakes and how to avoid them
- Assuming the outer diameter label alone determines tire size can lead to misfit. Always verify the ISO bead-seat diameter first.
- Ignoring rim width compatibility can cause tire deflection or burps under load. Check both tire width and rim width recommendations.
- Mixing tubeless-ready rims with non-tubeless tires without proper conversion can cause seal failures. Confirm bead type and sealant requirements.
- Reading old shop notes or manuals without cross-checking current brands can lead to outdated recommendations. Always verify with current manufacturer charts.
How to buy the right tire size: quick shopping tips
Always start with the ISO size (e.g., 25-622 or 50-584). Then pick a lane for your riding style: 25–28 mm tires for fast road riding, 32–40 mm for mixed terrain, or wider for comfort and stability. For tubeless setups, ensure your rim is tubeless-ready and that the tire’s bead is compatible with your rim’s bead seat design. When in doubt, bring the rim and a sample tire to a local shop for a hands-on check.
Final notes: brand guidance and practical next steps
The Tire Size Guide you use should be based on ISO/ETRTO measurements, because they are universally recognized. As you gain experience, you’ll learn to double-check numbers against both the rim label and the tire label. The BicycleCost approach emphasizes methodical verification and minimizing guesswork, which saves time and reduces the risk of flats or handling issues. According to BicycleCost Analysis, 2026, relying on ISO sizing improves cross-brand compatibility and makes future upgrades easier. For ongoing learning, bookmark the tire sizing section of BicycleCost guides and consult local bike shops when you’re upgrading to new tire types.
Authority and references
- ISO/ETRTO sizing guidelines (official standards)
- Rim and tire compatibility charts from major brands
- BicycleCost Analysis, 2026
- Local bike shop technicians for hands-on verification
Tools & Materials
- Tape measure or caliper(Essential for accurate diameter and width measurements (mm preferred).)
- Ruler or vernier caliper(Useful for precise width measurements and bead-seat diameter.)
- Marker or chalk(Label parts or note measurements on the tire sidewall for reference.)
- Notebook or smartphone notes app(Record measurements and ISO sizes for future reference.)
- Tire removal tool or tire levers(Helpful if you need to inspect the bead and rim more closely.)
- Lubricant or soapy water(Makes tire removal and reinstallation easier, especially with tight beads.)
Steps
Estimated time: 25-60 minutes
- 1
Identify the printed tire size
Inspect the sidewall for ISO/ETRTO numbers (e.g., 25-622) or the traditional sizing (e.g., 700x25c). Note both sizes if present. The ISO size will be your primary reference for compatibility.
Tip: If the label is worn, photograph the tire and zoom in later to read any remaining digits. - 2
Confirm the bead-seat diameter on the rim
Remove the tire if needed and measure the inner diameter where the tire bead sits. This is the bead-seat diameter and is the critical number for ISO sizing.
Tip: Use a caliper for accuracy; if you don’t have one, measure across the rim with a ruler and use a conversion chart as a fallback. - 3
Measure tire width and check clearance
With the tire mounted, measure the width across the tread or use a ruler at the widest point. Compare this width to your rim width recommendations to avoid mounting a tire that’s too wide or too narrow for your rim.
Tip: Consult your frame clearance; even a correct ISO size may rub if the tire is too wide for the frame or fork. - 4
Cross-check with manufacturer charts
Use the rim label and tire sidewall to match ISO size to your specific wheel. If there is a discrepancy, choose the size recommended by the rim manufacturer.
Tip: When in doubt, contact the brand’s support line or a local bike shop for confirmation. - 5
Consider compatibility for tubeless vs tube tires
If you plan to run tubeless, ensure the tire bead type and sealant compatibility with your rim. Tubeless-ready setups require specific bead shapes and rim compatibility.
Tip: If you’re unsure, start with a tubeless-compatible tire that explicitly states compatibility with your rim width. - 6
Test fit and inflate cautiously
Install the tire, seat the bead evenly, and inflate gradually to the recommended pressure. Listen for any leaks or unusual bulges and stop if you hear a hissing sound.
Tip: Always start at a lower pressure and ramp up gradually while inspecting the seal around the bead.
People Also Ask
Why do tire sizes seem different across brands?
Brand labeling can use different historical conventions, but ISO/ETRTO sizing is the universal standard. Cross-check any code you find with ISO 622 or ISO 584 bead-seat diameters to ensure compatibility.
Brand labels can differ, but ISO sizing is the standard. Check the ISO number on the tire to avoid mismatches.
Can I mix tire width with a different width rim?
Yes, but only within the recommended width range for your rim. Going outside the manufacturer’s guidelines can cause handling issues or tire burps.
You can mix widths within recommended ranges, but don’t exceed the rim’s guidelines.
What if the sidewall labels are worn off?
Measure the rim’s bead-seat diameter and tire footprint to estimate ISO size, then verify with a local shop or reference charts.
If labels are worn, measure the diameter and compare to charts, or ask a shop for help.
Do I need a different tire for tubeless setups?
Tubeless tires use specific bead designs. Ensure your rim is tubeless-ready and choose tires labeled for tubeless use with compatible sealant.
Tubeless rigs require tubeless-ready tires and rims with compatible beads.
How often should I re-check tire size when upgrading components?
Whenever you change rims, tires, or tubes, re-check ISO size compatibility. Small changes can affect fit and safety.
Check sizing whenever you change rims or tires to stay safe.
Is 700x25c the same as 25-622?
Many 700x25c tires correspond to ISO 25-622. Always verify with the tire’s ISO code on the sidewall for precise compatibility.
700x25c often maps to ISO 25-622, but verify the ISO code to be sure.
Watch Video
Quick Summary
- Read ISO/ETRTO first whenever possible.
- Measure bead-seat diameter to determine size when labels wear off.
- Always check rim-tire width compatibility before mounting.
- Use manufacturer charts and, if uncertain, consult a shop.
- Document sizes for easier future maintenance.