Bicycle Size Comparison: Finding Your Perfect Fit Across Bikes
A thorough guide to bicycle size comparison, blending frame size and geometry metrics to help riders of all levels choose the right bike fit for road, mountain, and hybrid styles.

TL;DR: In bicycle size comparison, use a hybrid approach that blends frame size and geometry metrics to ensure comfort across rider heights and riding styles. Beginners may start with a frame-size-based target, then refine with reach and stack checks as they gain experience. The BicycleCost team emphasizes on-bike fit tests to confirm comfort before any upgrade.
What is bicycle size comparison?
Size comparison in bicycles means evaluating frame dimensions, reach, stack, and standover height to determine how well a bicycle matches a rider's body and riding goals. A good bicycle size match reduces knee and back strain, improves power transfer, and makes shifting and braking more predictable. For longer rides, comfort plus efficient pedaling matters more than aesthetics. According to BicycleCost, the goal is to align the bike's geometry with the rider's inseam, torso length, and flexibility, not just overall height. The bicycle size comparison approach combines traditional frame-size heuristics with modern geometry considerations to create a more adaptable fit across road, mountain, and hybrid bikes.
Why sizing matters for comfort, efficiency, safety
A precise size match influences comfort by placing the rider in a natural, powerful position. When sized correctly, you waste less energy fighting the bike and you reduce the risk of overuse injuries such as knee pain or lower-back strain. Sizing also affects safety: a poorly fit bike can respond unpredictably during rapid changes in terrain or braking. In practice, size-aware setup improves control during cornering, descents, and sprint efforts. The BicycleCost team notes that a thoughtful size choice pays dividends over thousands of miles by preserving joint health and pedal economy.
Key sizing factors you should consider
- Inseam length and rider height
- Torso length and arm reach
- Riding discipline (commuting, sport, gravel) and flexibility
- Standover clearance for quick dismounts
- Frame geometry: top-tube length, seat-tube angle, head-tube angle
- Adjustability: saddle setback, handlebar drop, and stem length
- Bike category: road, mountain, or hybrid—each favors a different balance of frame size and cockpit geometry
- Shoe and pedal setup which can alter effective inseam and saddle height
For most riders, starting with a baseline size and then refining cockpit dimensions yields the best long-term comfort.
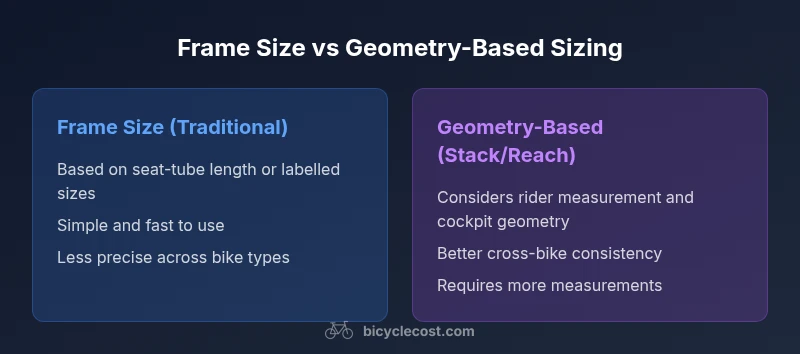
Frame size vs. standover height vs. reach: understanding the differences
Frame size traditionally describes the overall scale of a bicycle using a nominal size (e.g., small, medium, large) or a seat-tube length. Standover height is the clearance between the top tube and the rider when standing over the bike, important for confidence in mounting and stopping. Reach describes how far the cockpit elements (handlebars, levers) are from the saddle and rider's torso. Each factor contributes differently to fit; mismatches can remain even when other measurements look reasonable. A robust bicycle size comparison blends all three, ensuring a rider can stand over the bike with easy clearance and still reach the handlebars without overreaching or crowding the knees.
How to measure yourself for bike size
Steps to measure yourself:
- Measure your inseam using a book and wall: stand with heels against the wall, slide a book between legs, then mark the height. Measure from floor to the top of the book. This gives approximate frame size baselines.
- Record torso length and arm reach: a taped measure from sternum to the wrist, plus a comfortable reach distance.
- Note your riding goals and flexibility.
- Compare with a manufacturer’s size chart that uses stack/reach or seat-tube length.
- Plan a test ride or a sizing session with a shop that offers fit services.
The process should be iterative, not a one-time calculation.
How to size for different bike types (road, mountain, hybrid)
Road bikes typically demand longer reach and slightly lower stack to promote aero efficiency and leg extension. Mountain bikes favor a more upright position with a taller stack to improve control on varied terrain. Hybrids sit between road and mountain geometries, balancing comfort and efficiency for mixed use. When sizing, start with a baseline that matches your primary riding style, then fine-tune cockpit width, saddle height, and handlebar position so you can ride confidently for hours without fatigue.
Reading size charts and converting between systems
Size charts are a practical starting point, but brands vary in their reporting of frame size, top-tube length, and stack. When moving between brands, always verify the actual geometry: seat-tube length alone is rarely sufficient. Cross-check the chart with actual cockpit measurements (reach, stack) and consider trying a model with similar geometry to your current ride. If you ride multiple brands, focus on consistent cockpit geometry rather than frame sizes alone to maintain similar riding feel.
Common sizing mistakes and how to avoid them
Common errors include relying solely on frame size labels, ignoring cockpit geometry, and assuming a taller rider always needs a larger frame. Another frequent issue is neglecting saddle height, fore-aft position, and handlebar reach. To avoid these, always validate fit with an on-bike test, adjust the saddle and bars incrementally, and use a fit session if possible. Remember that fit is a moving target as you gain flexibility and ride different bikes.
Practical sizing workflow: step-by-step example
- Establish baseline: select a frame size from the brand's chart that matches your inseam and torso measurements. 2) Assess stand-over clearance: ensure you can stand flat-footed with comfortable clearance over the top tube. 3) Verify reach: on a test ride, confirm you can reach brake levers and shifters without bending your wrists uncomfortably and without overreaching. 4) Check saddle height: pedal a small circle; your knee should be slightly bent at bottom dead center. 5) Fine-tune: adjust saddle position, stem, and handlebars to optimize balance and control. 6) Confirm across scenarios: test seated and standing positions during climbs and sprints to ensure consistent comfort.
How to test fit on your actual bike
When testing a bike, focus on three cues: comfort, control, and power transfer. Ensure you can maintain a neutral spine without excessive reach or hunching. Check that you can bring your knee close to the front wheel without rubbing and that your hands stay comfortable on the handlebars for extended periods. If any discomfort appears within the first 20 minutes, reassess your saddle height, saddle setback, and handlebar position.
Sizing resources and tools: what works best
A combination of published size charts, a reputable sizing calculator, and professional fit sessions yields the best results. Use shop fitting services when possible, especially for new bike models or if you ride aggressively. Supplement with at-home measurements and a basic fit guide to maintain consistency across bike purchases.
Real-world scenarios and rider profiles
- Tall rider with long arms and a flexible back may prefer a geometry-based sizing approach to maximize reach without compromising stability.
- Shorter rider with limited inseam may benefit from a compact frame and adjusted cockpit geometry to preserve confidence during mounting and dismounting.
- Mixed-use riders who spend time on road and light trails should focus on a hybrid setup that allows comfortable transitions between different terrains.
- Competitive cyclists often rely on precise stack/reach measurements and cockpit geometry to optimize aerodynamics and power output.
Comparison
| Feature | Traditional frame-size-based sizing | Geometry-based sizing (stack/reach) |
|---|---|---|
| Measurement basis | Seat-tube length or labelled frame sizes | Stack and reach-based metrics linked to rider anatomy |
| Best for | Quick baseline and easy interpretation for beginners | Cross-bike consistency and precise cockpit fit |
| On-bike adjustability | Limited adjustments beyond saddle and saddle angle | Improved adaptability with cockpit geometry and longer cockpit reach options |
| Future-proofing | May require model-specific sizing for new geometries | Better transferability across brands with standardized measurements |
| Common pitfalls | Relying solely on frame size labels | Ignoring reach, stack, and top-tube length |
Pros
- Simple baseline method that is widely documented
- Fast to implement with standard size charts
- Useful for quick shopping decisions and product comparisons
- Low barrier to entry for beginners
Downsides
- Less precise for modern bike geometries
- Can fail across different bike types if cockpit geometry varies
- Requires later adjustments for long-term comfort
Hybrid sizing with geometry-aware checks wins for most riders
Frame size provides a starting point, but incorporating stack/reach and on-bike testing yields the most reliable fit across road, mountain, and hybrid bikes.
People Also Ask
What is bicycle size comparison, and why does it matter?
Bicycle size comparison assesses frame size, standover height, reach, and stack to match a rider's body with the bike's geometry. It matters because a good size fit improves comfort, efficiency, and safety across different riding styles.
Bicycle size comparison helps you pick a bike that fits your body so riding feels comfortable and safe from the first ride.
How do I measure myself for bike size?
Start with inseam length and torso reach measurements, then compare against the brand's size chart. Validate with a test ride and adjust saddle height, setback, and cockpit position to refine fit.
Measure your inseam and torso reach, then compare to charts and test ride to refine fit.
Is frame size the same across brands?
No. Frame sizes vary by brand and model. Always check the geometry details, especially top-tube length and stack/reach, when comparing bikes from different manufacturers.
Frame sizes aren’t universal—check each brand’s exact geometry before buying.
What is the difference between standover height and reach?
Standover height is the clearance when standing over the bike; reach measures how far the handlebars sit from your torso. Both influence fit and should be balanced for comfort and control.
Standover is clearance when you stand over the frame; reach is how far you reach to the handlebars.
When should I seek a professional fit?
If you experience persistent pain, bike-swapping for a different geometry, or plan a performance-focused upgrade, a professional fit can optimize frame size, cockpit setup, and saddle positioning.
Consider a pro fit if pain persists or you’re upgrading to a bike with different geometry.
Can I size bikes for multiple disciplines with one approach?
A hybrid sizing method that uses both frame size basics and cockpit geometry typically works for road, mountain, and hybrid bikes, with targeted tweaks for each discipline.
Use a hybrid sizing method and adjust cockpit details for different bike types.
Quick Summary
- Start with a baseline size, then verify cockpit fit
- Prioritize stack and reach for future bike changes
- Test fit on a real bike to validate comfort and control
- Account for riding style and flexibility in sizing
- Use size charts as guides, not guarantees