Why Is My Bicycle Chain Slipping? A Practical Troubleshooting Guide
Diagnose and fix bicycle chain slipping quickly with practical steps. Learn common causes, quick checks, lubrication, and safe replacements from BicycleCost.

Most chain slipping comes from wear, misadjustment, or a dirty chain. Start with the simplest fix: clean and lubricate the chain, then inspect for stiff links. If slipping continues under load, replace worn components (chain, cassette, or chainrings) and recheck derailleur alignment. For persistent issues, seek professional help before riding.
Why chain slip happens
Chain slip is a symptom, not a single fault. In practical terms, it occurs when the drivetrain cannot engage cog teeth reliably under load. A combination of worn parts, misadjustment, and insufficient lubrication creates a mismatch between the chain and gears. On hills or during hard accelerations, slack in the chain is more noticeable, and the symptom can escalate if you ride with worn parts. The BicycleCost team emphasizes that catching wear early saves money and reduces the risk of sudden drivetrain failure. Regular checks during routine maintenance will help you spot fatigue before it leads to a slip on the ride.
Common causes of chain slip on a drivetrain
There are several frequent culprits behind a slipping chain:
- Worn chain: Over time, a stretched chain won’t mesh properly with the cassette and chainrings.
- Worn cassette or chainrings: Teeth become hook-shaped or smooth, reducing engagement with the chain.
- Dirty, dry, or stiff links: Dirt and rust increase friction and reduce smooth engagement with cog teeth.
- Incorrect chain length or incompatible gearing: A chain that's too long or too short can cause misalignment when shifting.
- Derailleur misadjustment or worn jockey wheels: Indexing errors or worn pulleys can fail to feed the chain accurately.
- Rust or corrosion: Corrosion weakens the chain’s grab on teeth and can lead to sudden slipping.
Understanding which of these is most likely helps you pick the right fix quickly.
Signs that your chain, cassette, or derailleur are worn
Look for telltale signs that your drivetrain components have reached the end of their life:
- Chain elongation: A visibly stretched chain changes the geometry of engagement with the cassette.
- Skipped shifts: The chain jumps or refuses to engage when moving to larger cogs.
- Worn teeth on cassette or chainrings: Teeth appear shark-toothed or rounded, reducing bite.
- Frequent misalignment: Shifting feels imprecise or noisy, even after indexing adjustments.
- Rust or pitting: Metal corrosion that weakens the chain and pulleys.
If you observe multiple signs, it’s a strong signal that you should plan for replacement rather than mere adjustment.
Immediate checks you can perform before riding
Before you ride, run through a quick, safe diagnostic:
- Inspect the chain for kinks, stiff links, or rust. If you find stiff links, work them gently with a light lubricant and exercise the chain through the full range of motion.
- Clean and re-lubricate the chain to remove grit that could interfere with engagement.
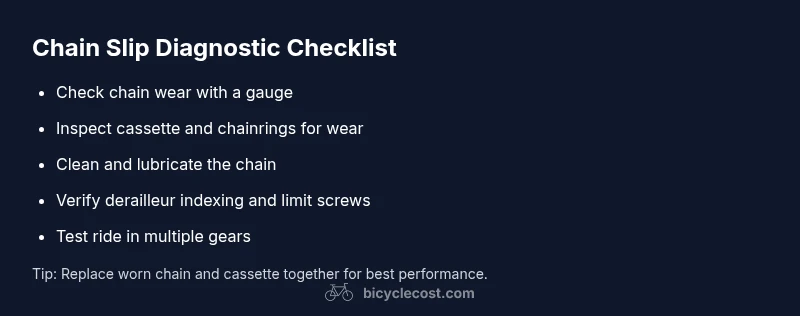
- Check for excessive chain wear using a chain wear gauge or ruler test. If the wear is beyond the acceptable range, plan to replace.
- Inspect the cassette and chainrings for hooked or worn teeth that no longer grip the chain well.
- Verify derailleur indexing and limit screws so that shifting aligns cleanly with each cog.
These checks help you decide if a simple service is enough or if component replacement is necessary.
Step-by-step fixes for the most common causes
If you’re ready to fix chain slip, start with the simplest options and move to more involved maintenance as needed:
- Clean and lubricate the chain, then test shifting under light load to see if the slip recurs. A clean, well-lubricated chain engages cog teeth more reliably.
- Inspect chain wear with a chain checker. If the chain is stretched beyond its useful life, replace the chain (and inspect the cassette at the same time).
- Check the cassette and chainrings for worn teeth. If teeth are rounded or hooked, replace the worn components to restore proper engagement.
- Recheck derailleur adjustment: ensure the derailleur cage tracks correctly, the high and low limit screws are set properly, and indexing aligns with each cog. Misadjustment is a frequent cause of slipping during shifts.
- If the chain length is incorrect for your gear setup, adjust accordingly or consult a shop. An incorrect length can create excessive cross-chaining and engagement problems.
- After replacements and adjustments, perform a controlled test ride in a variety of gears and conditions to confirm the fix is solid.
Always test in a safe area and avoid aggressive riding during the diagnostic phase.
Maintenance to prevent future chain slipping
Prevention is cheaper than repeated repairs. Build a simple maintenance routine around these points:
- Regularly inspect chain wear and replace before it becomes a liability; follow manufacturer guidelines for replacement intervals based on riding style.
- Replace chain and cassette together when wear becomes evident to maintain proper engagement.
- Keep the chain clean and lubricated; dirt and grit are the leading causes of friction and engagement problems.
- Ensure the derailleur is properly adjusted and that cables and housing are in good condition. Worn cables can cause misalignment and poor indexing.
- Protect the drivetrain from corrosion by drying after rides in wet conditions and avoiding prolonged exposure to moisture.
Following these steps reduces the likelihood of future slips and extends drivetrain life.
Safety notes and when to seek professional help
If you’re not comfortable performing maintenance tasks—such as measuring chain wear, replacing the cassette, or adjusting the derailleur—the safest course is to consult a professional bike mechanic. Working on the drivetrain without proper tools can lead to injury or further drivetrain damage. Always wear gloves and eye protection if you’re handling parts that might snap or spring. If you notice sharp, jagged teeth or a chain that keeps slipping after basic service, stop riding and seek expert help promptly.
Steps
Estimated time: 45-90 minutes
- 1
Prepare workspace and safety checks
Set the bike on a stable stand or upside down on a padded surface. Gather a chain wear gauge, Allen keys, a degreaser, a rag, a chain lubricant, and replacement parts if needed. Wear eye protection and gloves to avoid injury.
Tip: Keep a clutter-free area and secure the bike to prevent movement during work. - 2
Inspect the chain for wear and tension
Measure chain wear with a chain checker; if the chain is stretched beyond the recommended limit, prepare to replace it. Check for stiff links and corrosion. If you find any, fix or replace before proceeding.
Tip: Turn the crank slowly and feel for binding during each rotation to spot stiff links. - 3
Examine cassette and chainrings
Look for hooked, worn, or shark-toothed cog teeth. If teeth are rounded, replace the cassette and chainrings in addition to the chain to restore engagement.
Tip: Inspect both inner and outer chainrings since wear on either affects engagement. - 4
Clean and lubricate the chain
Degrease the chain thoroughly, rinse, dry, and apply a light, even coat of lubricant. Wipe off excess to prevent dirt attraction. A clean, well-lubed chain reduces friction and slip.
Tip: Lubricate while pedaling the crank slowly to distribute lubricant evenly. - 5
Check derailleur indexing and cables
Shift through all gears and listen for smooth engagement. If misalignment persists, adjust the high and low limit screws and indexing. Check the derailleur hanger for bending.
Tip: If you don’t have a cable tension tool, gently tweak the cable housing to improve feel, then test ride. - 6
Verify chain length and cross-chaining
Ensure the chain length is correct for your drivetrain. A chain too long or too short can cause poor chain wrap on the gears, leading to slips.
Tip: When in doubt, consult the manufacturer’s spec or a professional shop for the exact length. - 7
Test ride and verify fixes
Take a cautious test ride in varied gears and under load to confirm the slip is resolved. Pay attention to smooth shifts and absence of popping or skipping.
Tip: Avoid aggressive riding until you confirm the fix is stable. - 8
Document maintenance and schedule next check
Record what parts were replaced and when you last serviced the drivetrain. Set reminders for future checks to prevent recurrences of slipping.
Tip: Tag the bike with a maintenance date for easy reference on future rides.
Diagnosis: Chain slips or jumps under load when pedaling or shifting
Possible Causes
- highWorn chain that has stretched beyond safe limits
- highWorn cassette or chainrings
- highDirty, dry, or stiff links
- mediumImproper chain length or gearing compatibility
- mediumDerailleur misadjustment or worn jockey wheels
- lowRust or corrosion on chain or pulleys
Fixes
- easyInspect chain wear with a chain checker; replace if stretched
- hardInspect cassette and chainrings for wear; replace worn components
- easyClean and lubricate chain; ensure proper lubrication across pins
- mediumCheck derailleur indexing and limit screws; adjust as needed
- easyVerify chain length and compatibility with cogset; adjust or replace
- mediumConsult a shop if parts are worn or if alignment remains off
People Also Ask
What causes a bicycle chain to slip?
Chain slip typically results from worn chain or cassette, misadjusted derailleur, or a dirty chain. Proper diagnosis involves checking wear, alignment, and lubrication. Replacing worn parts and correcting setup usually resolves the issue.
Chain slip is usually caused by wear or misadjustment. Replacing worn parts and fixing the derailleur usually fixes it.
How do I know if my chain or cassette is worn?
Use a chain wear gauge to measure elongation and inspect the cassette teeth for hooked shapes. If the gauge shows wear or teeth look worn, plan replacement of the chain or cassette.
A chain wear gauge and a look at the cog teeth will tell you if wear is present.
Is chain slip dangerous?
Yes, it can lead to loss of control if it happens suddenly under load. Slow down, stop safely, and inspect the drivetrain before continuing.
Chain slip can be unsafe; stop riding and check the drivetrain before continuing.
Can I fix chain slip at home?
Many fixes can be done at home with basic tools: clean and lubricate, inspect wear, adjust derailleur, and replace worn parts. If you’re unsure or parts are worn beyond safe limits, seek professional help.
Yes, you can fix it at home if you’re comfortable; otherwise a shop can help.
How often should I replace a chain?
Chain replacement depends on riding style and wear. Regular checks with wear gauges and attention to shifting quality guide replacement timing rather than a fixed interval.
It depends on how you ride; use wear checks to decide when to replace.
What should I do if the derailleur is bent?
A bent derailleur can cause persistent misalignment. Do not ride in this condition; have a professional inspect and repair or replace the derailleur and check the frame hanger.
If the derailleur is bent, stop riding and get it serviced.
Watch Video
Quick Summary
- Start with cleaning and lubrication to reduce immediate slip.
- Replace worn chain and cogs together for best engagement.
- Proper derailleur setup is essential for reliable shifting.
- Regular checks prevent sudden drivetrain failures.