Why Is My Bicycle Chain Skipping? Quick Fix Guide
Diagnose and fix a skipping bicycle chain with a clear, step-by-step troubleshooting guide. Learn common causes, safe maintenance, and prevention tips from BicycleCost.

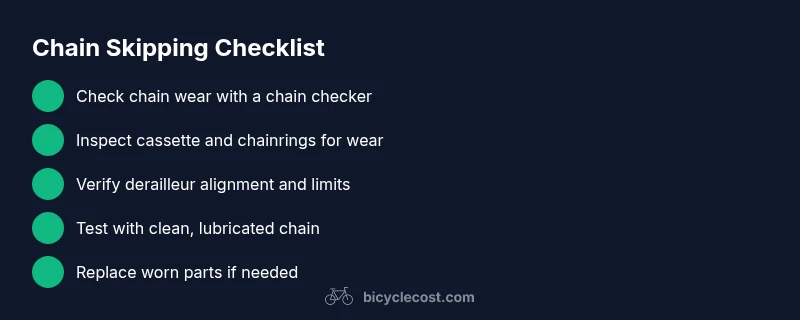
Most often, a skipping chain means worn or stretched chain, worn chainrings or cassette, or a misadjusted derailleur. Start by inspecting for loose links and testing wear with a chain checker, then verify derailleur alignment, limit screws, and cable tension. If it still slips under load after these basics, replace worn parts.
Common Causes of Chain Skipping
According to BicycleCost, skipping is most often caused by drivetrain wear or improper adjustment. A chain that’s stretched beyond its service limit can fail to engage the teeth on the chainrings or cassette, causing slips under load. Worn chainrings or a worn cassette (especially on the smallest or largest cogs) create mismatched engagement with the chain. In addition, a derailleur that’s out of alignment, or a mis-timed shift due to stretched cables or poorly indexed gears, can make the chain skip as you pedal hard or shift under load. Debris or mud between links can also mimic wear and throw the chain off the teeth. Finally, a damaged derailleur hanger or bent cog can produce persistent skipping that requires realignment or replacement. Regular checks help catch these issues early and prevent drivetrain damage.
Quick Pre-ride Checks for Skipping
Before riding, perform a quick diagnostic sweep to rule out obvious issues. Look for a visibly stretched chain by flexing it side to side and by checking that links don’t move unusually. Spin the cranks slowly and watch the chain engage the chainrings; if it hops or catches, there may be wear or misalignment. Check the derailleur cables for fraying, stiffness, or slack; ensure the shifter cable is seated correctly in its housing end. Make sure your derailleur hangs straight and that the derailleur hanger isn’t bent. Clear any grit from the chain, chainrings, and cassette; lubrication should be light but present. If you spot damaged teeth, frayed cables, or a bent hanger, stop riding and plan a proper repair.
Inspecting Wear: Chain, Chainrings, and Cassette
Worn chains wear elongation, which reduces engagement with chainrings and the cassette. Use a chain wear checker to measure slack; any reading near the manufacturer’s limit suggests replacement. Inspect chainrings for hooked, hooked or chipped teeth, which indicate wear transfer from the chain. Examine the cassette’s teeth: worn or shark-toothed teeth often indicate replacement is due. If you notice any stiff links, stiff pivots, or stiff derailleur pulleys, address these parts before continuing. Remember that a worn chain can quickly wear a new chainring or cassette, compounding the problem. After inspecting, clean the drivetrain to remove grit that can accelerate wear.
Derailleur Adjustment Basics
A misadjusted derailleur can cause the chain to skip between chainrings or across cogs. Start by setting the high and low limit screws so the chain tracks cleanly onto the smallest and largest gears. Check the cable tension; a cable that’s too loose can cause hesitation when shifting, while one that’s too tight can cause overshift or rubbing. Ensure the derailleur jockey wheels spin freely without binding. If the derailleur body or cage is bent, align or replace it as needed. After adjustments, perform a few light shifts and a moderate-load test to confirm the chain seats correctly on all gears.
Cables, Housing, and Shifting Smoothness
Cable wear or stiff housings can steal precise indexing and lead to slipping under load. Inspect cables for corrosion or fraying and replace any damaged wires. Lubricate inner cable segments that show excess stiffness, and ensure the housing ferrules are seated and not cracked. Check the shifters for smooth operation; dirty internals can hamper cable movement. If shifting remains inconsistent after lubrication, replace the entire cable and housing set to restore clean, reliable shifts. Avoid over-lubricating the cables, which can attract dirt.
Front vs Rear Derailleur Problems
The front derailleur is more sensitive to alignment and chainline; a misaligned front derailleur can rub and cause unusual skipping during upshift. The rear derailleur is more prone to skipping if the hanger is bent or if the cassette teeth are worn. In both cases, verify that the derailleur hanger is straight and that the chainline remains correct when seated on different gears. For a front derailleur, ensure the outer plate clears the chain when in the large chainring and that the inner plate clears when in the small ring. For the rear derailleur, confirm the pulley cage maintains a straight path and that there is no back-bending when shifting.
When to Replace Components vs. Try Repairs
If wear measurements exceed the manufacturer’s limits or if you notice repeated misalignment after adjustments, replacement is the safer choice. A worn chain, cassette, or chainrings can rapidly wear new parts and reduce shifting precision. If fewer than two components show significant wear, targeted repairs or adjustments can restore performance. Consider replacing the chain if it’s stretched past the recommended limit, and replace a cassette or chainrings if multiple teeth are worn. Always test ride after any replacement to confirm clearance and engagement.
Safety Notes and Common Mistakes to Avoid
Never ride with a visibly damaged derailleur or a bent hanger. Riding under those conditions can cause the chain to jump off completely or damage the frame. Avoid forcing shifts when under load; this can bend components or snap the chain. Do not use excessive lubricant on the chain; it collects dirt and accelerates wear. Always wear proper eye protection when inspecting drivetrain parts and ensure the bike is secured in a stable stand.
Preventive Maintenance Plan to Prevent Skipping
A proactive plan reduces skipping risk dramatically. Schedule periodic chain wear checks every 500–1,000 miles depending on riding style and conditions. Replace chains at the recommended elongation limit, and inspect the cassette and chainrings for wear at the same interval. Clean and lubricate the chain after wet rides or dusty sessions, then wipe off excess to prevent grit buildup. Finally, verify derailleur alignment and cable tension during regular tune-ups and after any major crash or impact that could misalign components.
Steps
Estimated time: 45-60 minutes
- 1
Check for obvious wear and damage
Begin with a clean drivetrain. Look for a visibly stretched chain and inspect the chainrings and cassette teeth for wear. Check for a bent derailleur hanger and any obvious damage to the derailleur. If you find severe wear or damage, plan for replacement parts before continuing with adjustments.
Tip: A clean chain makes wear patterns easier to spot. - 2
Test chain wear with a chain checker
Use a chain wear checker to measure elongation. If the reading is near or beyond the recommended limit, replace the chain first to prevent further wear on the cassette and chainrings.
Tip: Even new-looking chains can wear quickly if the cassette is worn. - 3
Inspect cassette and chainrings for wear
Rotate the crank slowly and inspect teeth on the cassette and chainrings. Look for hooked or chipped teeth. If multiple teeth show wear, replacement is likely needed to prevent skipping.
Tip: Replace both chain and cassette if wear is uneven. - 4
Check derailleur alignment and limit screws
Ensure the derailleur hanger is straight. Set the high and low limit screws so the chain tracks cleanly on the smallest and largest gears. Misadjustment commonly causes skipping on specific gears.
Tip: Take turns adjusting one screw at a time to isolate the issue. - 5
Test and adjust cable tension
Shifting should be crisp and accurate across the entire range. If shifts lag behind or overshift, fine-tune the cable tension with the barrel adjuster and recheck.
Tip: Make small tweaks—quarter-turns—and test between gears. - 6
Check and lubricate moving parts
Lubricate pivot points and the chain. Wipe off excess lubricant to avoid attracting dirt. Ensure the pulley wheels rotate freely and that the derailleur moves without binding.
Tip: Dry, clean pivots shift more predictably than dirty ones. - 7
Replace worn components if needed
If wear exceeds limits or shifting remains unreliable after adjustments, replace the chain, cassette, or chainrings as needed. Use compatible parts for your drivetrain and ensure proper installation.
Tip: Match parts to your drivetrain speed (e.g., 11-speed vs 9-speed). - 8
Test ride and verify
Take a short ride in a safe area and test every gear under light and moderate load. Confirm there is no skipping and that shifting remains smooth in all conditions.
Tip: Document any gear where skipping persists to guide replacements.
Diagnosis: Chain skipping during pedaling under load
Possible Causes
- highWorn chain causing poor engagement with chainrings/cassette
- highWorn chainrings or cassette teeth
- mediumDerailleur misadjusted or misaligned
- lowCable tension or housing issues affecting shifting
Fixes
- easyReplace worn chain if elongation limit is reached and re-check wear on chainrings/cassette
- mediumReplace worn chainrings or cassette if teeth are hooked or shark-toothed
- easyAdjust derailleur limit screws, realign hanger, and tune cable tension
- easyInspect and replace frayed cables or damaged housing; re-test shifting
People Also Ask
What causes a bicycle chain to skip under load?
Skipping under load is usually caused by worn chain, worn chainrings or cassette, or improper derailleur adjustment. Inspect wear, verify alignment, and test shifting before deciding on replacements.
Skipping under load is usually due to wear or derailleur issues. Start by checking wear and alignment, then adjust or replace parts as needed.
How can I tell if my chain needs replacing?
Use a chain wear checker to measure elongation. If it’s near or past the limit, replace the chain to protect the cassette and chainrings.
Run a wear check with a chain checker; replace if it's near the limit to avoid more wear.
Can a misadjusted derailleur cause chain skipping?
Yes. Check high and low limit screws and cable tension. Realigning the derailleur often eliminates skipping on multiple gears.
Yes—adjust the derailleur screws and tension to fix skipping across gears.
Is it worth replacing the cassette if the chain is worn?
If the cassette shows worn teeth or if a new chain skips on the old cassette, replacement is recommended to restore smooth shifting.
If the cassette teeth are worn or a new chain skips, replace the cassette for best results.
Should I lubricate the chain after every ride?
Lubricate after riding in wet or dusty conditions, then wipe off excess. Avoid over-lubricating as it attracts dirt.
Lubricate after wet or dusty rides and wipe away excess.
When should I seek professional help?
If you notice persistent skipping after adjustments, bent hangers, or major wear, consult a bike shop for a precise diagnosis and parts replacement.
If guessing doesn’t fix it, visit a bike shop for a precise diagnosis.
Watch Video
Quick Summary
- Inspect wear regularly and replace worn parts
- Check derailleur alignment and cable tension
- Differentiate between repairable problems and worn components
- Prevent skipping with proactive maintenance