What is Wrong with My Bike Chain? A Troubleshooting Guide
Urgent, step-by-step guide to diagnose and fix bike chain problems—from wear and lubrication to derailleur alignment—so you can ride safely again.

Most chain problems come from wear, rust, poor lubrication, or a misadjusted derailleur. The quickest fix is to inspect the chain for stiff links, clean and lubricate it, and check the drivetrain alignment. If shifting remains rough, replace worn links or the entire chain and adjust the derailleur. For safety, stop riding if the chain shows severe skipping or breaks.
Symptoms that Signal a Bike Chain is in Trouble
If your bike complains when you ride—chains slipping, skipping over cassette teeth, or catching on derailleur pulleys—it's time to troubleshoot. According to BicycleCost, these symptoms commonly arise from a worn chain, rusted links, insufficient lubrication, or a misaligned derailleur. You might also notice stiff links, grinding noise, or chains that feel unusually loose. Early signs include rough shifting, occasional drop-offs, or chain derailment during climbs. Recognizing these symptoms early helps prevent drivetrain damage and expensive fixes down the road. The goal is to identify the root cause quickly and decide whether you can fix it at home or you need professional service.
Quick Home Checks You Can Do Right Now
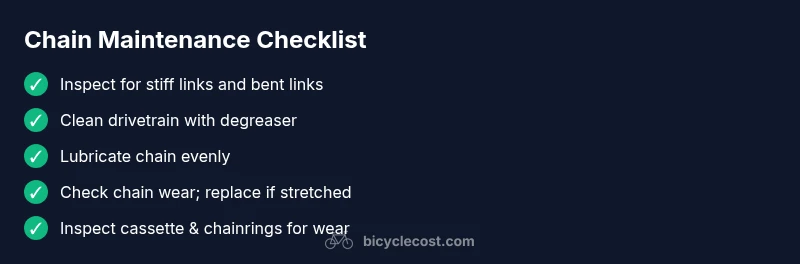
Before diving into deeper repairs, perform a few fast checks. Start by shifting through all gears while pedaling gently to feel for stiffness or binding. Inspect the chain for kinks, rust, and stiff links; wipe it clean and apply a light bicycle-specific lubricant after drying it completely. Check the rear derailleur for alignment and the cassette for worn teeth. A misaligned derailleur or a worn cassette can mimic chain wear. If the chain is visibly stretched or teeth are rounded, plan for replacement. Keep safety in mind: if the chain breaks fully while you’re riding, stop immediately and walk the bike to a safe location.
How to Assess Chain Wear, Stretch, and Drivetrain Compatibility
Chain wear is often the first culprit behind poor shifting. A worn chain won’t engage the sprockets properly, causing skipping or jumping. Use a chain wear indicator or a simple ruler test: place the ruler on the inner plates and measure how much the chain has stretched relative to a new one. If you notice a noticeable elongation or the tool indicates wear, replace the chain. Don’t forget to inspect the cassette and chainrings for hooked teeth or excessive wear, as a worn chain can quickly wear these parts as well. If you’re unsure, treat it as a high-priority inspection—the drivetrain should feel smooth and precise.
Step-by-Step Fixes for the Most Common Causes
- Clean and Lubricate: Remove dirt with a degreaser, rinse, dry, and apply a lubricant designed for your conditions (dry lube for dusty environments, wet lube for wet climates). Wipe off excess to prevent attracting more grit. 2) Check for Stiff Links: Manually flex the chain to locate stiff links; replace the chain or use link pliers to free a stuck link if minor. 3) Inspect Wear: Use a chain wear indicator; if it shows wear, replace the chain. 4) Align the Derailleur: Check the derailleur hanger alignment and adjust outer limit screws if the chain won’t shift between rings cleanly. 5) Inspect Sprockets & Chains: If the cassette or chainrings show hooked teeth, replacement may be necessary. 6) Re-test Ride: After fixes, take a short test ride in all gears and confirm shifts are crisp. 7) Safety Check: Ensure the chain is not rubbing on the frame and there are no loose components.
Safety, Maintenance Routine, and Prevention
Build a simple maintenance schedule: quick inspections after every ride, thorough cleaning and lubrication every week or two (depending on riding conditions), and a periodic drivetrain check every few months. Avoid riding with a chain that feels loose or looks stretched, since this can abruptly fail and cause crashes. Use high-quality lubricant and avoid over-lubing, which attracts grit and accelerates wear. If you notice persistent skipping, unusual noises, or chain derailment in multiple gears, stop riding and assess the entire drivetrain.
Tools You'll Need and When to Seek Help
Keep a basic toolkit on hand: a chain wear indicator, chain breaker, pliers, a torque wrench, a compatible lubricant, a degreaser, and a rag. If you suspect bent derailleur hanger, warped chainrings, or a damaged cassette, professional help is recommended. Also consider a professional check if you ride high-mileage or complex drivetrains (e.g., 11-, 12-speed systems). Early maintenance is cheaper than replacing multiple drivetrain components later.
Steps
Estimated time: 30-60 minutes
- 1
Secure bike and assess visible damage
Place the bike on a stand or flip it upside down on a soft surface. Visually inspect the chain for kinks, rust, or cracked links. If you see any severe damage, stop and replace the chain or consult a mechanic.
Tip: Use a flashlight to spot micro-cracks or bent links that aren’t obvious at first glance. - 2
Clean drivetrain and apply lubricant
Degrease the chain and drivetrain, rinse, and allow to dry completely. Apply a thin, even layer of bicycle-specific lubricant to the inner side of the chain while turning pedals slowly. Wipe away excess lubricant to prevent dirt buildup.
Tip: Lubricate only after the chain is dry to avoid trapping grime. - 3
Check for stiff links and replacements
Manually flex the chain to find stiff links. If you find one or two, you can try to free them, but persistent stiffness usually means replacing the chain. A worn chain can cause poor shifting and derailleur misalignment.
Tip: If you must free a link, use the correct chain tool to avoid damaging rivets. - 4
Measure chain wear and decide on replacement
Use a chain wear indicator or ruler to check for elongation. If wear is detected beyond the tool’s threshold or the chain skips under light load, replace the chain. Remember to replace the cassette if teeth are worn.
Tip: Replace the chain before cassette wear accelerates; it saves money in the long run. - 5
Inspect derailleur and compatibility
Check derailleur alignment and limit screws; ensure the chain shifts across all gears smoothly. If derailleur hangers are bent or misaligned, realign or replace, as this can cause chain skipping.
Tip: Use a derailleur alignment tool or seek professional help for accurate results. - 6
Install new chain and adjust drivetrain
If replacing the chain, size it to fit your drivetrain and install using the correct chain tool. Reinstall the chain on the cassette and rings, and adjust the derailleur if necessary. Take a test ride in all gears.
Tip: Double-check chain length to avoid poor shifting or chain drop. - 7
Test ride and monitor performance
Take a short ride under varied terrain. Listen for grinding, feel for smooth shifting, and ensure chain doesn’t rub frames or derailleur. If issues persist, consult a professional.
Tip: Record any persistent symptoms to discuss with the mechanic.
Diagnosis: Chain slips, jumps, or derails while pedaling
Possible Causes
- highExcessive chain wear/stretch
- mediumRusty or stiff links
- mediumDerailleur misalignment or worn cassette
- lowInadequate lubrication or dirty drivetrain
Fixes
- easyClean and lubricate the chain, then re-test shifting
- easyMeasure chain wear and replace the chain if stretched or worn
- mediumInspect derailleur alignment and cassette wear; adjust hanger and replace worn parts if needed
- hardReplace chain and cassette/chainrings as a set if wear is extensive; ensure correct chain length
People Also Ask
How can I tell if my bike chain is worn out?
A worn chain often allows slipping and poor engagement with the gears. Use a wear indicator or ruler to compare to a new chain and replace if the chain has elongated beyond the tool’s threshold. Also inspect the cassette and chainrings for wear and replace if needed.
A worn chain slips and shifts poorly. Use a wear gauge or ruler to compare with a new chain and replace if there's notable elongation, then check the cassette.
Can I ride with a chain that slips?
Riding with a slipping chain is risky. It can cause sudden loss of power or derailment. Stop riding and inspect the drivetrain, replacing worn parts as needed.
No. A slipping chain can lead to a dangerous derailment. Stop riding and inspect the drivetrain before continuing.
Should I replace the cassette when I replace the chain?
If the cassette teeth are worn or the chain has stretched significantly, replacing the chain alone may not restore clean shifting. Inspect the cassette and chainrings; consider replacing worn components to preserve performance.
If the cassette teeth are worn, replace them along with the chain to keep shifting reliable.
What tools do I need to inspect a chain at home?
A chain wear indicator, a chain tool, a degreaser, a rag, lubricant, and a torque wrench are enough for basic inspection and replacement. For precise derailleur alignment, you may need special tools or professional help.
Grab a wear gauge, chain tool, degreaser, and lubricant to inspect and replace the chain at home.
When should I seek professional help?
If you notice bent derailleur hangers, warped chainrings, or persistent shifting problems after basic fixes, seek professional service. A shop can safely realign components and replace worn parts without risking damage.
If in doubt or if parts are bent or worn beyond home repair, take the bike to a shop for a proper drivetrain overhaul.
Watch Video
Quick Summary
- Test for wear with a chain wear indicator regularly
- Keep the drivetrain clean and well-lubricated
- Replace chain before it damages cassette and chainrings
- Align derailleur and inspect for worn teeth