When to Replace Bicycle Chain: A Practical Rider's Guide
Learn how to recognize chain wear, evaluate drivetrain health, and replace your bicycle chain safely with practical, step-by-step guidance from BicycleCost. Includes signs of wear, tools, and maintenance tips.

Definition: When to replace bicycle chain is based on wear and performance. According to BicycleCost, replace the chain when it shows persistent skipping, poor engagement, or many stiff links that interrupt shifting. Regular inspection helps protect the cassette and chainrings. If you notice slipping under load or increased rust, it's a strong signal to replace now rather than later.
Understanding chain wear and signs
A bicycle chain is a wear item that travels across your chainrings and cassette day after day. Over many miles, the inner plates gradually wear, causing the chain to elongate and mesh less effectively with the teeth. The most reliable signal that you should replace the chain is practical: you notice poor shifting, skipped gears, or the chain feels slack or stiff in places. According to BicycleCost, routine inspections help catch wear before it harms the cassette or rings, saving money and preventing breakdowns on rides. Look for visual cues like rust, stiff links, muddy build-up, or a chain that doesn’t seat cleanly on the cog; these are wake-up calls to inspect more closely.
In addition to wear, consider riding conditions. Wet, sandy, or muddy environments accelerate chain wear, while riding in high-torque situations (hills, sprinting) places extra stress on the chain. If you ride aggressively or frequently ride at high power, plan more frequent checks. This proactive approach aligns with BicycleCost guidance for drivetrain health and safer riding.
A strong, well-maintained chain supports predictable shifting and reduces wear on the cassette. If you neglect the chain too long, you may wear out your gears faster, leading to more expensive replacements. The key is to catch wear early and act before drivetrain damage compounds.
How chain length and cog wear affect replacement timing
The chain is part of a system. If the chain elongates or if the cassette and chainrings show wear, the overall drivetrain diminishes. Replacing the chain alone may solve shifting problems temporarily, but when cog wear is substantial, you’ll want to evaluate cassette replacement too. The decision hinges on how smooth shifting feels, whether the chain binds or skips under load, and whether the chain maintains proper tension through the full gear range. If the chain and cassette wear together, replacing only the chain can be insufficient, and you risk accelerated wear on the new chain. BicycleCost recommends assessing both chain wear and cog wear to decide on a full drivetrain refresh when needed.
How to inspect chain wear without tools
No tool? No problem—start with a close visual inspection and a simple test. Look for stretched links by lifting the chain off the chainring; if it forms a straight line across multiple teeth, it’s a sign of elongation. Run the chain along the gears and watch how it engages; consistent skipping or misalignment is a red flag. Spin the crank slowly and shift through the gears; if the chain binds or refuses to sit squarely on the cog, wear is likely present. While a gauge provides a precise read, you can confidently identify worn chain behavior with these tactile checks. Remember that rust, stiff links, and a visibly stretched chain indicate a higher likelihood that replacement is due soon.
For road or mountain bikes with advanced drivetrains, wear can appear gradually. If you’re uncertain, err on the side of caution and replace sooner rather than later to protect the cassette and rings. This conservative approach aligns with best practices for maintenance and safety.
Measuring wear with a chain wear gauge and cassette compatibility
A dedicated chain wear gauge is the most reliable method to quantify elongation, and it helps standardize replacement timing. Place the gauge on the chain to see if a pin fits within the indicated tolerance. If you don’t have a gauge, use the ruler method by measuring how much the chain links bend when placed over a straight edge, though this is less precise. In addition to wear, assess cassette teeth for hooked, rounded, or thin-worn shapes. If the chain consistently rides high over the teeth or the teeth appear sharp or hooked, wear is present and a replacement should be considered. If you’ve replaced the chain but still experience shifting issues, examine cassette wear as well. A worn cassette can negate the benefits of a new chain, leading to poor performance and accelerated wear on the new link.
Regular checks using a gauge or ruler help create a clear replacement timeline and prevent drivetrain damage. BicycleCost emphasizes that early replacement reduces long-term costs and keeps gears clean and efficient.
When to replace: decision paths and timing
There isn’t a single fixed mileage for chain replacement. The decision depends on wear, noise, shifting performance, and the overall health of the drivetrain. If you regularly notice skipped shifts, chain slip under load, or a chain that won’t stay seated, these are strong indicators to replace. For riders with classic setups, replacements may be needed sooner due to older chainring and cog wear. In contrast, new drivetrains can stretch longer, provided you maintain them with regular cleaning and lubrication. The safest approach is to monitor chain condition at least every few hundred miles and adjust your maintenance schedule based on riding style and conditions. BicycleCost recommends pairing chain replacement with a check of the cassette if wear signs emerge.
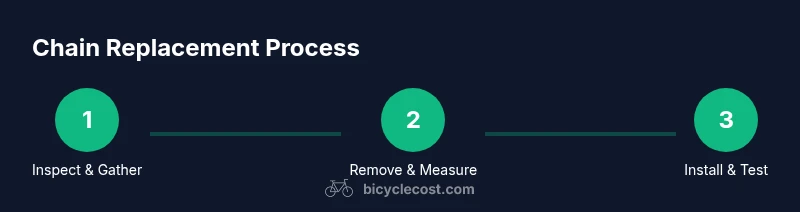
Replacement steps overview (high-level) and maintenance after install
Replacing a chain is straightforward when you have the right tools and knowledge. The general process involves removing the old chain, measuring wear, selecting the correct chain length, installing the new chain, and testing the drivetrain. After installation, lubricate the chain and ensure smooth shifting through all gears. Regular maintenance after replacement includes cleaning off old grime, checking tension, and re-lubricating as needed. This maintenance loop extends chain life, reduces friction, and ensures safer riding.
Authority sources
- https://www.parktool.com/en/maintenance/chain-wear
- https://www.cdc.gov/transportation/bikesafety/index.html
- https://www.bicycling.com/tech-a-science/
Tools & Materials
- Chain wear gauge or ruler(Essential for assessing wear precisely)
- Chain tool (chain breaker)(Needed to remove and reconnect the chain)
- New compatible chain(Choose the correct width for your drivetrain (2x or 3x))
- Master link/tool or quick link (optional depending on chain)(Helpful for quick install/removal)
- Degreaser and clean rags(Prepare drivetrain before installation)
- Lubricant(Bike chain lube appropriate for conditions)
- Bike stand (optional)(Stability makes work easier)
Steps
Estimated time: Total time: 45-90 minutes
- 1
Assess current chain condition
Visually inspect the chain for rust, stiff links, or obvious elongation. If you notice skipping, poor engagement, or rough shifting, plan a replacement. This step saves you from chasing symptoms later.
Tip: Do the assessment with the drivetrain clean and lubricated; grime hides wear. - 2
Remove the old chain
Shift to the smallest gear, then use the chain tool to push out a pin and separate the chain. If your chain uses a master link, you can use pliers to release it instead.
Tip: Use a well-lit workspace and keep track of removed links in case you need to recreate the chain length. - 3
Measure wear and inspect the cassette
Place the chain on a straight edge or use a wear gauge to check elongation. Inspect cassette teeth for hooked or rounded wear; if the cassette shows wear, you may need to replace it with the chain for best performance.
Tip: If the gauge shows wear or you notice heavy tooth wear, consider replacing cassette as well. - 4
Install the new chain and set length
Thread the new chain through the derailleur and around the chainrings and cassette. Remove or add links to achieve the proper length; connect with a master link if applicable. Rotate to ensure smooth motion.
Tip: Double-check that the chain isn’t over-tight or too loose; incorrect length causes shifting problems. - 5
Test shift and derailleur alignment
Shift through every gear at a light pedal pressure to confirm smooth engagement. If skipping persists, adjust derailleur limit screws and cable tension.
Tip: Test under load on a gentle incline to confirm the system holds under real riding conditions. - 6
Lubricate and clean
Apply lubrication to the inner plates after wiping away excess grease. Wipe the exterior to remove excess lube and grime. A clean drivetrain lasts longer and shifts better.
Tip: Wipe the chain after a ride in wet or dirty conditions to maintain longevity.
People Also Ask
How do I know when my chain needs replacing?
Look for skipped shifts, stiff links, rust, and signs of elongation. If shifting becomes unreliable or the chain doesn’t sit on the teeth, replacement is likely needed.
If your gears are skipping or the chain won’t sit right on the teeth, you probably need a new chain.
Can I replace only the chain, or should I replace the cassette too?
If only the chain shows wear and the cassette teeth look fine, replacing the chain alone may suffice. If the cassette is worn, particularly with hooked or rounded teeth, replacing it along with the chain yields better shifting and longevity.
Replace the chain if the cassette teeth aren’t worn, but replace the cassette too if the teeth are damaged or worn.
What tools do I need to replace a bicycle chain?
A chain tool or master-link pliers, a chain wear gauge or ruler, a new chain, lubricants, and cleaning supplies are the basics. Optional: a bike stand and a cassette removal tool.
You’ll need a chain tool, a gauge, a new chain, and lubricant; a stand helps but isn’t required.
How long does it take to replace a chain?
For a confident rider with the right tools, expect about 30 to 60 minutes. Beginners may take longer as they learn the steps and adjust the derailleur.
Around half an hour to an hour for most riders, depending on experience.
Should I clean the chain before installing a new one?
Yes. Clean the drivetrain to remove grime and old lubricant; this helps the new chain seat properly and reduces wear.
Yes, clean the drivetrain so the new chain seats well and lasts longer.
Is the replacement different for road and mountain bikes?
The process is the same, but you must choose the correct chain width and check for wear on the cassette as well, since drivetrain wear patterns differ with terrain.
The steps are the same; pick the correct chain width and check the cassette for wear.
Watch Video
Quick Summary
- Inspect chain wear regularly and note shifting quality.
- Use a gauge for precise wear assessment when possible.
- Replace chain before cassette wear progresses too far.
- Always check chain length and derailleur alignment after install.
- Maintain drivetrain with regular cleaning and lubrication.