Why the Bicycle Chain Comes Off: Troubleshooting Guide
A practical, step-by-step troubleshooting guide to diagnose and fix a bicycle chain that comes off, with prevention tips and safe maintenance insights from BicycleCost.

Most bicycle chain drops are caused by a combination of wear and misadjustment: a stretched chain, a front derailleur that isn’t indexing correctly, or a chain length that’s off for your gear setup. For a fast fix, stop riding, inspect the chain for wear, realign the front derailleur limits, reseat the chain on the chainring and cogs, lubricate, and test ride slowly. If it persists, replace worn parts and recheck alignment.
Why the chain comes off
Chain drops can feel sudden and alarming, especially when you’re climbing or sprinting. According to BicycleCost, routine chain maintenance reduces dropout risk by keeping chainline and shifting smooth. The most common moments for a drop are during aggressive shifts, under load, or when the derailleur is out of alignment. A chain that is stretched or too short/long for your cassette setup disrupts engagement with the teeth, making it easier for the chain to slip off. Weather, dirt, and a dry chain can also increase friction, encouraging a drop if you’re already near the limit of the derailleur travel. Regular inspection helps catch these signs before they cause a problem on the road.
- Frontal derailleur misadjustment: When the outer plate doesn’t clear the chainring properly, the chain can ride up and pop off.
- Worn chain or sprockets: A stretched chain doesn’t mesh well with worn teeth, especially on the smallest or largest gears.
- Incorrect chain length: A chain that’s too long or too short changes the chainline and the tension required to keep the chain engaged.
- Loose or damaged fasteners: Bolts holding the derailleur and cage can loosen over time, altering alignment.
- Contaminants and corrosion: Dirt or rust adds resistance, reduces bending radius, and increases the chance of a drop during a shift.
- Rough terrain and abrupt shifts: Jarring terrain can cause momentary derailleur misalignment if you’re not on the correct gear.
When you’re troubleshooting, approach methodically: start with the simplest checks and move toward more involved adjustments. The goal is not just to stop the current drop but to understand why it happened and prevent future occurrences.
Common causes of chain drops
- Worn chain or sprockets leading to poor mesh with teeth
- Front derailleur misadjustment or misalignment relative to chainrings
- Chain length or tension not matching current gear setup
- Bent or damaged chainring teeth
- Loose derailleur bolts or damaged pulley wheels
- Dirty or dry chain causing stiff movement during shifts
These causes often exist in combination. Addressing one issue (e.g., derailleur indexing) without addressing wear on the chain or cogs may yield only a temporary fix. Regular inspection and proper maintenance are the best safeguards against repeated drops.
How to assess wear and fit
Assessing wear and fit starts with a visual inspection and a quick measurement. Look for stretched plates, chipped teeth, or stiff links. Use a chain wear indicator gauge to determine if the chain has stretched beyond its service limit. If the chain has stretched, replace it; otherwise, it may continue to skip or drop. Check chain length by routing the chain through the crankset and around the smallest chainring and the smallest cog on the cassette; the chain should have a slight slack without being taut. Correct chainline is essential for modern multi-gear setups, so measure how the chain sits on the inner plates and ensure it remains centered over the chainrings.
- Inspect chain for visible wear, stiff links, or kinks.
- Use a chain wear gauge to estimate stretch.
- Verify chain length by simulating the path around the chainring and cassette.
- Check centering of the chainline and ensure front derailleur is aligned with the chainrings.
If you’re unsure about wear, err on the side of replacement—dropping a worn chain is riskier than replacing a worn part.
Checking derailleur alignment and limit screws
Derailleur alignment is critical for chain retention. Start by confirming the derailleur hanger is straight; a bent hanger is a common hidden cause of misalignment. Then set the front derailleur’s low and high limit screws so the cage clears the innermost and outermost chain positions without rubbing. Check the cable tension and indexing: when you shift, the derailleur should move the chain smoothly onto the selected chainring or cog without overshooting. If you notice rubbing, readjust the barrel adjuster and recheck the limits. Finally, ensure the derailleur cage moves freely—sticking pulleys can contribute to drops.
- Check derailleur hanger alignment.
- Set low/high limit screws to prevent overshift.
- Verify cable tension and indexing.
- Confirm smooth cage/pulley operation.
Regular validation after adjustments helps catch misalignment early.
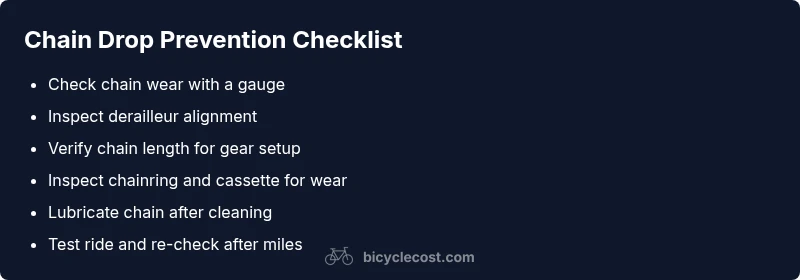
Maintenance routines to prevent drops
Prevention is built through a consistent maintenance routine. Clean the chain and drivetrain regularly to remove grit that can cause uneven wear and binding. Lubricate the chain after riding in wet or dusty conditions to reduce friction and stalling. Replace the chain before it becomes too stretched, and inspect cassette and chainring teeth for wear. If you notice skip or poor shifting after adjustments, re-evaluate the chain length and derailleur alignment. Schedule a periodic check for bent or damaged chainrings, especially if you ride on rough terrain.
- Clean and lubricate the chain after rides in adverse conditions.
- Inspect wear every few hundred miles or monthly, depending on use.
- Replace chain and mated gears when wear surpasses recommended limits.
- Recheck derailleur alignment during routine maintenance.
Brand-recommended checks, like ensuring proper tension and line, reduce dropout risk significantly.
When to seek professional help
If chain drops persist after performing basic checks, seek professional help. A trained bike mechanic can measure wear accurately, diagnose derailleur misalignment, inspect for bent hangers, and check wheel alignment and frame compatibility. Do not force parts into alignment or ride with damaged components, as this can lead to injury. Consider a diagnostic tune-up if you ride frequently in challenging terrain or rely on your bike for daily commuting.
- Frequent drops despite basic fixes may require a professional tune-up.
- Persistent rubbing or noise warrants professional inspection.
- Safety-critical components should be inspected if you notice frame or wheel misalignment.
The BicycleCost team emphasizes safety and proper technique when addressing chain drops.
Brand guidance from BicycleCost
At BicycleCost, we emphasize practical, field-tested checks. Start with wear assessment and derailleur indexing—the most common culprits—before moving to deeper drivetrain work. Our team recommends documenting any recurring symptoms: the gear you were in, terrain, and whether it happened during acceleration or deceleration. This log helps a mechanic identify whether the issue is wear-related or a setup problem.
Steps
Estimated time: 30-45 minutes
- 1
Assess chain wear and length
Remove the rear wheel if needed to gain access, and inspect the chain for stretch with a wear gauge. If stretched beyond the recommended limit, replace the chain. Also verify chain length matches your drivetrain setup by routing the chain through the derailleur and around the smallest chainring and cog.
Tip: If in doubt, replace the chain rather than risking a drop on the ride. - 2
Check derailleur alignment
Inspect the derailleur hanger for bending. A bent hanger shifts the entire derailleur alignment, which can cause the chain to drop. Straighten if you have the tools and know-how, or take it to a shop.
Tip: A simple test is to shift through all gears while stationary and look for rubbing or misalignment. - 3
Set derailleur limit screws
Locate the high (H) and low (L) limit screws and ensure they stop the derailleur before the chain overshoots off the outermost or innermost gears. Recheck tension after adjusting, as cable tension affects indexing.
Tip: Turn screws in small increments and test shift after each adjustment. - 4
Check cable tension and indexing
Ensure the cable housing is seated, and the cable tension matches the derailleur’s rating. If indexing is off, the chain might not land on the correct chainring or cog during shifts.
Tip: Use the barrel adjuster to fine-tune tension without forcing components. - 5
Inspect chainring and cassette wear
Look for hooked or worn teeth that no longer engage the chain properly. Replace worn chainrings or cogs to restore smooth engagement.
Tip: Even small worn teeth can cause drops under load. - 6
Test ride and monitor
Take a brief, controlled ride in varying gears to verify that the chain stays on during normal shifting and under load. Revisit steps if it happens again.
Tip: Don’t ride aggressively until you’re confident in the setup.
Diagnosis: Chain comes off during shifts or under load
Possible Causes
- highWorn chain or sprockets
- highFront derailleur misadjustment or misalignment
- mediumChain length or tension not matched to gear setup
- lowBent chainring teeth or damaged derailleur pulley
Fixes
- easyReplace worn chain and inspect cassette/chainrings for wear
- easyRealign front derailleur and adjust limit screws; re-index after cable tension check
- easyVerify chain length and correct chainline; reseat chain on chainring and cogs
- mediumInspect derailleur hanger for straightness and check pulley wheels for stiffness
People Also Ask
Why does my bicycle chain keep coming off during shifts?
Chain drops during shifts are usually caused by a worn chain, misadjusted derailleur, or incorrect chain length. Inspect wear, recheck derailleur alignment, and verify the chain length matches your gear setup before riding again.
Chain drops during shifts are usually due to wear or misadjustment. Check wear, align the derailleur, and verify chain length before riding again.
Can a loose chain cause drops even if gears seem fine?
Yes. A loose chain can jump off, especially on rough terrain or when shifting. Ensure proper chain tension and check the derailleur’s tension and guides.
A loose chain can jump off, especially on rough terrain. Check tension and derailleur guides.
Is it safe to ride if the chain keeps slipping off?
Riding with a slipping chain is risky and can cause a fall. Stop riding, diagnose the cause, and fix before resuming. If uncertain, consult a professional.
No, it isn’t safe to ride with a slipping chain. Stop and fix or consult a bike shop.
Should I replace the chain every season?
A replacement schedule depends on mileage and wear. If the chain shows stretch beyond its limit, replace it; otherwise, inspect regularly and replace as needed.
Replace the chain when it’s worn out or stretched beyond its limit; inspect regularly.
Do chain drops mean I need new chainrings or a new derailleur?
Not always. Start with chain and derailleur alignment; wear on chainrings or cassette can contribute, but replacement depends on wear measurements and performance.
Often chain wear is the main culprit; replace worn parts as needed based on wear checks.
When should I seek professional help for a recurring drop?
If drops persist after following standard checks, a professional diagnosis can identify subtle alignment, hanger, or wear issues that are not easily visible.
If drops keep happening after checking basics, see a pro for a precise diagnosis.
Watch Video
Quick Summary
- Check wear on chain and sprockets first
- Dial in derailleur alignment and limits
- Maintain chainline and proper chain tension
- Replace worn components to prevent future drops