Wash Bicycle Chain: A Complete Step-by-Step Guide
Learn how to wash a bicycle chain safely and effectively. This guide covers gear, on-bike vs off-bike cleaning, lubrication, and maintenance tips to keep your drivetrain quiet and efficient.

By washing your bicycle chain, you remove grime, improve shifting, and extend chain life. Gather degreaser, a chain-cleaning brush or scrubber, warm water, rags, and lubricant. You can clean on the bike or remove the chain; scrub, rinse, dry, lubricate, and test the drivetrain for smooth operation.
Why wash bicycle chain matters
A clean chain runs smoother, shifts more crisply, and lasts longer. When you ride through dusty roads, wet roads, or greasy city streets, grime and old lubricant build up on every link. That dirt acts like sandpaper against the chain and cassette, increasing friction and accelerating wear. Regular washing reduces grime adhesion and helps your drivetrain run quietly and efficiently. For cyclists who value reliability, cleaning the chain is a quick, inexpensive form of preventive maintenance.
According to BicycleCost, a clean chain is part of a broader maintenance routine that keeps the drivetrain efficient and reduces the risk of chain skipping or dropped chains. The BicycleCost Team notes that even a small amount of accumulated grime can compromise shifting precision, especially on more complex drivetrains. By washing the chain, you also inspect for bent plates, stiff links, and signs of rust, catching issues before they cause noticeable performance problems.
The lifecycle of a chain is influenced by exposure to dirt, moisture, and load. A neglected chain not only wears out faster but can also contaminate other components such as the cassette and derailleur pulleys. A simple wash, followed by proper lubrication, can extend lifespans and save money over time. In addition to performance benefits, keeping your chain clean reduces the chance of grit migrating into cables and housings, which some riders experience after off-road rides or wet commutes.
What you’ll need
Before you start, assemble the gear and materials so you’re not scrambling mid-clean. Having the right tools helps you clean thoroughly without damaging seals or links. A well-prepared workspace makes the process safer and faster, especially if you’re cleaning after a muddy ride or a wet commute.
- Degreaser (required: true) - Use a bike-safe solvent that won’t corrode rubber o-rings or drive-train seals.
- Chain-cleaning brush or scrubber (required: true) - A purpose-built tool helps reach inner plates and pin joints.
- Bucket or bowl of warm water (required: true) - Warm water dissolves grime more effectively and speeds up cleaning.
- Rag or lint-free cloth (required: true) - For wiping and drying; avoid leaving lint on links.
- Old toothbrush or small brush (required: true) - Targets stubborn grime between inner plates.
- Lubricant (required: true) - Choose wet, dry, or ceramic lube based on riding conditions.
- Chain removal tool or master-link pliers (required: false) - Only if you plan to remove the chain for a deeper clean.
- Protective gloves (required: true) - Keeps skin clean and protects from solvents.
- Drying towel or rack (required: true) - Pat dry to reduce rust risk; air-drying is acceptable if kept in a dry area.
- Optional: chain wear gauge (required: false) - Helps assess wear and timing for replacement.
Pro tip: Work in a ventilated area and lay down a tray or old towels to catch degreaser and rinse water. A clean, dry surface reduces the chance of contaminating new lubricant with dust.
On-bike vs off-bike cleaning
Cleaning a chain on the bike is convenient and quick, especially for road-only riders or when you lack tools. It’s best for light grime and quick maintenance, but it’s harder to inspect each link or remove heavy buildup. Off-bike cleaning provides superior access to every plate, inner links, and rollers; it’s easier to scrub thoroughly and check for wear. The choice often comes down to how dirty the chain is and whether you plan to remove the chain for a complete bath.
BicycleCost analysis shows that a thorough off-bike clean, followed by proper lubrication, can improve drivetrain efficiency and prolong chain life. The extra effort pays off on bikes with multiple gears or after off-road rides where mud accumulates between links. If you’re a casual rider with a cleaner drivetrain, on-bike cleaning combined with a thorough wipe-down can be sufficient between deeper cleanings.
When you remove the chain, you should have a plan to reinstall with correct orientation and tension. If the chain has a master link, you can open and close it with pliers; otherwise, you’ll need a chain tool. Regardless of method, ensure every link is free of grit and that the lubricant you apply later reaches each link.
Common mistakes and how to avoid them
Even experienced riders can slip into bad habits during a chain wash. Common mistakes include using harsh solvents that degrade seals, skipping the rinse step and leaving degreaser residue, over-wetting the drivetrain, and applying too much lubricant, which attracts more dirt. Another frequent error is failing to dry the chain completely, leaving moisture that accelerates rust. Finally, not inspecting the chain after cleaning can let a worn or stretched chain slip under load.
To avoid these issues:
- Choose bike-safe degreasers and avoid solvents not intended for chains.
- Rinse thoroughly and dry completely before applying lubricant.
- Apply lubricant only to the inner rollers while rotating the pedals to distribute evenly.
- Inspect for stiff links, bent plates, or rust and replace as needed.
Brand context: Maintaining chains is a foundational skill for any cyclist. The BicycleCost Team emphasizes that regular attention to the chain reduces the risk of drivetrain problems and saves money over time by delaying wear on cassette and chainring.
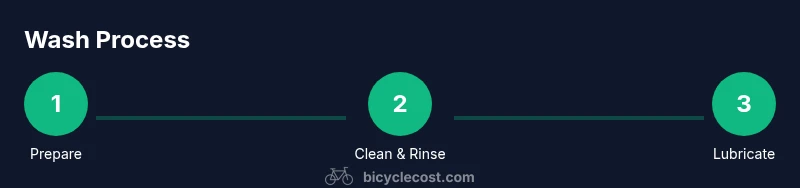
Step-by-step overview
A well-structured cleaning workflow minimizes mess and maximizes effectiveness. Start by choosing your cleaning method (on-bike or off-bike) based on chain condition and tools available. Move through degreasing, scrubbing, rinsing, drying, lubrication, and final checks. This overview prepares you to follow the detailed steps in the dedicated STEP-BY-STEP block while reinforcing best practices and safety considerations. Always finish with a quick test ride to ensure smooth shifting and no chain slip under load.
For best results, plan iterations: a light wipe-down after short rides, and a full deep-clean after muddy trips. If you ride in wet conditions, consider a more frequent wash cadence and a higher-quality lubricant to guard against wash-off. Remember to dispose of used degreaser and wash water according to local rules to protect your environment.
Lubrication and post-wash care
Lubrication is the final critical step after a wash. A dry chain absorbs lubricant better and reduces the attraction of dirt, so ensure the chain is perfectly dry before applying lubricant. Apply a small amount of lubricant to each inner link while rotating the pedals to spread it evenly. Wipe off excess with a clean cloth to prevent puddling on the outer plates. The goal is a thin, even film that protects against rust without attracting excess grime.
There are several lubricant types: dry lubes for dusty roads, wet lubes for wet or muddy conditions, and ceramic or wax-based options for longevity. Your choice should match riding conditions, climate, and your maintenance cadence. After application, wipe any excess and run the chain through a few gears to distribute the lubricant. A follow-up wipe after a short test ride checks for drips and ensures smooth shifting.
Safety and environmental considerations
Safety matters during every maintenance task. Wear gloves to protect skin, goggles if splashes are possible, and work in a well-ventilated area. Degreasers can irritate skin and eyes, so read the label and rinse thoroughly if contact occurs. Environmentally, do not pour used degreaser or rinse water down storm drains. Collect waste in a sealed container and dispose of it according to local guidelines. Use a dedicated cleaning space to prevent solvent contamination of other bike parts.
Tidy up after the job: seal containers, wipe down any surfaces, and store lubricants upright and away from heat. Practicing good safety and environmental habits aligns with best practices in BicycleCost’s guidance and helps you maintain a responsible maintenance routine.
How to assess chain condition after wash
A clean chain is not a signal that it’s perfectly fine to ride indefinitely. After washing and lubrication, check for signs of wear or stretch. Look for stiff, bent, or cracked links, and note if the chain skips under heavy load or if shifting remains rough. If you have a chain wear gauge, use it to assess stretch; if you don’t, inspect with a ruler: measure the distance between pin centers at several points and compare; any noticeable elongation indicates wear that warrants replacement.
If rust appears on the chain after washing or if links bind or creak after lubrication, stop riding and re-check the chain, pulleys, and derailleur. A worn chain can quickly damage the cassette, making future repairs more expensive. Regular checks keep your drivetrain in good health and maintain safe, predictable shifting.
Brand guidance and next steps
Keeping your chain clean is a foundational maintenance routine that pays dividends in performance and longevity. The BicycleCost team recommends scheduling a regular cadence for chain cleaning based on riding conditions, mileage, and storage climate. If you ride frequently in rain or mud, clean more often and consider investing in a higher-end lubricant and a stainless-steel chain for longevity. With consistent care, your drivetrain stays quiet, shifts smoothly, and requires fewer expensive replacements over time.
Summary and quick actions for readers
- Start with a clean workspace and gather all tools before you begin.
- Decide on on-bike or off-bike cleaning based on grime and tools available.
- Thoroughly degrease, scrub, rinse, and dry the chain before applying lubricant.
- Use the appropriate lubricant and wipe away excess to prevent dirt buildup.
- Inspect for wear or rust and replace if necessary. Repeat this routine regularly to keep your drivetrain running smoothly.
Tools & Materials
- Bike-safe degreaser(Choose a degreaser that won’t degrade seals or rubber components.)
- Chain-cleaning brush or scrubber(A purpose-built tool helps reach inner links easily.)
- Bucket or bowl of warm water(Warm water helps break down grime more effectively.)
- Lint-free rag or microfiber cloth(Use dry rags to avoid leaving fibers in the chain.)
- Old toothbrush or small brush(Targets grime between inner plates and around rivets.)
- Chain lubricant (dry or wet)(Match lubricant to riding conditions (dry for dust, wet for wet/moist).)
- Chain removal tool or master-link pliers(Only if you plan to remove the chain for a full bath.)
- Protective gloves(Nitrile gloves protect skin from solvents.)
- Drying rack or clean towel(Ensures complete drying before lubrication.)
- Optional: chain wear gauge(Useful for assessing chain wear over time.)
Steps
Estimated time: 25-40 minutes
- 1
Prepare the workspace
Set up a clean, ventilated area with a towel or tray to catch any drips. If you plan to remove the chain, gather your chain tool and a spare magnet to keep small parts organized. Put on gloves and lay out all tools so you can reach them without tracking grime around the bike.
Tip: Keep a plate or lid handy to hold removed fasteners and avoid losing tiny parts. - 2
Choose your cleaning method
Decide whether to clean on the bike or off. On-bike is quicker and good for light grime; off-bike allows full inspection and deeper cleaning. If removing the chain, consider detaching it at a master link for simplicity.
Tip: On-bike cleaning is fastest after a light ride; off-bike is best after muddy or gritty rides. - 3
Apply degreaser and scrub
Spray or apply degreaser along the entire length of the chain. Use the chain-cleaning brush or scrubber to scrub inner and outer plates, paying attention to the rivets and pins where grime collects.
Tip: Avoid hosing down components; damp is fine, but excess water can pool in bearings. - 4
Rinse and dry
Rinse the chain with clean water or wipe with a damp rag to remove loosened degreaser. Dry thoroughly with a clean cloth or let the chain air-dry in a warm, dry area to prevent rust.
Tip: Spin the crank slowly to ensure all residues are removed from every link. - 5
Lubricate and distribute
Apply lubricant to the inner side of each link as you slowly rotate the pedals. Let the lubricant penetrate, then wipe away excess to prevent attracting dirt.
Tip: Only a thin film is needed; excess lubricant accelerates dirt build-up. - 6
Reinstall and test the chain
If you removed the chain, reinstall it ensuring correct orientation and tension. Spin the crank and shift through all gears to verify smooth operation and listen for any stickiness or noise.
Tip: Check the master link closure and derailleur alignment after reinstallation.
People Also Ask
Can I wash the chain without removing it?
Yes, you can clean the chain on the bike for light grime, but a full off-bike clean allows deeper scrubbing and inspection for wear. Use care around the derailleur and pulleys to avoid splashing water into bearings.
Yes, on-bike cleaning works for light grime, but off-bike cleaning lets you inspect wear more thoroughly.
What degreaser is safe for bicycle chains?
Choose a bike-safe degreaser labeled for chains and drivetrain parts. Avoid household solvents that can damage seals or rubber components.
Use a bike-safe degreaser designed for drivetrains.
How often should I wash my chain?
Cadence depends on riding conditions. Clean more frequently after wet, muddy, or dusty rides, and at least check and wipe down after every week of riding in challenging conditions.
Clean more often after wet or dirty rides; check weekly if you ride in harsh conditions.
Is it okay to rinse with a hose?
A gentle rinse is acceptable if water pressure is low and aimed away from bearings. Avoid blasting solvent into seals, and dry thoroughly afterward.
Light hose rinse is fine if you avoid bearings and dry the chain well afterward.
What if the chain shows rust after washing?
Small surface rust can be cleaned with degreaser and a scrub, but persistent rust or stiff links indicate chain wear or corrosion. If in doubt, replace the chain to prevent drivetrain damage.
Rust that persists after cleaning usually means replacement is wise.
What lubricant should I use after washing?
Choose a lubricant suited to your riding conditions: dry lubes for dust, wet lubes for rain, or ceramic/wax-based formulations for longevity. Apply thinly and wipe off excess.
Use depending on conditions; apply a small, even film and wipe away excess.
Do I need to remove the chain to check wear?
Not always. A chain wear gauge or careful measurement can indicate wear while the chain remains on the bike. Remove only if you’re comfortable with the tools and the chain shows obvious wear.
You can gauge wear with a tool or by inspection; remove if wear is evident.
Can chain cleaning damage my cassette?
Improper degreaser or aggressive scrubbing around the cassette can cause scuffing or loosen protective coatings. Use a gentle approach near the cassette and rinse thoroughly.
Gentle scrubbing near the cassette is best; avoid harsh scrubbing that could damage parts.
Watch Video
Quick Summary
- Wash the chain regularly to extend life and improve shifting.
- Choose the cleaning method based on grime and tools.
- Dry thoroughly before lubrication to prevent rust.
- Use the right lubricant for conditions and wipe away excess.
- Inspect chain wear and replace as needed.