How to Clean a Bicycle: Step-by-Step Guide (2026)
Learn how to clean bicycle safely and effectively with a complete, step-by-step guide. Discover tools, techniques, safety tips, and maintenance advice from BicycleCost to keep your ride performing its best.

By following this guide, you will learn how to clean bicycle safely and effectively, preserving the frame finish and drivetrain performance. You’ll gather the right tools, choose a gentle cleaner, and perform a step-by-step routine that covers the frame, drivetrain, and components. This quick answer highlights the essentials to get started with confidence.
Why Regular Cleaning Matters
According to BicycleCost, regular cleaning helps extend frame life, preserve paint and finish, and prevent grime from building up on bearings and moving parts. A clean bicycle is easier to inspect for wear, corrosion, and loose hardware, which can reduce the risk of mechanical failure on rides. Cleanliness also improves component performance, especially in drivetrain efficiency and braking response. In this section, we explore how dirt, sweat, and road grime accumulate over time and why a simple routine beats infrequent, intensive scrubbing. Think of cleaning as part of preventative maintenance: it saves money, reduces the chance of sudden repairs, and keeps your ride safe and enjoyable. By adopting a consistent cadence—seasonally or monthly depending on use—you can keep your bicycle looking sharp and performing smoothly across miles of riding.
A practical cleaning cadence combines quick post-ride wipe-downs with a deeper weekly or monthly wash. Even if you ride in dry climates, wiping down the frame and drivetrain after exposure to moisture or road grime helps prevent corrosion. For riders who commute in wet or urban environments, aim for more frequent cleanings, especially around the chain, chainrings, and derailleur pulleys. The essential takeaway is to develop a routine you can stick to, not to chase perfection on every ride.
Essential Tools and Materials
Having the right tools makes cleaning easier, faster, and more effective. Start with a soft brush and a couple of dedicated bike sponges so you’re not cross-contaminating dirt from the drivetrain to the frame. A bucket with warm water, a mild bike-friendly cleaner or gentle dish soap, and a clean rag are the backbone of most cleanings. For stubborn grease, a bike-specific degreaser is recommended, used sparingly and only on appropriate components. You’ll also want a chain brush or old toothbrush for tight spots, and a clean, dry patch of cloth for drying and buffing. If you use a bike stand, that extra elevation helps you access every area without bending. Finally, finish with a quality bike lubricant for the drivetrain and pivot points. Having these tools on hand lets you clean efficiently and safely, without risking damage to sensitive parts.
Prep Your Bicycle: Safety First
Safety comes before scrubbing. Place the bike on a stable stand or prop it securely so the wheels are off the ground. Remove accessories that could get in the way, such as lights or water bottles, and shift the chain to the smallest ring to reduce tension on the drivetrain during cleaning. If you have hydraulic brakes, avoid spraying cleaner directly onto the brake rotors and pads. Wearing gloves protects your skin from solvents, and protective eyewear is wise when dealing with degreasers. Lay a towel or mat underneath to protect your work surface. These preparations reduce the risk of accidents and help you clean more thoroughly, especially around moving parts.
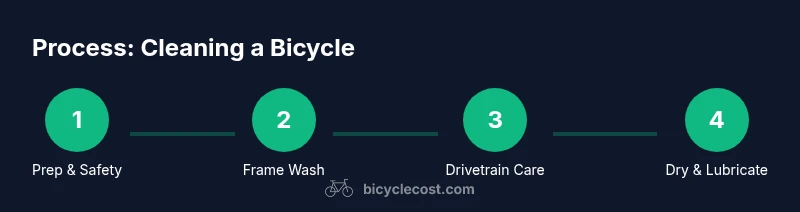
Step-by-Step Cleaning Process Overview
A clear, top-to-bottom approach helps you avoid missing spots. Start with the frame and wheels, then move to the drivetrain, and finish with the chain, cassette, and derailleurs. Use a soft brush and mild cleaner for the frame, rinsing with a light spray or a damp sponge. Degrease the chain, chainrings, and pulleys separately, taking care not to soak sensitive bearings or cartridges. Rinse off residue gently and dry the bike with clean towels. Finally, apply lubricant to the chain and pivot points as needed, and perform a quick function check. This overview sets the rhythm for a thorough, safe cleaning session and aligns with best practices for bike care.
Cleaning by Area: Frame, Drivetrain, and Components
Frame care focuses on removing surface grime, avoiding harsh cleaners that could strip protective coatings, and drying quickly to prevent water spots. The drivetrain deserves special attention: apply a degreaser to the chain, cassette, and chainrings, agitate with a brush, and rinse away with clean water. Pulleys, jockey wheels, and derailleur attachments should be inspected for wear while you clean, as buildup can mimic or mask issues. Brakes require special care: avoid getting lubricants on brake rotors or pads, and keep rims dry for better stopping. Cleansing the handlebars, stem, and seat post helps keep the whole bike feeling responsive and confident on the road. This section offers a methodical, area-by-area checklist to ensure nothing is overlooked during the wash.
Drying, Lubrication, and Maintenance Tips
After washing, dry everything thoroughly, paying special attention to the chain and joints. Apply a light, bike-specific lubricant to the chain while turning the pedals to distribute evenly. Wipe away any excess lube to prevent attracting dirt. Inspect for signs of wear on the chain, cassette, and derailleur; this is a good time to plan maintenance or replacements. For storage, keep the bike in a cool, dry location away from direct sun and moisture. Regular lubrication and timely inspection extend the life of moving parts and help maintain smooth shifting and reliable braking. Finally, adopt a brief post-clean routine: wipe down quickly after rides in wet weather and re-lubricate monthly or according to use.
Common Mistakes and How to Avoid Them
Over-wetting the bike, using harsh solvents, or applying degreasers to brakes or bearings can cause damage and safety concerns. Rinsing with high-pressure water may force dirt into bearings or remove protective finishes. Skipping thorough drying leads to rust and corrosion, particularly on steel parts. Not lubing correctly can cause stiff shifting or chain squeeze. Rushing through any step increases the risk of missed spots or residue that can attract more dirt. The key is to keep cleaners mild, apply the right amount, and dry completely before lubricating. Adopting a calm, patient approach ensures you do a clean job every time and learn to spot wear early, keeping your bicycle safer and more enjoyable to ride.
Tools & Materials
- Bucket(Medium size with handle)
- Warm water(Not hot; comfortable for hands)
- Mild bike cleaner or dish soap(Gentle formula, non-corrosive)
- Degreaser (bike-specific)(Only on drivetrain components)
- Soft brushes(Multiple sizes for frames and crevices)
- Old toothbrush / chain-brush(Tackle tight spots)
- Sponge or microfiber cloth(Gentle cleaning and drying)
- Bike stand or maintenance stand(Optional but helpful)
- Rags or towels(Drying and buffing)
- Lubricant (bike-specific)(Apply to chain and joints)
- Goggles or safety glasses(Eye protection)
- Gloves(Protect hands from solvents)
- Waste water tray or tarp(Contain rinse water)
Steps
Estimated time: 30-45 minutes
- 1
Prepare and secure the bike
Place the bicycle on a stable stand or clamp, remove accessories, and shift to the smallest chainring. This reduces load on the drivetrain during cleaning and gives you clear access to all areas. Check that brakes are off and the wheels spin freely before you begin.
Tip: Ensure the stand grips the frame without scratching paint. - 2
Protect yourself and the workspace
Lay a towel under the bike and wear gloves to protect your hands from cleaners. Cover nearby surfaces to avoid water and cleaner splashes. Keep a dedicated cloth for chalky residue and one for drying to prevent cross-contamination.
Tip: Work in a well-ventilated area to avoid inhaling fumes from cleaners. - 3
Rinse and frame wash
Rinse the frame and wheels with lukewarm water. Apply a mild cleaner with a sponge or soft brush, gently scrubbing away dirt without scrubbing aggressively. Rinse from top to bottom to prevent dirty water from re-soiling cleaned areas.
Tip: Avoid direct high-pressure spray on bearings and seals. - 4
Degrease the drivetrain
Apply degreaser to the chain, chainrings, cassette, and derailleur jockey wheels. Use a chain-brush to agitate and loosen built-up grease. Rinse with clean water, ensuring you don’t pollute surrounding areas.
Tip: Work in sections to avoid drying cleaner on the frame. - 5
Dry and inspect
Thoroughly dry the bike with clean towels. Inspect for rust, wear, or loosened bolts. If you notice any issues, address them before your next ride. This is also a good time to check tire pressure and brake pads.
Tip: Drying completely reduces rust risk and helps reseal bearings better. - 6
Lubricate and finalize
Apply a light coat of bike-specific lubricant to the chain as you rotate the pedals. Wipe off excess so it doesn’t attract dirt. Reinstall any removed parts and perform a quick function check for smooth shifting and braking.
Tip: Only apply lubricant to moving parts; avoid over-lubing.
People Also Ask
What supplies do I need to clean a bicycle?
A basic kit includes a bucket, warm water, mild soap, brushes, rags, degreaser for drivetrain, and bike-safe lubricant. Having a stand helps but is not required.
You need a bucket, warm water, mild soap, brushes, rags, degreaser for the drivetrain, and lubricant. A stand is helpful but optional.
Can I use dish soap on my bike?
Mild dish soap can be used, but choose a cleaner formulated for bikes when possible to protect finishes and lubricants. Avoid harsh solvents on rubber and plastic components.
Dish soap is okay in a pinch, but bike-specific cleaner is better for protecting parts.
Is it safe to spray a pressure washer on a bicycle?
Avoid high-pressure sprays near bearings, seals, and cables. A gentle rinse or damp sponge is safer and effective for cleaning a bike.
Pressure washers can push water into bearings; stick to a gentle rinse instead.
Should I remove the chain before cleaning?
Removal is optional for many bikes, but taking the chain off can allow a deeper clean and easier lubrication. If you don’t remove it, be careful to avoid soaking the internal hubs.
You can clean the chain on the bike, but removing it gives a deeper clean.
How often should I clean and inspect my bicycle?
Clean and inspect after heavy riding in wet or muddy conditions, or at least monthly for regular riders. Routine checks help spot wear before it becomes a problem.
Clean and inspect regularly—monthly for commuting, more often if you ride in grime or rain.
What if degreaser gets on the frame or brakes?
Rinse the area thoroughly with water and wipe dry immediately. Degreaser can degrade finishes or affect brake performance if left in contact with components.
If degreaser touches the frame or brakes, rinse it off right away and dry the area.
Watch Video
Quick Summary
- Gather the right tools before you start
- Wash from top to bottom with mild cleaners
- Dry thoroughly and lubricate moving parts
- Inspect for wear during the clean
- Maintain a regular cleaning schedule