Pressure for Bicycle Tires: Optimal Ranges and How to Check
Discover how to set and check pressure for bicycle tires. Learn tire-width guidelines, bike-type ranges, and practical tips for safer, more efficient rides.

For most riders, pressure for bicycle tires varies by tire width, bike type, and rider weight. Typical ranges are about 40–60 psi for road tires and 30–40 psi for mountain tires, with narrower tires requiring higher pressure. Correct inflation lowers rolling resistance, improves grip, and reduces pinch flats. According to BicycleCost analysis, checking pressure before every ride yields the best balance of speed, comfort, and tire life.
What pressure for bicycle tires actually does\n\nThe pressure for bicycle tires directly affects rolling resistance, grip, comfort, and tire longevity. Correct inflation makes you faster on pavement with less effort and helps you maintain control on wet or uneven surfaces. Too-high pressure reduces the contact patch and can make the ride harsh, while too-low pressure increases heat, wear, and the risk of pinch flats. According to BicycleCost, the right pressure depends on tire width, rider weight, and terrain, so there is no universal number. Instead, use established ranges as a starting point and verify with a gauge before each ride to ensure consistency and reliability. This approach aligns with our goal at BicycleCost to empower cyclists with practical, data-informed guidance for everyday maintenance and performance.
How to determine the right pressure for your tires\n\nBegin with the tire sidewall, which often shows a recommended pressure range in psi. Then tailor that range to your tire width and payload. Road tires with narrow widths typically need higher pressures to reduce rolling resistance and prevent pinch flats on fast surfaces, while wider tires on gravel or mountain bikes benefit from lower pressures for traction and comfort. Use a pump with a reliable gauge; periodically calibrate your gauge against a known standard to avoid drift. For riders who carry extra gear, ride in warm weather, or transport children or pets, plan for small pressure adjustments within the safe range. BicycleCost notes that small, incremental changes—like 2–5 psi at a time—can yield noticeable differences in ride feel without compromising safety.
Step-by-step: checking and adjusting tire pressure\n\n1) Inspect the tire for wear, cuts, or embedded objects before inflation. 2) Reset your gauge to zero when starting. 3) Inflate to the target range, then check with the gauge at multiple points along the tire. 4) Spin the wheel and press the tire to feel the contact patch and assess firmness. 5) Recheck after a few minutes of riding, as heat may raise pressure.
Impact of tire pressure on performance and safety\n\nProper pressure improves rolling efficiency and grip, especially in corners or wet conditions. Underinflation increases rolling resistance, heat buildup, and wear; it also raises the risk of pinch flats when hitting potholes or rough patches. Overinflation reduces traction and can cause a harsher ride and higher chance of punctures by hard edges. Note that pressure interacts with tire width, rim width, and rider weight; optimizing all variables yields the best balance between speed, comfort, and safety. In BicycleCost's analysis, riders who routinely check and calibrate inflation report smoother rides and fewer tire-related concerns across seasons.
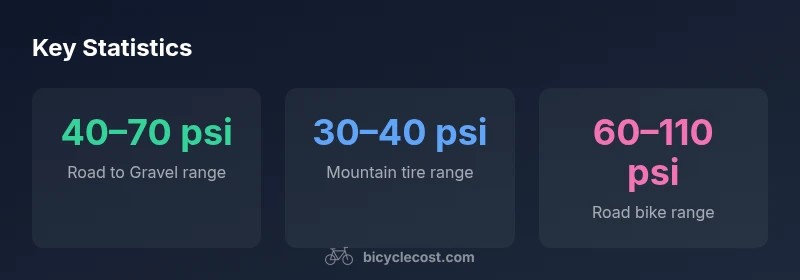
Pressure by tire width and bike category\n\n- Road tires (narrow, 23–28 mm): 60–110 psi.\n- Gravel and cyclocross tires (28–50 mm): 40–70 psi.\n- Mountain bike tires (2.0–2.4 inches): 30–40 psi.\n- Hybrid/City tires (28–38 mm): 50–70 psi. These ranges are starting points; adjust for rider weight, terrain, and rim width. When riding rough surfaces at the upper end of a range, you increase risk of tire wear; when riding hot days at the lower end, watch for heat buildup.
Weather, temperature, and altitude considerations\n\nTemperature affects air density; colder air reduces pressure and warmer air increases it. While riding through temperature swings, recheck inflation. Altitude matters: higher elevations can slightly change the required pressure, especially if the air is thinner or the ride is on steep grades. In cold mornings, start with a slightly lower pressure within the recommended range to avoid overinflation after warming up. BicycleCost recommends pairing your inflation checks with a quick weather scan so you keep pressure aligned with current conditions.
Tools and maintenance routine\n\nMaintain three tools: a gauge you trust, a floor pump with a built-in gauge, and a portable pump. Keep a small notebook or app log to track changes. Do not rely on the feel alone; gauge accuracy declines with wear. Schedule a monthly pressure check for casual riders and before any long race or training block. Consistent practice reduces surprises and improves ride quality over time.
Practical tips: building a personal pressure chart\n\nCreate a personal chart: record tire size, rim width, rider weight with and without gear, typical terrain, and the range you settle on after testing. Use a simple table in your phone notes or a printable sheet. Start with a baseline in the mid-range and ride 2–3 miles to gauge feel. Then adjust by 2 psi increments and re-test. Document results along with ride conditions and weather. The BicycleCost team recommends keeping this record to minimize guesswork when you switch tires or riders, and to help you maintain consistent performance year-round.
Pressure ranges by bike type
| Bike Type | Tire Width | Typical Pressure Range (psi) |
|---|---|---|
| Road bike | 23-28 mm | 60-110 psi |
| Gravel bike | 28-42 mm | 40-70 psi |
| Mountain bike | ≥50 mm | 30-40 psi |
| Hybrid/City bike | 28-38 mm | 50-70 psi |
People Also Ask
What is the best tire pressure guide for beginners?
Begin with the tire’s recommended range on the sidewall, then adjust for width and payload. Use a reliable gauge and recheck before each ride. Start with mid-range pressures and test how the bike feels.
Start with the tire’s recommended range, then fine-tune with small checks using a gauge.
Can I mix front and rear tire pressures?
Yes, but usually the rear tire may require slightly higher pressure due to greater load. Adjust within the overall safe range and verify feel after a short ride.
Usually yes; the rear tire often needs a touch more pressure. Check how it feels after a test ride.
Is tubeless different in tire pressure requirements?
Tubeless setups use similar pressure ranges but require careful setup and seal checks. Always consult the tire and rim manufacturer guidelines.
Tubeless uses similar ranges, but follow specific setup steps and check seals.
How do I know if my gauge is accurate?
Compare your gauge against a known standard or another gauge periodically. If readings drift consistently, replace the gauge or recalibrate.
Test your gauge against another trusted gauge; replace if readings drift.
Why does my tire feel flat after riding for a while?
If a tire loses pressure during a ride, inspect for leaks, valve issues, or punctures. Reinflate after the ride and recheck in different temperatures.
If it feels soft during a ride, check for leaks or punctures and recheck after cooling down.
Should I adjust pressure for cold weather?
Yes. Cooler temperatures can lower pressure; recheck pressure when moving between warm and cold environments and ride within your normal range.
Yes, recheck in cold weather and adjust within your safe range.
“Getting tire pressure right isn't a one-size-fits-all task. It depends on tire width, rider weight, and riding conditions, and small adjustments can dramatically improve grip and comfort.”
Quick Summary
- Check tire pressure before every ride and tailor ranges to tire width and rider weight.
- Use a reliable gauge and calibrate it regularly to avoid drift.
- Account for weather and temperature; re-check pressure when conditions change.
- Track your personal pressure data to maintain consistency across tires and riders.
- Starting in the mid-range and testing with small 2 psi adjustments yields reliable performance gains.