What Should Bicycle Tires Be Inflated To
Learn how to set the correct tire pressure for your bike. This data-driven guide covers PSI ranges by tire width, riding style, and conditions, with practical tips and a plan you can trust from BicycleCost.

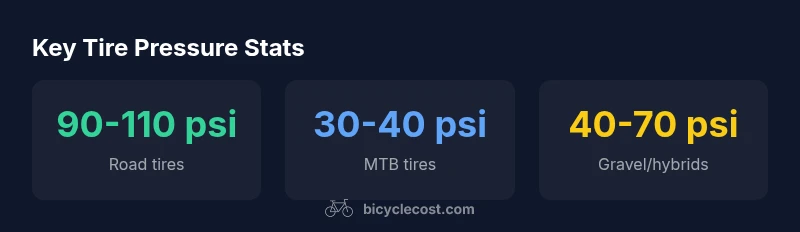
Road tires typically run 90-110 psi, while mountain bike tires use 30-40 psi. Gravel and hybrid tires sit around 40-70 psi, with adjustments for rider weight and terrain. BicycleCost Analysis, 2026 shows that tire width, weight, and surface type shift the ideal PSI within these ranges.
Why Tire Inflation Matters\n\nInflating bicycle tires to the correct pressure is not just about a smooth ride. Proper PSI improves rolling efficiency, grip, and ride comfort while reducing the risk of pinch flats and rim damage. Underinflated tires tend to roll more slowly, squirm over edges, and wear unevenly. Overinflated tires can feel harsh, lose grip on rough surfaces, and increase the likelihood of punctures from sharp objects. The BicycleCost team has found that even small PSI adjustments can yield noticeable gains in traction and control, especially on mixed terrain. This is why tire pressure shouldn’t be treated as a fixed setting but as a dynamic parameter you tailor to your ride.\n\nWhen asked what should bicycle tires be inflated to, most riders benefit from starting with broad, type-specific ranges and then dialing in based on feel, load, and conditions.
How PSI Is Measured and What It Means\n\nPSI, or pounds per square inch, is the most common unit in cycling, but many tires also list a maximum pressure in bar units. Use a reliable gauge and calibrate it against known references, like a tire shop gauge. Remember that ambient temperature, ride temperature, and tire heat after a long climb can slightly change the pressure. A good practice is to check PSI when the tires are cold and again after you’ve ridden a few miles, to see how they settle under load. The goal is consistency: the same pressure for similar weights, tires, and surfaces.\n\nIf your gauge reads low or high compared with the sidewall markings, don’t force-fit the pressure. Instead, adjust in small increments and ride a short section to evaluate feel before committing to a longer ride.
Where to Find the Right PSI on Your Tire\n\nMost tires have markings on the sidewall indicating a recommended pressure range. The upper limit is not a target to reach; it’s a safety cap. Sidewalls may also warn against underinflation or overinflation. Start with the middle of the recommended range as a baseline, then fine-tune by ride feel. For tubeless setups, pressures can be slightly lower due to better sealant support, but you should still respect the tire’s maximum. Always consider load: extra weight from gear or a passenger bike rack calls for a higher PSI within the safe range.\n\nA practical rule is to align the tire pressure with the tire width and your weight, adjusting in small steps. This baseline will help you compare different tires and riding styles across the same route more accurately.
Road vs MTB: PSI Ranges by Tire Type\n\nRoad bike tires are narrow and designed for efficiency on smooth pavement. They typically require higher PSI for best performance, which reduces tire squirm and rolling resistance. Mountain bike tires are wider and designed for traction on uneven terrain; lower PSI improves grip but can risk pinch flats if you ride aggressively. Gravel and hybrid tires live in between, with a mid-to-high PSI range that balances comfort and control. Always adjust within the manufacturer’s stated range for your specific tire.\n\nWhen you swap tires, re-check PSI as part of your setup, since a different width or tread pattern can shift the ideal pressure by several psi. This helps maintain predictable handling and protect rims on rough surfaces.
Impact of Tire Width on Inflation\n\nWider tires generally run at lower pressures to maximize contact patch and grip, while narrower tires require higher pressures to prevent squirm and improve stability. For example, a typical 25-28 mm road tire might run near the upper end of its range, while a 40-50 mm MTB tire uses a noticeably lower pressure. The exact numbers depend on rider weight, rim width, and terrain. Adapting PSI to width is a practical shortcut to better ride quality without changing your tires.\n\nConsider testing a few PSI values within the recommended width-based ranges on similar routes to identify a comfortable, predictable balance of grip and rolling resistance.
Practical Methods: Using a Gauge Correctly\n\nInvest in a reliable floor or portable gauge and verify it against a known calibration. Check pressures when tires are cold, then again after a short ride to see how they settle under load. Keep a small log of your pressures for different rides, noting weight in gear and terrain. Apply a consistent testing protocol: baseline PSI, then +2 psi, +4 psi, etc., and assess ride feel, cornering, and comfort.\n\nIf you’re unsure, start at the middle of the recommended range and adjust in small steps. A structured approach minimizes guesswork and improves long-term consistency.
Seasonal and Temperature Effects\n\nTemperature affects air density; cooler air reduces pressure and warmer air increases it. On a cold morning, a tire might read lower than its “warm” pressure after a lengthy ride. This is why many riders set a baseline in cool conditions and verify after warming up or riding short distances. If you ride in extreme heat or cold, monitor PSI more frequently and adjust within the tire’s safe range.\n\nBy tracking how your PSI changes with weather, you’ll maintain consistent performance regardless of season.
Common Mistakes and How to Fix Them\n\nCommon mistakes include running tires underinflated to save weight, overinflating in an attempt to prevent flats, and ignoring tire width and load when setting PSI. Address these by following the manufacturer’s range, accounting for rider weight and luggage, and rechecking PSI after long rides or significant terrain changes. Also, don’t rely on a single pressure for all conditions; vary within the safe range to optimize grip and comfort.\n\nFixes include recalibrating after tire changes, switching to a gauge you trust, and keeping a small inflator on long rides for quick adjustments.
Maintenance Checklist: Keep PSI Right\n\nCreate a simple routine: check PSI weekly during peak riding seasons and before planned long rides. Record the date, tire type, PSI, and any noticeable changes in ride feel. Inspect tires for wear and punctures at the same time. Replace tires when treads are worn, or sidewalls show cracks. A consistent PSI schedule translates into reliable handling and longer tire life.
Choosing PSI for Your Ride Style\n\nDifferent riding styles demand different pressure strategies. A fast urban rider on smooth pavement may favor higher PSI for efficiency, while a weekend racer on mixed terrain might dial in slightly lower PSI for grip. Casual riders benefit from a broader baseline within the tire’s recommended range. The key is to test, observe, and adjust within the tire’s specified limits to maintain safe handling and comfortable rides.
Typical PSI ranges by tire type
| Tire Type | Typical PSI Range | Notes |
|---|---|---|
| Road | 90-110 psi | Narrow tires, smooth surfaces |
| MTB | 30-40 psi | Wider tires, rocky terrain |
| Gravel/Hybrid | 40-70 psi | Mid-range, versatile |
People Also Ask
How often should I check tire pressure?
Check PSI at least weekly during peak riding seasons and before long rides. Inspect tires for wear and embedded objects while you’re checking pressure. Log any changes to track what works for your weight, tires, and terrain.
Check your tire pressure weekly, and before long rides. Look for wear and embedded objects while you’re at it.
Does temperature affect tire pressure?
Yes. Colder temperatures lower PSI; warmer temperatures raise it. Adjust by checking after warming up or riding a bit, and compare to your baseline within the tire’s safe range.
Temperature matters. Check again after temperature changes to keep your pressure accurate.
Should I always follow the tire sidewall max PSI?
Never exceed the sidewall maximum. Use the middle of the range for a baseline, then tune based on ride feel and load.
Don’t go past the max—start in the middle and adjust.
What about tubeless tires—do I inflate differently?
Tubeless setups can run slightly lower pressures for grip, but you still must stay within the tire’s recommended range and consider rim and sealant conditions.
Tubeless can be a bit different, but don’t ignore the tire’s range.
How does rider weight affect PSI needs?
Heavier riders or loads generally require higher PSI within the safe range to maintain shape and avoid pinch flats; lighter riders can use lower PSI for comfort and grip.
More weight? You’ll likely go a bit higher within the safe range.
Can I use one PSI for all conditions?
No. Different surfaces and tires need different pressures. Start with the baseline for your tire width, then fine-tune by terrain and feel.
Not one PSI fits all—adjust based on surface and tire width.
“Proper tire inflation is the single most underappreciated factor in bike performance and safety. Small PSI adjustments can unlock substantial grip and ride quality.”
Quick Summary
- Check PSI when tires are cold before rides
- Stay within the tire’s sidewall range and respect max pressure
- Adjust PSI for rider weight and terrain, not just speed
- Use a reliable gauge and log changes for consistency
- Test small PSI changes to find the sweet spot for grip and comfort