What Pressure Bicycle Tyre: A Practical Guide to PSI
Discover the correct tyre pressure for your bicycle with practical PSI ranges, measurement tips, and maintenance guidance. Learn how to tailor pressure to tyre width, terrain, and rider weight for safer, more efficient rides.

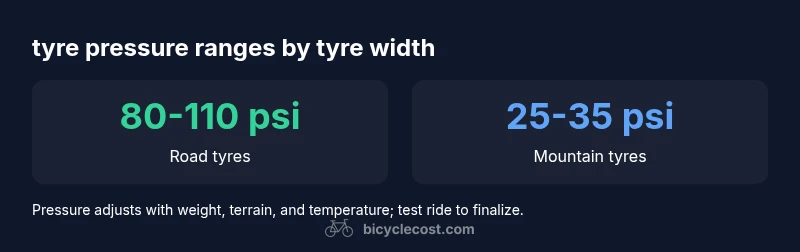
The exact pressure for a bicycle tyre depends on tyre width, rider weight, terrain, and riding goals, but practical ranges are commonly cited as road tyres around 80-110 psi and mountain tyres around 25-35 psi. For most riders, start with the manufacturer’s guidance within these ranges and adjust by small increments after testing on cold tyres. This quick rule of thumb helps minimize pinch flats and maximize grip and efficiency.
Why pressure matters for bicycle tyres
Understanding tyre pressure starts with recognizing how air affects the contact patch between the tyre and the road. The phrase what pressure bicycle tyre entails isn’t one-size-fits-all; it depends on tyre width, tyre construction, rider weight, the terrain you ride, and your performance goals. Correct pressure helps minimize pinch flats, optimize grip, and reduce rolling resistance. Overinflation reduces the footprint of the tyre, often making the ride harsher and cutting grip on rough surfaces. Underinflation enlarges the contact patch, increasing rolling resistance, overheating the tyre bead, and boosting the risk of pinch flats on sharp edges. For commuting and sport riding alike, starting with a broad range and fine-tuning based on feel is a practical approach. Over years of rider testing, BicycleCost analyses show that small pressure adjustments can yield noticeable differences in comfort, control, and speed without changing the tyre itself.
In practice, you should treat tyre pressure as a dynamic setting rather than a fixed number. Factors such as weather, tyre wear, rim width, and even the load you carry can all influence the optimal pressure. This guide uses broad, safe ranges and actionable steps so you can tailor your setup quickly and confidently during rides, training, or race days.
How air pressure interacts with ride quality
Air pressure shapes the tyre’s stiffness, which in turn dictates how the wheel translates road texture into ride feel. A higher pressure stiffens the tyre, reducing deformation and improving rolling efficiency on smooth pavement. However, on rough pavement or loose surfaces, excessive pressure can lead to poor grip and a harsher ride. Conversely, a lower pressure increases the tyre’s ability to flex, improving traction and comfort on uneven surfaces but raising rolling resistance and fuel consumption. The balance is especially important for tyres in the 28–32 mm and wider categories, where the wider footprint can deliver more grip if pressure is tuned correctly. For tubeless setups, running slightly lower pressures can improve compliance and cornering stability, provided the bead seats reliably. In short, the ride quality you experience is a direct reflection of how pressure interacts with tyre casing, tread, and road surface. bicycle maintenance insights from BicycleCost emphasize testing changes in small increments to avoid overcorrecting in one ride.
Be mindful of rim width, which interacts with pressure to determine the actual contact patch. A wider rim typically allows for a lower pressure while maintaining a similar contact area, which can improve grip with less risk of pinch flats. If you’re using disc brakes or aero rims, the added stiffness can also influence how pressure translates to tyre performance. A systematic approach—test, ride, assess, and adjust—produces the most reliable, repeatable results for any bike setup.
How to measure and set the correct pressure
The most reliable way to manage tyre pressure is to measure when the tyre is cold (before you ride or after the bike has been stationary for several hours). Use a high-quality gauge, ideally a digital gauge with a known accuracy, and compare your readings to the tyre’s recommended range printed on the sidewall and to the rim width you’re using. Start with the manufacturer’s range, then refine by small increments of 5–10 psi based on ride feel and flat risk. Remember to check both tyres, as front and rear pressures can differ depending on weight distribution. For tubed tyres, ensure the bead is seated evenly and that the tube isn’t pinching between the rim and the tyre. For tubeless setups, verify seal integrity after inflating and adjust pressure to optimize bead seating and rolling resistance. In all cases, calibration of your gauge matters: consider testing the gauge against a known reference periodically and replace batteries in digital models as needed.
When planning a long ride or carrying additional gear, factor in the added load. A typical method is to begin with your standard cold pressure and then increase by 5–10 psi if you’re carrying a heavy bag or a passenger. For high-speed training or racing on smooth roads, slight increases can shave seconds from a lap time, but only if grip remains secure and the ride feels stable. The key is to be methodical: log your pressures, the conditions, and the ride result to build a personal profile you can repeat.
Pressure ranges by tire width and terrain
Different tyre widths and road conditions demand different pressures. The following practical ranges reflect common practice for many cyclists, but always cross-check with your tyre manufacturer guidelines and consider rider weight. Narrow road tyres (23–25 mm): about 80–110 psi for standard pavement. Wider road tyres (28–32 mm): roughly 65–95 psi, balancing speed with comfort. Gravel or cinched-tread tyres (38–42 mm): 30–50 psi to improve grip on loose surfaces. Mountain bike tyres (2.0–2.4 in): 25–35 psi to maximize traction on technical terrain. For tubeless tyres, you may be able to run a slightly lower pressure without pinch flats, but ensure the seal is secure and the bead seats properly. Always start at the middle of the recommended range and adjust based on ride feel, handling, and flat risk. A cautious, incremental approach helps you discover your ideal pressure more efficiently than chasing a single fixed number.
Common scenarios and how to adjust
Riders vary in weight, luggage, and riding goals, all of which influence tyre pressure. If you carry a heavy load or ride with a friend on a tandem, you’ll likely need to raise pressure a notch or two to maintain stability and avoid pinch flats. For soft or wet surfaces, a slight pressure decrease can improve grip, provided you’re not risking excessive rolling resistance on smoother sections. Extreme temperatures can affect air density; on very hot days, pressure may rise, while cold mornings can decrease it. In general, aim for small adjustments (5–10 psi) at a time and observe how the bike responds in cornering, braking, and acceleration. If you’re new to pressure tuning, a practical approach is to keep a baseline for typical conditions and create a simple adjustment map for different scenarios (weight, terrain, weather). BicycleCost's practical maintenance guidance emphasizes repeatable checks and documenting how each change feels, so you can dial in quickly on future rides.
Tools, measurement, and best practices
Choose a gauge you trust. Digital gauges are convenient and precise, while dial gauges offer robustness. Always check that the gauge reads within a couple of psi of the bike manufacturer’s range when tested against a known standard. Calibrate your gauge occasionally, and replace batteries in digital units to maintain accuracy. Read the sidewall for manufacturer-recommended ranges, then use your own test rides to refine. Keep tyres clean and free of debris to avoid underestimating pressure due to dirt or crust. Finally, dedicate a regular maintenance window to inspect tyres and rims for wear, cuts, or punctures, and verify bead seating after any tyre change. A disciplined approach to tyre pressure reduces the likelihood of flats and enhances overall ride quality.
Pressure ranges by tyre type and terrain
| Tire Type | Typical PSI Range | Common Uses | Notes |
|---|---|---|---|
| Road (23-25mm) | 80-110 psi | Road & racing | Check manufacturer range; adjust for weight |
| Gravel (32-45mm) | 30-50 psi | Mixed terrain | Lower pressures improve grip on loose surfaces |
| Mountain (2.0-2.4in) | 25-35 psi | Off-road | Avoid pinch flats; monitor wear |
| Hybrid (28-38mm) | 40-70 psi | City & commuting | Balance speed and comfort |
People Also Ask
What is the recommended tyre pressure for road bikes?
Road bikes typically fall within a broad range, often around 80-110 psi depending on tyre width and rider weight. Always start with the tyre’s manufacturer guidelines and adjust in small increments based on ride feel and grip.
Road tyre pressure usually sits around 80 to 110 psi, but check your tyre’s guidelines and tune by small steps.
Does tyre pressure change with rider weight?
Yes. Heavier riders generally require higher pressures to prevent excessive tyre squish, while lighter riders may ride at the lower end of the range for comfort and grip. Use small, measured adjustments and test ride feedback to calibrate.
Yes. Heavier riders often need slightly higher pressures; lighter riders can use a bit less to improve grip.
How often should I check tyre pressure?
Check tyre pressure weekly or before every long ride, especially if you ride in varying temperatures or carry luggage. If you ride daily on consistent terrain, a monthly check can suffice, but periodic checks are best practice.
Check weekly or before long rides; more often if temperatures swing or you carry gear.
What happens if I overinflate?
Overinflation reduces grip and increases the risk of punctures on rough surfaces. It also makes the ride harsher and can cause rim damage if you hit a sharp edge at high pressure.
Overinflating can cut grip and make the ride harsher; it also raises puncture risk on rough roads.
What happens if I underinflate?
Underinflation increases rolling resistance, reduces efficiency, and raises the risk of pinch flats on sharp objects. It can also cause uneven wear and poor handling.
Underinflation raises rolling resistance and pinch-flat risk; it also wears tyres unevenly.
Should tubeless tyres require different pressures?
Tubeless tyres can often run slightly lower pressures for better grip, but verify bead seating and seal integrity. Always follow manufacturer guidance for tubeless setups and adjust based on feel and puncture resistance.
Tubeless tyres often use a bit lower pressure for traction, but ensure proper seating and seals.
“Consistent tyre pressure is a foundational aspect of bike handling and safety. Small, repeatable adjustments based on conditions yield the best balance of speed and grip.”
Quick Summary
- Check tyres when cold using a reliable gauge.
- Start with manufacturer ranges, then fine-tune in small steps.
- Wider tyres and heavier loads usually require higher pressures.
- Temperature and terrain can shift optimal pressure; adjust accordingly.
- Record your settings to build a personal pressure profile.