How Often to Pump Bicycle Tires
Learn how often to inflate bicycle tires for optimal grip, efficiency, and tire life. This BicycleCost guide explains how to determine target pressure, check practices, and maintain safe, comfortable rides.

You should check and adjust tire pressure before most rides and recheck after a short warm-up to account for temperature and ride conditions. Target pressure sits within the tire’s stated range, tailored to your weight, tire width, and riding style. Regular checks prevent flats, improve efficiency, and extend tire life.
Why tire pressure matters
Tire pressure is a crucial, often overlooked part of bicycle maintenance. Proper inflation affects rolling resistance, grip, comfort, and tire longevity. Underinflated tires flex too much, increasing rolling resistance and the chance of pinch flats, while overinflated tires can reduce grip and cause a harsher ride. Regular checks help you ride safer, more efficiently, and with fewer repairs. According to BicycleCost, developing a simple pre-ride pressure habit can dramatically improve performance and reduce avoidable wear over time.
How to determine your target pressure
Your target pressure should fall inside the tire’s stated range on the sidewall and reflect your weight, bike type, and riding style. Start by locating the minimum and maximum PSI printed on the tire. Choose a target toward the lower end when carrying a heavy load or riding on rough surfaces, and toward the higher end for smooth pavement or lighter loads. If your tires show width information, remember that narrower tires typically require higher pressures than wider ones, so adjust accordingly.
Tools and gauges: what you need
Having the right tools makes inflation accurate and quick. A floor pump with a built-in gauge is ideal for everyday use, paired with a Presta/Schrader valve adapter for compatibility. A backup digital gauge can help you cross-check the pump gauge from time to time. Keep a PSI chart or a bike-specific app handy for quick reference, and consider soap water for leak testing around valve stems after extended use.
Reading tire markings and sidewall ranges
Tire sidewalls show a recommended pressure range (min–max). Always target a number within this range rather than the stated maximum. Pay attention to tire width and load; stiffer or wider tires generally tolerate lower pressures for comfort and grip. If you ride with tubeless tires or have special rubber compounds, consult manufacturer notes for any exceptions to standard ranges.
Pressure guidelines by tire width and type
Different tire classes demand different approaches. Road tires with narrow widths typically benefit from higher pressures, improving rolling efficiency, while wider tires on gravel or hybrid setups often perform better at lower pressures for traction and comfort. Always anchor your target to the tire’s own range and your personal riding goals, rather than chasing a single universal number.
Temperature, weather, and seasonal effects
Air temperature and riding heat influence tire pressure. As a tire heats during a ride, the air expands and pressure increases slightly. Cold mornings may yield lower readings, making a check after a ride or after several hours of rest more accurate. If you switch between indoor training and outdoor riding, expect small fluctuations and adjust accordingly on the next check.
How often to check and adjust
Make it a habit to check tire pressure before each ride, especially after a long rest or a change in weather. If you ride frequently, a quick mid-ride check on longer outings can prevent pressure-related issues. For many riders, a weekly check is sufficient, with a monthly full calibration that includes both tires and valves.
Common mistakes and how to avoid them
Common errors include inflating to the maximum rating, neglecting to recalibrate after temperature changes, and ignoring slow leaks from valve stems or bead seats. Avoid these by using a reliable gauge, checking when tires are cold, and performing a quick leak test if you notice any unusual pressure drop. Keep your valve caps snug to prevent dust and moisture from entering.
Impact on ride quality and safety
Correct pressure improves traction, cornering stability, and ride comfort. Underinflation increases tire deformation, heat buildup, and pinch-flat risk; overinflation raises the risk of bead damage and a harsher ride. A properly inflated tire contributes to safer handling, better braking, and a smoother experience on varied surfaces.
Creating a simple inflation routine
Develop a routine that fits your schedule. For most riders, pull out a floor pump with gauge, check both tires, and adjust to the target range in under 10 minutes. Log the target pressures and any notes (e.g., weather, recent miles) in a notebook or app so you can compare trends over time and refine your targets.
Troubleshooting low or high readings
If pressure readings seem inconsistent, verify gauge accuracy by comparing with a backup digital gauge. Check for slow leaks at the valve stem or bead, and inspect the valve cores for proper seating. If the tire repeatedly loses air within a day, you may have a puncture, faulty tube, or damaged rim tape that needs inspection.
Quick-reference checklist for cyclists
- Check tires while cold, before riding.
- Read the tire sidewall for min/max PSI and stay within that range.
- Use a reliable gauge and attach firmly to avoid leaks.
- Inflate gradually, recheck, and adjust after a short warm-up if needed.
- Log pressures and adjust targets based on comfort and performance.
Tools & Materials
- Floor pump with built-in gauge(Choose a model with ±1–2 psi accuracy and a gauge range up to at least 160 psi)
- Presta/Schrader valve adapters(Ensures compatibility across road and mountain tires)
- Digital tire gauge (backup)(Good for cross-checking pump gauge accuracy)
- PSI reference chart or app(Keep handy for quick target lookups)
- Soapy water (leak testing)(Use to identify slow leaks at valve stems or bead seats)
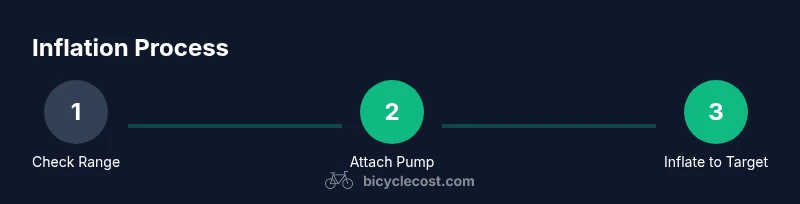
Steps
Estimated time: 15-25 minutes
- 1
Identify target pressure
Inspect the tire sidewall to locate the min and max PSI. Choose a target within that range that suits your weight and riding style. If you ride with a load or on rough surfaces, lean toward the lower end of the range.
Tip: Record your chosen target and refer back on subsequent rides to track changes. - 2
Prepare the pump and valve
Remove the valve cap, select the correct adapter for your valve type, and ensure the pump head is clean and ready. A clean seal prevents air leaks and ensures an accurate read.
Tip: Attach adapters before pressurizing to avoid leaks mid-inflation. - 3
Attach pump and seal
securely mount the pump head onto the valve and verify a tight seal. If air leaks, reposition the head and re-seal before inflating.
Tip: Hold your wrist steady to maintain a consistent seal during pumping. - 4
Inflate to target pressure
Pump gradually until the gauge shows the target pressure. Stop every few strokes to re-check the reading and avoid overshooting.
Tip: Inflate in small increments; rushing can overshoot your target. - 5
Recheck after a short ride
After a brief ride or within 5–10 minutes of inflation, re-measure the tire. Temperature and heating can raise pressure slightly, so adjust if needed.
Tip: If you ride immediately after inflating, recheck again at the end of the ride. - 6
Cap and log
Replace the valve cap and note the final pressure and conditions (temperature, terrain, ride length). This makes it easier to refine future targets.
Tip: Keep a small log on your phone or notebook for trend tracking.
People Also Ask
How often should I check bike tire pressure?
Aim to check before each ride and recheck after long or hot rides. For frequent cyclists, a weekly check and a monthly calibration of gauges help maintain accuracy and performance.
Check your tires before every ride and recheck after long or hot rides. Weekly checks and monthly gauge calibration are good practices for accuracy.
Can I use any pressure gauge for bikes?
Use a pump with a built-in gauge or a dedicated bike gauge that is accurate within a small margin. If you rely on a general air gauge, cross-check with a separate gauge occasionally.
A bike-specific gauge is best, but you can cross-check with a separate gauge to ensure accuracy.
What are the signs of underinflation on the ride?
You may notice a squirmy feel, slower acceleration, increased rolling resistance, and more flex in the tire sidewalls. Handling can feel imprecise, especially in corners.
Expect a soft, sluggish feel and wobbly steering if the tires are underinflated.
How do tubeless tires affect inflation?
Tubeless setups rely on proper seal and bead seating. Inflate to the recommended range, watch for bead seating during inflation, and ensure a stable seal to avoid slow leaks.
Tubeless tires need proper bead seating; inflate within the range and check for leaks after seating.
Does weather affect tire pressure?
Yes. Colder temperatures can lower readings, while warm riding can raise them. Measure when tires are cold for accurate comparisons and adjust accordingly on the next ride.
Weather shifts pressure; measure when cold and adjust later as needed.
Is it okay to inflate to the maximum PSI for fast riding?
Inflating to the maximum can reduce comfort and grip and increases risk of rim-related damage on rough terrain. Stay within the recommended range and tailor to conditions.
Don't inflate to the max; stay within range for safety and comfort.
Watch Video
Quick Summary
- Check tire pressure before every ride.
- Use a reliable gauge and verify accuracy occasionally.
- Inflate within the tire’s stated range, adjusting for ride conditions.
- Temperature and riding can affect readings—recheck after changes.