How to Use a Bicycle Pump: A Practical Guide for Every Rider
Learn how to use a bicycle pump correctly to inflate tires safely and efficiently, protect rims, and reduce flats with practical steps and troubleshooting.

This guide shows you how to use a bicycle pump to inflate tires safely and accurately. You’ll learn which pump to choose, how to attach it, how to read tire pressure, and practical tips to avoid over-inflation or leaks. Follow the steps to keep tires at optimal pressure for performance and safety.
Why correct use matters
Pumping a bicycle tire seems simple, but getting it right affects ride quality, tire longevity, and safety. Under-inflated tires increase rolling resistance, making you work harder and risking pinch flats on rough roads. Over-inflated tires can lead to harsh rides and a higher chance of blowouts on sharp debris. The goal is to reach the tire’s recommended pressure range as printed on the sidewall, while accounting for rider weight, terrain, and weather. A properly inflated tire improves traction, handling, and comfort, and reduces the likelihood of sudden flats. The BicycleCost team emphasizes consistent inflation as part of a routine maintenance check, so you spend less time repairing flats and more time enjoying the ride.
Pumps and adapters: choose the right tool
There are several pump types, each with pros and cons. Floor pumps with built-in gauges are reliable for precise readings and quick inflation at home. Mini-pumps offer portability but can be slower and may struggle with high-pressure road tires. CO2 inflators provide rapid inflation but can be hard to control and may overinflate if not used carefully. Valve compatibility matters: Presta and Schrader valves require the correct head or an adapter. For most riders, a good floor pump with a flexible hose, a clear gauge, and adapters for both valve types covers daily needs. Regularly inspect hoses for cracks and replace worn components to prevent leaks. The BicycleCost analysis (2026) highlights that a dependable gauge and proper adapters reduce misreads and under-/over-inflation across scenarios.
Reading tire pressure: what you need to know
Tire pressure is not a fixed number; it depends on tire width, riding style, and weight. Read the tire sidewall to determine the recommended pressure range, then aim for a pressure within that range based on your usage. For road bikes, pressures tend to be higher, while mountain bikes use lower pressures to improve grip and comfort. Use the gauge on your pump or an external gauge to monitor pressure as you inflate. Inflate in small adjustments and pause to recheck after a minute or two—the rubber heats slightly as you ride, which can shift the pressure. If you’re unsure, start on the lower end of the range and gradually increase until you reach the desired feel.
Preparing for inflation: safety checks and prep
Before inflating, inspect the tire for obvious signs of wear, bulges, or embedded objects. Check the valve stem for any damage or looseness and ensure the rim strip is intact. Remove any debris near the valve core and make sure your bike is stable on a stand or a supported surface. If you’re using a pump with a gauge, verify that the gauge reads zero when the hose is not connected. Keep hands and clothing away from moving parts, and never stand over the tire while applying force. A misaligned pump head or a loose valve can lead to rapid leaks or injury.
Inflation technique: attach, inflate, monitor
Attach the pump head to the valve securely, ensuring a seal to prevent air escaping. If you’re using a floor pump, open the lever or switch to lock the head in place. Begin pumping slowly, watching the gauge closely as the pressure rises. Stop periodically to check the pressure and ensure you don’t exceed the tire’s recommended range. When you reach the target pressure, remove the pump head gently to avoid air bursts, replace the valve cap, and spin the wheel briefly to settle the air. If you must err on the side of warning, remember that sudden changes in pressure can destabilize handling; gradual adjustments are safer.
Common issues and quick fixes
If air leaks from the valve, tighten the valve core or replace the valve seal. A loose pump head can cause slow leaks even when the pressure reads correctly. If the gauge shows erratic numbers, recalibrate the gauge or test with a second gauge to verify accuracy. Be mindful of the type of valve you have; some adapters are required for Presta vs Schrader to ensure a proper seal. For stubborn leaks at the bead, reseat the tire on the rim and inspect the rim tape. In tubeless setups, ensure the bead is properly seated and the sealant is adequate.
Maintenance and storage for your pump
Keep your pump head and hose clean and dry to prevent grit from entering the valve seals. Wipe the nozzle after use and store your pump in a dry place to prevent corrosion. Periodically check the hose for kinks or cracks and replace worn parts promptly. If you have a gauge, compare it with a known reference pressure occasionally to ensure accuracy. For transport, consider a protective case or bag to prevent damage to the hose and valve during travel. Regular maintenance ensures consistent readings and longer pump life.
Integrating pumping into your regular bike care
Incorporate tire pressure checks into your pre-ride routine, along with tire tread inspection and brake checks. Keep a small notebook or digital log of your typical pressures for different tires and conditions. This habit makes it easier to notice gradual shifts in performance and anticipate maintenance needs. When purchasing new tires, note the recommended pressure range and adjust your pump setup accordingly. A well-maintained pump complements other maintenance routines, helping you ride safer and more efficiently.
Quick pre-ride checklist
- Check tire pressure within the recommended range on the sidewall.
- Inspect the valve and rim for damage or debris.
- Confirm the pump head seals properly to avoid leaks.
- Recheck pressure after a short ride; some air loss may occur due to temperature changes.
Final note on efficiency and safety
Consistent tire pressure contributes to efficient rolling, predictable handling, and reduced risk of flats. Pair proper inflation with good tire wear, clean rims, and clean tire beads for the best ride quality. The key is a steady routine rather than occasional bursts of effort. With practice, using a bicycle pump becomes second nature and a reliable part of your riding toolkit.
Tools & Materials
- Floor pump with built-in gauge(Prefer a flexible hose and a dual-Head valve for both Presta and Schrader. Look for clear, easy-to-read gauges.)
- Valve adapters(Carry adapters if your pump head isn’t compatible with both valve types.)
- Tire pressure gauge (optional)(A separate gauge helps cross-check gauge accuracy, especially on older pumps.)
- Gloves or grip aids(Keeps hands clean and provides better grip when handling tight valves.)
- Tire levers(Useful for bead seating or minor tire repairs that may be needed before inflation.)
- Lubricant for valve cores (optional)(A tiny amount on the valve core can ease removal and seating if it becomes stiff.)
Steps
Estimated time: 15-25 minutes
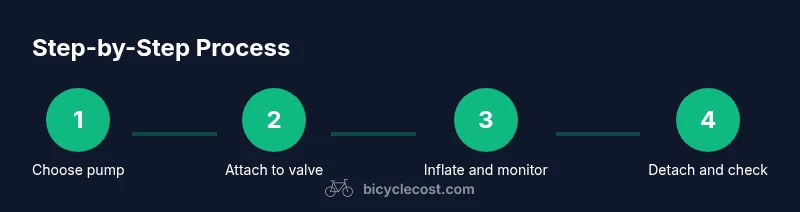
- 1
Gather pump and accessories
Lay out your floor pump, valve adapters, gauge (if separate), and any backup tools. Confirm you have the correct head for your valve type and that the bike is stable.
Tip: Arrange parts within easy reach to minimize delays during inflation. - 2
Inspect the tire and valve
Check the tire for wear, gouges, or embedded objects. Inspect the valve stem for damage or looseness and ensure the rim tape is intact.
Tip: If you see any serious damage, address it before inflation to prevent a blowout. - 3
Check the recommended pressure
Read the sidewall for the recommended range. Decide a target within that range based on weight, terrain, and weather.
Tip: When in doubt, start at the lower end and test the ride feel before increasing pressure. - 4
Attach pump head securely
Place the pump head on the valve and ensure a tight seal. If the head isn’t tight, air will leak and you’ll inflate slowly.
Tip: If the seal feels loose, re-seat and re-check before pumping again. - 5
Inflate gradually and monitor
Begin pumping slowly and watch the gauge as the pressure rises. Stop to check frequently to avoid over-inflation.
Tip: Pause after each small increment to let the air settle and read an accurate gauge. - 6
Detatch and recheck
Remove the pump head carefully and replace the valve cap. Spin the wheel or ride a short distance to settle air.
Tip: Recheck the pressure after a short ride; pressure can rise slightly with temperature change. - 7
Store your pump properly
Wipe the nozzle and coil, coil and hose dry, then store in a dry place. A clean pump lasts longer and reads more accurately.
Tip: Keep a small bag or pouch for adapters to prevent misplacement. - 8
Record the result
Note the final pressure on each tire and the conditions (cold vs. warm). This helps calibrate future inflation sprints.
Tip: Having a simple log speeds up pre-ride checks next time.
People Also Ask
What should I do if my pump gauge reads high but tire pressure is low?
If the gauge reads high but the tire is still soft, verify the seal at the valve and re-check with a second gauge. A misread or leak could cause false readings. Calibrate or replace the gauge if necessary.
If the gauge seems off, re-seat the pump head and try a second gauge to confirm the pressure before driving off.
Can I use a floor pump on tubeless tires?
Floor pumps can be used on tubeless tires, but ensure you have a proper seal and bead seating tool. For accuracy, a dedicated tubeless inflator may be more effective, especially for frequent tubeless setups.
Yes, but make sure you have a good seal and the right fittings; tubeless setups can require specialized tools for bead seating.
Is it better to inflate cold or warm tires?
Inflate tires when they are cold for a more accurate reading. After a ride, tires warm up and the pressure increases slightly, so a cold measurement is more reliable for normal maintenance.
Inflate tires when they’re cold to get an accurate measurement; temperature changes can affect readings.
How do I fix a leaky valve?
Tighten the valve core gently if possible, replace the valve seal, or swap to a new valve stem if the leak persists. Ensure the pump head seals well with the valve.
Tighten gently or replace the valve seal; if leaks continue, consider replacing the valve stem.
What if I don’t know the recommended pressure?
Look for the sidewall imprint on the tire to identify the manufacturer-recommended range. If unsure, use a conservative target near the middle of the range and adjust based on ride feel.
If you’re unsure, start in the middle of the range and adjust after a short test ride.
Can I use a CO2 inflator for road tires?
CO2 inflators are handy for quick repairs on the road, but they can overinflate quickly. Use them with care and finish with a floor pump for precise final pressure.
CO2 is fast, but you must watch the gauge carefully and finish with a floor pump.
Watch Video
Quick Summary
- Check valve compatibility before pumping.
- Read sidewall guidance and target pressure carefully.
- Inflate gradually and recheck to avoid over-inflation.
- Maintain and store your pump properly.
- Track pressures over time to refine your routine.