Using a Foot Pump for Bicycle Tires: Step-by-Step Guide
Learn how to use a foot pump for bicycle tires, including valve types, attachment techniques, pressure targets, and maintenance tips for safe, efficient inflating.

By the end of this guide you will confidently use a foot pump for bicycle tires, from selecting the right pump to locking onto Presta or Schrader valves and reaching the recommended pressure. You'll learn attachment techniques, how to pace your pumping, and quick checks to prevent under- or over-inflation for a safer ride.
Why a Foot Pump Matters for Cycling
Tire pressure is a foundational element of cycling performance and safety. A good foot pump lets you adjust pressure quickly, on-demand, without needing to visit a shop or rely on digital kiosks. A properly inflated tire rolls more efficiently, grips better in corners, and is less prone to flats caused by underinflation. For recreational riders, a compact pump that fits in a saddle bag is a reliable companion for road and trail rides.
According to BicycleCost, maintaining correct tire pressure is a simple, repeatable habit that yields tangible benefits across most bikes and tires. The BicycleCost team found that riders who regularly check inflation experience smoother rides, longer tire life, and fewer pinch flats when riding off-road or in variable weather. The goal is not to inflate to maximum numbers every time but to reach the tire’s recommended range for your weight, terrain, and tire size.
When choosing a pump, consider how you typically ride: do you commute, mountain bike, or pedal long-distance events? The right model will have a stable base, a hose long enough to reach both tires without contorting your body, and a gauge you can read without removing your gloves. A lightweight floor pump or a compact foot pump can serve multiple conditions, especially if you carry a spare tube or patch kit. This article will guide you through selecting a pump, understanding valve types, and following a safe, repeatable inflation routine.
Tools & Materials
- foot pump(Check valve compatibility (Presta/Schrader) and built-in gauge)
- pressure gauge (built-in or separate)(A mechanical gauge is fine; digital is easier to read)
- valve adapters(For uncommon valve types or adapters)
- gloves(Optional for grip and cleanliness)
- tire levers(Only if you're addressing a separate flat before inflation)
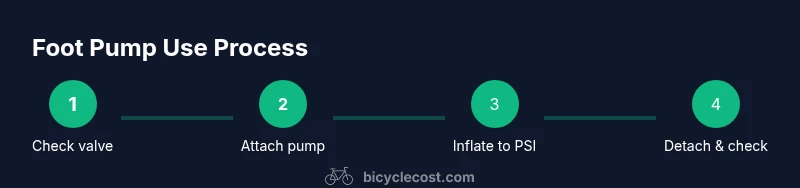
Steps
Estimated time: 8-12 minutes
- 1
Prepare and inspect
Inspect the tire and valve to confirm compatibility and check for damage. Look for the sidewall max PSI and ensure the rim is not overtly flat. The goal is to know what you are inflating and to avoid forcing the pump into a valve that could bend or damage.
Tip: Knowing your tire's max PSI prevents over-inflation. - 2
Attach the pump securely
Remove the valve cap and align the pump head with the valve. If your pump uses a lever, flip it to lock the connection before you start pumping. Ensure the head sits squarely to minimize air escape.
Tip: Keep wrists straight to avoid fatigue. - 3
Inflate to target PSI gradually
Begin pumping in steady, controlled strokes. Stop briefly to check the gauge and avoid overinflation. If using Presta, account for locknut; if Schrader, ensure the core remains seated.
Tip: Aim to reach target in 10-20 strokes, then pause. - 4
Verify pressure and adjust
Compare the gauge reading against the tire's recommended PSI on the sidewall. If under, continue; if over, release air slowly using the pump head release or by pressing the valve core with a small tool.
Tip: Small adjustments prevent tire damage. - 5
Detach and reseal the valve
Carefully remove the pump head and replace the valve cap. Inspect for any air leakage around the valve stem. If you loosened the connection too much, re-seating will fix leaks.
Tip: Replace caps to keep dust out. - 6
Store the pump properly
Wipe the nozzle, coil the hose, and store in your saddlebag or toolbox. Regularly check for cracks and leaks. A well-stored pump lasts longer and is ready for your next ride.
Tip: A clean pump lasts longer.
People Also Ask
What is the advantage of using a foot pump over a CO2 inflator?
A foot pump provides consistent pressure control, is reusable, and reduces the risk of overinflation compared with disposable CO2 cartridges. It’s more economical for frequent inflation.
Foot pumps give you steady control and are reusable, which helps you inflate safely and save money over time.
How do I know the correct tire pressure?
Check the tire sidewall for the recommended PSI range and consider rider weight and terrain. Use a gauge to compare your target and adjust accordingly.
Look at the tire's sidewall for PSI and use a gauge to hit that target.
What if my pump won't attach to the valve?
Ensure the valve type matches (Presta or Schrader). Use any built-in adapters or adjust the hose angle to seat the head properly.
Make sure the valve matches and try a different angle or adapter.
Is it safe to top up the tire mid-ride?
If you’re in a safe area, you can add air to reach the target PSI, but avoid prolonged pumping. Pull over and inspect for damage after inflating.
Only if safe; otherwise, stop and inspect.
Can a foot pump handle both Presta and Schrader valves?
Many foot pumps include adapters or dual heads to fit both valve types. Check compatibility before riding.
Most pumps fit both types with an adapter.
How should I store a foot pump when not in use?
Keep it in a dry place, with the hose coiled. Regularly inspect seals for wear and replace if necessary.
Store it dry and check seals regularly.
Watch Video
Quick Summary
- Identify valve type before attaching
- Attach securely and seal leaks
- Inflate to recommended pressure range
- Check gauge frequently during inflation
- Store the pump properly after use