How to Stop Bike Properly: Safe Braking Techniques
A comprehensive guide to stopping a bike safely in diverse conditions, covering front and rear braking, emergency stops, maintenance, and practice drills for road, mountain, and electric bikes.

By the end of this guide you will be able to stop bike properly in most common riding scenarios, from casual streets to wet conditions. You’ll learn front vs. rear brake use, progressive braking, and how body position affects stopping distance. Before you start, ensure your brakes are serviced, wear a helmet, and practice in a clear, hazard-free space.
Why stopping properly matters for safety and control
Stopping a bike safely is a foundational riding skill. Doing it well reduces crash risk, preserves control in emergencies, and helps you ride with confidence in traffic, on hills, and in changing surfaces. According to BicycleCost, the way you brake—front and rear balance, timing, and body position—directly determines how quickly you come to a stop and how easily you can regain balance if conditions change. In this guide, you’ll learn how to stop bike properly by combining brake technique with smart riding habits and deliberate practice. We’ll cover the physics of braking, the differences across surfaces, and practical drills you can do in a safe space. By the end, you’ll know how to assess stopping distance in real time and how to adjust your approach for road, trail, or commuting scenarios.
Understanding braking dynamics on different surfaces
Braking behavior changes with surface conditions. Dry asphalt offers the most predictable grip, while wet pavement reduces traction and increases stopping distance. Gravel or sand can lead to wheel slip, especially when braking hard. On smooth concrete, you can usually brake late and still stop in time, but you must stay alert for slick patches near drainage grates or painted lines. BicycleCost analysis shows that shifting weight slightly backward on slick surfaces helps prevent the front wheel from washing out, while modulating both brakes evenly reduces skidding. In practice, read the surface ahead, choose a braking plan before entering the hazard, and adjust your pressure gradually. The goal is a smooth, controlled deceleration rather than a sudden grab that can throw you off balance. Use low speeds to practice variations so you can respond quickly no matter what the road throws at you.
Front vs rear braking: when to use which
The front brake provides the majority of stopping power due to weight transfer during deceleration, but it also carries the risk of a wheel tuck if used aggressively. The rear brake helps stabilize and can prevent skidding on slippery surfaces. A common safe approach is to start with light pressure on both brakes, then progressively increase front brake engagement as you sense traction, keeping your weight centered over the bike. In emergencies, a quick, even squeeze on both levers is more reliable than a hard pull on one end. Always modulate braking to avoid wheel lock, especially when wearing low-traction tires. This balance becomes second nature with consistent practice.
Pre-ride checks and bike maintenance for reliable stopping
Before you ride, inspect your brakes, tires, and drivetrain. Worn brake pads reduce stopping power and can fail unexpectedly, while frayed cables or disc rub indicate a need for service. Check tire pressure; underinflated tires increase rolling resistance and reduce grip during braking. Ensure rotors and calipers are clean, and that the brake levers return to rest smoothly when released. If you notice vibration or uneven braking, stop in a safe area and troubleshoot or seek professional service. Regular maintenance creates predictable stopping performance and reduces the risk of brake fade on longer descents. A well-tuned bike helps you stop bike properly with confidence in every ride.
Braking techniques: progressive braking, threshold braking, and emergency stops
Progressive braking means applying increasing pressure gradually rather than grabbing the brake hard. Start with light pressure and build smoothly as you assess traction and speed. Threshold braking sits between gentle braking and hard braking, using just enough pressure to maintain control without skidding. In emergencies, apply full, controlled pressure to both brakes while staying relaxed and looking ahead to steer away from hazards. The goal is to decelerate quickly yet predictably, so you can choose a safe line and avoid obstacles. Always keep your eyes up and your hands ready, and remember that your body position—feet level, hips centered, and head up—contributes to a faster, safer stop.
Stopping from common speeds and scenarios
From a walking pace to moderate speeds typical of urban cycling, your stopping approach changes. At very slow speeds, a light, steady squeeze on both brakes is enough to bring you to a stop without skidding. At moderate speeds, begin braking early and progressively, using more rear brake on slippery patches and ensuring your line remains straight. When you encounter an obstacle, consider both brakes and plan a controlled stop that allows you to steer away with minimal loss of balance. In all cases, scan the path ahead, practice deceleration drills, and adjust your stance to keep weight over the pedals. This discipline improves reaction time and helps you stop bike properly under pressure.
Bike-type considerations: road, mountain, and e-bike braking systems
Road bikes typically use compact caliper brakes or disc brakes, requiring careful modulation to avoid wheel lock on slick coatings. Mountain bikes rely on wider tires and robust brakes designed for variable terrain; they benefit from earlier, gentler braking on loose surfaces to maintain traction. Electric bikes present additional challenges due to heavier total mass and possible regenerative braking profiles; practice braking with and without assist modes to anticipate stopping distances. In all cases, maintain the brake system appropriately, adjust lever reach to fit your grip, and tailor your stopping technique to the bike’s geometry. The right braking habit reduces fatigue and increases control in traffic, snow, or dust.
Practice plan to improve stopping safely (2-week sample schedule)
A structured practice plan accelerates mastery. Week 1 focuses on foundational skills: ensuring light, controlled braking on straight paths, practicing emergency stops from a slow roll, and confirming a stable body position. Week 2 introduces speed variation, braking on gentle curves, and real-world drills like approaching a stop sign, stopping behind a line, or stopping at crosswalks. Begin each session with a 5-minute warm-up ride, then spend 20-30 minutes on braking drills at low to moderate speeds. End with a 5-minute cool-down as you reflect on what worked and what felt uncertain. Progress gradually and prioritize safety above all else.
Common mistakes and how to fix them
Common mistakes include grabbing the brakes too hard, which can cause skidding or loss of balance; inconsistent brake balance between front and rear; and braking while turning, which can lead to a slide. Another frequent error is riding with worn tires or poor brake maintenance, which undermines stopping power. To fix these issues, practice balanced braking drills, check tire and brake wear regularly, and ensure you ride with proper posture—elbows relaxed, shoulders level, and head up. If you find yourself repeatedly skidding on wet surfaces, slow down and adjust your speed before approaching hazards. Developing awareness and practicing deliberately will help you stop bike properly in a wide range of conditions.
Tools & Materials
- Helmet(Compliant with regional safety standard (e.g., EN 1078 or equivalent))
- Bike in good condition(Brake pads, cables, tires, and rotors checked; brakes functional)
- Open practice area(Flat surface, at least 25–50 meters straight, free of traffic)
- Chalk or cones (optional)(To mark stopping distances or lanes)
- Gloves (optional)(Improve grip and comfort during drills)
- Timer or stopwatch (optional)(Track practice intervals and rest periods)
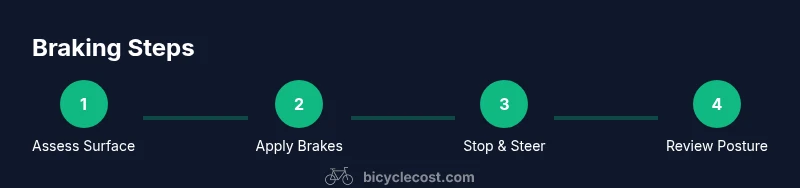
Steps
Estimated time: 30-45 minutes
- 1
Inspect brakes and gear alignment
Check brake pads for wear, ensure levers return to rest, and verify wheel alignment before practicing. A misadjusted brake can give a false sense of stopping power and cause fade or rubbing.
Tip: If you notice rubbing or soft lever feel, stop and adjust or replace components before training. - 2
Set up a safe practice area
Choose a flat, clear space away from traffic and obstacles. Mark a straight run of 20–30 meters to practice deceleration, then a separate 10-meter line for emergency stops.
Tip: Place visible markers so you can gauge progress and stop distance more accurately. - 3
Adopt correct hand position
Place fingers on the brake levers with relaxed wrists. Start with two fingers on each lever to maintain control and reduce risk of over-braking.
Tip: Avoid wrapping your fingers around the handlebars; a light grip improves lever feedback. - 4
Practice progressive braking at low speed
Ride slowly, apply light brake pressure to bring you to a smooth stop, and avoid abrupt grabs. Focus on even, controlled deceleration without skidding.
Tip: Look ahead and keep your eyes on your stopping point, not the wheels. - 5
Run emergency stops from a moderate speed
Increase speed slightly, then perform a controlled emergency stop by applying both brakes evenly and quickly. Practice a straight line to keep the bike stable.
Tip: Do not freeze; tense shoulders and back for stability. - 6
Brake while standing or seated?
Experiment with your stance; standing can help balance on loose surfaces, while seated helps maintain posture on smooth pavement. Use a neutral position and keep weight centered.
Tip: Avoid leaning away from the bike; your center of gravity should stay over the pedals. - 7
Braking in curves and around corners
Practice gentle braking before entering a corner, then adjust speed so you can exit with control. Use slight pressure and steer with your shoulders, not your hands.
Tip: Brake early; entering a turn too fast is a common crash trigger. - 8
Review and adjust posture and fit
After your drills, check your riding posture and bike setup. Adjust saddle height or handlebar reach if needed to improve stopping comfort and control.
Tip: Small changes can significantly improve stopping consistency.
People Also Ask
What is the safest way to distribute braking force between front and rear brakes?
In most conditions, use both brakes with progressive pressure; the front brake provides the most stopping power, but avoid locking wheels. Practice to find a balanced feel that works for your bike and surface.
Use both brakes with smooth, progressive pressure; the front brake stops more, while the rear adds stability.
Can I stop quickly on wet pavement without skidding?
Wet surfaces require gentler, shorter strokes and more rear brake use. Modulate pressure and avoid abrupt input to maintain traction.
Go light and smooth; wet roads are forgiving when you ease into braking.
Should I always brake before turning?
Brake before entering a turn when possible; avoid heavy braking mid-turn. If you must brake mid-turn, ease pressure and slow down gradually.
Brake before corners; if you have to brake, do it softly as you turn.
What should I do if brakes feel spongy?
A spongy feel indicates air in the lines or worn components. Stop riding and seek maintenance; do not ride with uncertain brakes.
If the brakes feel soft or spongy, stop riding and have them checked.
How can I stop safely with a heavy load?
Shift weight back slightly to help wheel traction, and brake earlier with smoother, gentler pressure.
With a heavy load, brake sooner and more gently to avoid lockups.
What training plan helps improve stopping?
Follow a structured practice schedule with progressive braking drills, monitored distances, and feedback. Regular practice builds instinctive stopping.
A structured plan with gradual drills helps you stop more reliably.
Watch Video
Quick Summary
- Brake smoothly and progressively to stop
- Balance front and rear brakes for control
- Keep a centered stance to prevent skids
- Inspect brakes and tires regularly
- Practice stopping drills in safe spaces