How to Bike Properly: A Practical, Safety-Driven Guide
Learn how to bike properly with a practical, safety-focused approach. This step-by-step guide covers posture, balance, braking, signaling, and bike fit, plus maintenance tips to keep you riding confidently.

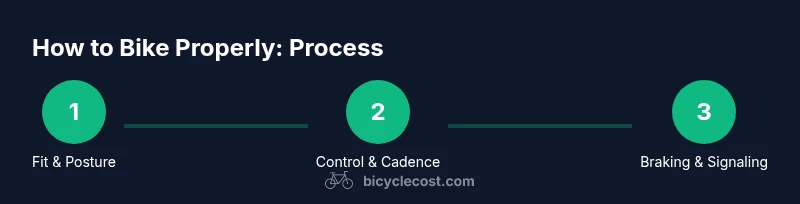
By the end of this guide you will know how to bike properly: establish balanced posture, smooth pedaling, confident braking, safe signaling, and a quick pre-ride check. You’ll learn body position for different terrains, efficient gear use, and how to choose a comfortable bike fit. This will improve safety, efficiency, and enjoyment on every ride.
Foundations of Safe Bike Fit
According to BicycleCost, proper bike fit is the foundation of safe riding. The BicycleCost team emphasizes that a comfortable, efficient position reduces strain, improves control, and lowers the risk of injury on every ride. Whether you’re a beginner or returning after a break, you’ll benefit from learning how to assess fit, posture, and baseline balance before you roll away. This section sets the stage for how to bike properly. The right fit makes everything else easier: pedaling becomes smoother, steering feels precise, and you can respond quickly in traffic. You'll learn to adjust components and test ride to confirm a comfortable range of motion.
- Check saddle height and fore-aft position for a balanced reach to the pedals.
- Ensure your hands rest lightly on the handlebars with a soft grip to reduce tension.
- Verify brake and shifter cable tension is appropriate to prevent sluggish responses.
A correct fit also helps prevent knee, back, and neck discomfort over longer rides, and it makes you more confident negotiating traffic and urban obstacles.
Posture and Balance on the Bike
Good posture anchors your ability to control the bike and respond to changes in terrain. Start with a neutral spine, relaxed shoulders, and elbows slightly bent to absorb shocks. Your weight should be centered over the pedals—not leaning excessively forward or back. Eyes stay ahead, scanning the road 2–3 bike lengths, which improves balance and reaction time. A stable core supports pedaling efficiency and reduces fatigue. This section expands on how to maintain a relaxed, athletic stance while learning how to bike properly. Practice short rides on flat, smooth surfaces to ingrain this posture before tackling hills or busy streets.
- Keep your head up and gaze forward, not at the front wheel.
- Maintain a light grip with wrists straight and relaxed arms.
- Let your hips move as you pedal to distribute weight evenly.
Pedal Technique and Cadence
Efficient pedaling is circular rather than a straight push. Focus on a smooth, controlled rotation that uses both legs—pull up slightly after the downstroke without forcing the pedal. Cadence should feel steady and comfortable, not rushed; avoid mashing or bouncing the pedals. Engage your core to stabilize your torso, which helps maintain balance on uneven surfaces. By refining pedal technique, you’ll ride with less fatigue and more consistent speed, making it easier to learn how to bike properly over longer distances.
- Aim for a consistent, comfortable rhythm rather than trying to spin too fast.
- Let your knee track over the pedal to avoid side-to-side wobble.
- Use gears to keep a steady cadence on varying terrain.
Braking and Stopping Safely
Braking control is central to safe riding. Practice progressive braking—apply pressure smoothly rather than grabbing the brake abruptly. Learn to modulate both front and rear brakes for effective stopping without skidding. Weight should shift slightly backward when braking to prevent forward dive, especially at higher speeds. Anticipate obstacles early and give yourself space to stop. This is a core component of how to bike properly, and it becomes second nature with practice.
- Use both brakes evenly for a balanced stop.
- Feather the brakes on slippery surfaces to avoid skidding.
- Practice emergency stops in a safe, open area before riding with others.
Steering, Cornering, and Vision
Steering accuracy comes from confident line selection and consistent hand positioning. Look where you want to go, not at the front wheel; your body will follow your eyes. When cornering, brake before entering, lean with the bike, and keep your outside foot down to stabilize posture. Maintain a slight bend in the arms and hips to absorb road irregularities. Clear vision and planning reduce last-minute corrections, making your ride smoother and safer. This section helps you translate theory into real-world riding, whether on city streets or scenic trails.
- Identify the exit point of a turn as you enter it.
- Keep your head up to anticipate hazards like potholes or debris.
- Stay relaxed to avoid tension-driven steering errors.
Shifting, Gearing, and Efficiency
Understanding when and how to shift improves efficiency and keeps your cadence steady. Shift early to avoid stalling or grinding in difficult terrain. Use the larger chainring on flat terrain and the smaller ring up steep climbs to maintain a comfortable pace. Cross-chaining—using extreme combinations—should be avoided to prolong drivetrain life and keep shifting reliable. Efficient gearing reduces fatigue and helps you sustain longer rides with less effort. This is especially important when learning how to bike properly on mixed routes.
- Shift before you need to, not after you feel strain.
- Anticipate inclines to keep a steady cadence.
- Avoid cross-chaining to protect your drivetrain.
Signaling and Ride Etiquette
Clear signaling and courteous behavior improve safety for everyone on shared paths. Signal turns early with confident arm movements, check mirrors or surroundings if riding with others, and maintain predictable lane position. Don’t weave between parked cars or pedestrians; give space to avoid collisions. Riding assertively yet politely helps you defend your right of way while keeping others safe. This section reinforces the social aspect of riding and is essential for beginners learning how to bike properly in mixed traffic.
- Signal well in advance and cancel signals after completing a turn.
- Position yourself where cars can see you and you can be seen.
- Keep gaps between riders to avoid pile-ups on crowded routes.
Pre-Ride Checks and Bike Maintenance
A quick pre-ride checklist reduces flats, mechanical failures, and safety hazards. Inspect tires for proper pressure and tread, test brakes, verify derailleur movement, and ensure the chain runs smoothly with adequate lubrication. Check accessories like lights, reflectors, and a functional bell or horn. If anything feels off during a test ride, adjust or postpone riding until you can remedy the issue. Regular maintenance builds confidence and is a key part of how to bike properly.
- Inflate tires to the recommended PSI as shown on the tire sidewall.
- Wipe down the chain and inspect for rust or stiff links.
- Test lights and bells to ensure visibility and audibility.
Adapting to Terrain and Weather
Riding in different weather and on varied surfaces requires flexible technique. On wet pavement, reduce speed, brake gently, and avoid sudden maneuvers. On gravel or loose surfaces, keep pedaling smooth and stay upright to maintain balance. Hills demand efficient gearing and a steady cadence; practice switching gears to stay in your comfort zone. Weather-aware riding also means wearing appropriate clothing and maintaining tire grip. This practical guidance helps you remain stable and safe in changing conditions.
- Slow down before entering slick patches.
- Keep a wider following distance behind vehicles.
- Dress in layers and wear reflective gear for low visibility.
Training Progressions and Drills
Progression drills help you build muscle memory for how to bike properly. Start with slow, controlled rides focusing on posture, balance, and braking. Add cadence-focused drills: practice keeping a steady pedal speed while varying effort with terrain. Include cornering practice in a quiet area to reinforce body position and line choice, then gradually introduce urban scenarios with light traffic. Regular practice cement these skills and boost confidence.
- Do short, focused sessions 2–3 times a week.
- Mix drills with relaxed, easy rides to reinforce technique.
- Record yourself or seek feedback to identify habit changes.
Choosing the Right Bike Fit and Accessories
Beyond initial fit, accessories can enhance comfort and safety. A properly fitted saddle, compatible handlebars, and appropriate grips contribute to a stable ride. Add protective gear like a helmet, gloves, and lights for visibility. Consider fit adjustments as you grow more confident; you may need a different stem length, saddle setback, or handlebar angle for optimal posture. This section helps you customize your setup to sustain how to bike properly over time.
- Use adjustable components to fine-tune reach and height.
- Wear a certified helmet and consider gloves for grip and comfort.
- Invest in lights and reflective gear for better visibility.
Common Mistakes and Quick Fixes
New riders often repeat avoidable errors when learning how to bike properly. Common mistakes include looking down, gripping the bars too tightly, and braking abruptly. Slow down to re-establish balance if you feel wobbly, relax your grip, and practice smooth, progressive braking. If you feel numbness or pain after a ride, adjust saddle height or handlebar position and seek guidance from a local bike shop. Small, deliberate corrections now prevent bad habits later.
- Look ahead, not at the front wheel.
- Soften your grip to reduce forearm fatigue.
- Re-check fit if you experience persistent discomfort.
Conclusion (Note: Key Takeaways appear in a separate box to avoid repetition)
Tools & Materials
- Bike that fits your size(Ensure frame size matches inseam and rider height; consult a professional if unsure)
- Helmet (CPSC-certified)(Proper fit around the forehead and straps snug under chin)
- Bike pump with pressure gauge(Inflate tires to the recommended PSI on the sidewall)
- Allen keys / multi-tool(For saddle, handlebars, and minor adjustments)
- Gloves(Improve grip and comfort on longer rides)
- Front/rear lights(Mandatory for low light and high visibility riding)
Steps
Estimated time: 60-90 minutes
- 1
Inspect bike and gear up
Walk around the bike, check tires for cuts, ensure brakes engage smoothly, and verify gears shift cleanly. Put on a correctly fitted helmet and gloves if you use them. This step prevents surprises and sets the stage for a safe ride.
Tip: Test brake response at low speed in a safe area before riding in traffic. - 2
Set saddle height and reach
Adjust saddle so the leg is almost straight at the bottom of the pedal stroke with the ball of the foot on the pedal. Adjust the handlebar reach to keep elbows soft and shoulders relaxed. A proper setup reduces knee strain and improves control.
Tip: Small incremental changes are better; ride a few minutes to test before further tweaks. - 3
Find a comfortable cadence
Pedal with a smooth circular motion and avoid mashing. Aim for a steady rhythm that doesn’t strain your legs or back. Keep your upper body relaxed as you learn how to bike properly.
Tip: If you feel strain, adjust gear to reduce effort and maintain the cadence. - 4
Practice braking and stopping
Gradually apply both brakes, shifting weight slightly back to prevent front-end dive. Practice stopping in a clear space and then at different speeds to build confidence.
Tip: Use rear brake to control speed on slippery surfaces. - 5
Signaling and awareness
Practice hand signals early in your ride and maintain a safe following distance. Keep your eyes up and scan the road ahead, noting hazards and pedestrians.
Tip: Signal early and release your signal after completing the turn. - 6
Try a short urban ride
Take a short loop in a low-traffic area to apply posture, signaling, and braking in real conditions. Gradually increase duration as confidence grows.
Tip: Stay within your comfort zone while expanding your practice routes.
People Also Ask
What does it mean to bike properly?
Biking properly combines correct posture, balanced pedaling, smooth braking, clear signaling, and routine maintenance. It emphasizes safety, efficiency, and control in various riding situations.
Biking properly means using the correct posture, smooth pedaling, safe braking, clear signaling, and regular maintenance for safe, efficient rides.
Should I get a professional bike fit?
A professional bike fit helps optimize posture and reach for your body. It can reduce pain and improve comfort, especially for longer rides or recurring discomfort.
A professional bike fit can improve comfort and reduce pain, especially on longer rides.
What gear should I wear when learning to ride?
Always wear a certified helmet, gloves for grip, and visibility gear like lights or reflective clothing. Dress for the weather and layers for temperature changes.
Wear a certified helmet, gloves for grip, and visible clothing. Dress for the weather.
How can I improve signaling safety?
Signal early before turns, keep signals clear, and cancel once the maneuver is complete. Practice signals in safe areas until you can do them automatically.
Signal early and clearly, then cancel after turning. Practice in safe spaces until it becomes automatic.
How often should I perform pre-ride checks?
Do a quick check of tires, brakes, chain, and lights before every ride. For longer rides, also check gear shifting and overall bike cleanliness.
Check tires, brakes, chain, and lights before every ride; do a gear check on longer rides.
Can kids learn to bike properly?
Yes. Start with basic balance and low-traffic environments, progress to signaling and braking, and ensure appropriate safety gear is worn at all times.
Kids can learn with gradual practice, starting in safe areas with proper gear.
Watch Video
Quick Summary
- Ensure a correct bike fit before riding.
- Maintain relaxed posture and steady cadence.
- Practice progressive braking and signaling.
- Perform regular pre-ride checks and adjust as needed.