How to Put Bicycle Tire Back on Rim
Learn how to put bicycle tire back on rim safely and efficiently with a complete step-by-step guide covering beads, levers, and safe inflation. BicycleCost provides practical, expert tips for confident tire mounting.

Mastering how to put a bicycle tire back on the rim is a practical skill that prevents flats and roadside delays. This step-by-step guide shows bead seating, tire levers, and safe inflation. By practicing on a calm surface, you can mount tires quickly without pinch flats. According to BicycleCost, proper technique saves time and reduces frustration.
Why Tire Bead Seating Matters
Having the tire bead properly seated on the rim is foundational for ride quality and safety. A bead that sits unevenly can cause slow leaks, pinch flats, and even complete blowouts under load. It also affects how smoothly you can roll over small obstacles and how effectively the tire seals against the rim. The BicycleCost team notes that practice with a calm, controlled environment reduces on-road stress when you get a flat or need to swap tires. In this guide, we focus on the standard clincher setup with inner tubes, but the same principles apply to tubeless systems with appropriate beads and sealants. By mastering the right sequence, you’ll save time, minimize waste from pinched tubes, and preserve tire life. Let’s dive into the anatomy of beads, rims, and tubes so you know what you’re dealing with. This section also references authoritative sources to help you verify best practices.
Understanding Beads, Rims, and Tubes
Bicycle tires use a bead that locks the tire to the rim. There are different bead styles (folding vs wire) and rim designs that influence how you mount a tire. In clincher setups, the rim bed must be smooth, with no protruding burrs, and the rim tape should cover spoke holes to prevent punctures. Tubes sit between the tire and rim, so orientation matters to prevent pinch flats. Tubeless setups replace the inner tube with sealant and require compatible rims and tape. Knowing the parts helps you spot problems early and choose the right mounting approach. This section sets a mental map for the steps that follow and aligns with BicycleCost's practical maintenance guidance.
Prepping Your Workspace and Tools
Start with a clean, flat surface and enough room to maneuver the wheel. Remove the wheel from the bike if you need more space, and set it on a stand or propped against a wall. Gather essential tools: tire levers, a pump with a gauge, soapy water or tire mounting lubricant, and a clean rag. Optional items include a spare tube, rim tape (if installing tubeless components or inspecting rim) and gloves for grip. Check the tire for deep cuts or worn tread, and inspect the rim for sharp edges. Preparing your area reduces the risk of pinching the tube and makes the procedure smoother. BicycleCost emphasizes methodical preparation as the backbone of a fail-safe tire mounting session.
Inspect the Tire and Rim for Damage
Carefully examine the tire bead for any nicks, cuts, or embedded debris. Run your fingers along the rim bed to feel for burrs, sharp edges, or deformed sections. If you find damage, fix or replace the rim and avoid mounting until the rim is smooth. Remove old rim tape if it’s torn, and replace it with new tape where appropriate. A compromised bead or rim surface can cause immediate bead seating problems or pinch flats. This inspection step is inexpensive insurance against recurring flats and poor performance.
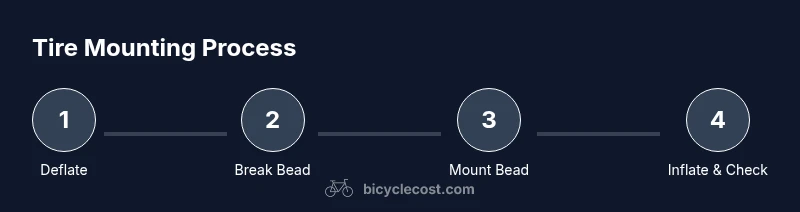
Deflate and Break the Bead
If the tire is still mounted with air, deflate completely before starting. Break the tire bead away from the rim using your fingers or a tire lever on a non-dominant side to minimize the risk of tube damage. Work slowly around the circumference, especially near the valve, to create enough slack for the next steps. For tubeless setups, avoid excessive bead movement that could dislodge rim tape. A calm, deliberate approach reduces frustration and protects the tube from pinching. This preparation sets the stage for successful mounting.
Start Mounting: Get One Bead On
Position the tire so that one bead sits inside the rim bed and the other bead remains outside. Work the tire into the rim slowly, using your thumbs to push the bead over the rim edge. Keep the valve stem aligned with the valve hole to prevent misalignment later. Make sure the tube (if present) is inside the tire and not twisted. Start at a point opposite the valve to balance bead seating. This initial beat establishes the frame for the rest of the mounting.
Align Valve Stem and Position Beads Correctly
With one bead on the rim, rotate the wheel to line up the valve stem with the rim hole. This alignment helps prevent the valve from being crushed or pinched during inflation. If the tube is present, gently tuck it into the tire as you seat the second bead, avoiding twists. Be patient here; misalignment often leads to leak paths that require rework. BicycleCost recommends checking alignment before applying pressure.
Use Levers Carefully to Seat the Bead
Tire levers can help seat the second bead, but improper use can damage the rim or tire. Insert the lever under the bead and pry gently, working in small increments around the wheel. Avoid pinching the tube; if you hear a pop, pause and inspect for pinching or bead misalignment. Use the levers as a last resort and keep pressure on the tire with your fingers instead of forcing it. This step often decides whether the bead seats cleanly on the first try.
Inflate to Seat the Bead Slowly
Reconnect your pump and inflate gradually in short bursts. Stop immediately if you feel resistance or the bead refuses to seat. For tubed setups, avoid overinflating and watch for any bead slip or tube pinch. If the bead seats unevenly, pause, recheck bead placement, and try again. The goal is a uniform bead seating around the entire circumference. Slow, controlled inflation is safer and more reliable than rapid pumping.
Recheck Bead Seating and Tire Pressure
Once inflated, spin the wheel and inspect the bead seating all the way around. Look for a uniform silver line along the rim where the bead meets the rim bed. Check the tire pressure using the gauge and compare against the sidewall recommendations. Adjust pressure as needed, ensuring the tire sits evenly and the tube remains free of twists or pinches. This final check confirms the mounting is sound and ready for riding.
Troubleshooting Common Issues
If the bead refuses to seat, inspect for burrs on the rim or treads on the bead that catch. Lightly lubricate the bead with soapy water or lubricant and reposition. If the tire won’t seal, it may be the rim tape or valve; reseat the tape or re-center the valve and retry. Persistent issues might indicate a damaged rim, tubeless tape failure, or a defective tire. In such cases, consider replacing the damaged component or seeking a quick professional check. Troubleshooting early prevents delayed rides.
Maintenance and Future Prevention
After mounting, clean the rim and beads and inspect for any wear. Keep a small toolkit with tire levers, a pump, and spare tubes readily accessible. Regularly check tire pressures before rides and rotate tires if you notice uneven wear. Replace beads that show cracking or flattening and refresh rim tape when switching to tubeless setups. Establishing a routine helps you mount tires more quickly next time and reduces the risk of pinch flats.
Tools & Materials
- Tire levers (plastic or metal)(Two levers recommended; avoid sharp metal edges on aluminum rims)
- Bicycle pump with gauge(Choose a pump with a built-in gauge for accurate seating pressure)
- Soapy water or tire mounting lubricant(Light lubrication helps beads slide over the rim)
- Clean rag(Used to wipe the rim and beads during mounting)
- New inner tube (optional)(Replace if the current tube is punctured or elderly)
- Rim tape (if tubeless or inspecting rim)(Ensure it is intact and centered)
- Gloves (optional)(Provides grip and protects hands)
- Wheel stand or stable surface(Helps keep the wheel steady during mounting)
Steps
Estimated time: 25-40 minutes
- 1
Prepare workspace and tools
Place the wheel on a stable surface, gather all tools, and remove extraneous clutter. Make sure you have enough room to rotate the wheel. If you’re mounting on the bike, secure the bike to a stand. This reduces the risk of slips and pinching during mounting.
Tip: Have a small towel or rag handy to wipe away grease that could cause slips. - 2
Deflate and inspect
Deflate the tire completely and inspect the bead area for any embedded debris. Check the rim bed for burrs or sharp edges. Cleaning at this stage prevents bead tangling and pinch flats later.
Tip: If you see burrs, file them or replace the rim to avoid future issues. - 3
Break the bead
Use a tire lever gently to pry the bead away from the rim on a small section at a time. Work around the rim until you create enough slack to proceed. Do not force the bead, which can damage the rim or tube.
Tip: Keep fingers on the tire sidewall to avoid pinching the tube. - 4
Position one bead on the rim
Move one bead inside the rim bed, starting opposite the valve. Ensure the bead sits evenly on the rim and does not twist. This establishes the anchor for seating the second bead.
Tip: Rotate the wheel slowly to confirm even bead seating around the circumference. - 5
Check valve alignment
Align the valve stem with the rim hole and ensure it is vertical. This helps prevent the stem from being pinched during inflation and avoids misalignment that can cause leaks.
Tip: If you’re using a tube, tuck it flat inside without twists before inflating. - 6
Lift the second bead
With your thumbs, push the second bead into the rim bed, working around the wheel. If the bead sticks, refresh with a small amount of lubricant and reorient.
Tip: Avoid lifting with a lever on the second bead to reduce pinch risk. - 7
Use levers only if needed
If the second bead resists, carefully use tire levers to seat the bead in small increments. Stop if you see tube or bead pinching. Levers should assist, not force the bead.
Tip: If possible, rely on palms and gentle pressure before using levers. - 8
Inflate in short bursts
Attach the pump and inflate gradually in small bursts. Stop if the bead pops into place or if you feel resistance. This minimizes bead slippage and reduces the chance of a pinch.
Tip: Keep a finger on the tire near the valve to monitor seating. - 9
Check bead seating
Spin the wheel slowly and inspect the bead all the way around. If there are gaps or the bead doesn’t sit flush, deflate, adjust, and retry. Be patient; this step is critical.
Tip: Peel back the tire slightly to re-seat a stubborn spot if needed. - 10
Recheck the tube and valve
If a tube is present, ensure it isn’t twisted and the valve is straight. Inflate to a safe, moderate pressure and recheck that there are no air leaks around the bead or valve.
Tip: A tube with a pre-inserted stem reduces risk of pinching during inflation. - 11
Final pressure check
Use the gauge to confirm tire pressure matches the tire sidewall or your riding needs. Ensure the tire feels firm all around and there are no soft spots indicating a seating issue.
Tip: Avoid over-inflating; too much pressure can damage the tire or rim. - 12
Store and prep for next ride
Wipe the rim clean, store tools, and verify the wheel spins true. A quick post-mount check helps catch issues before your next ride and saves time when you head out.
Tip: Keeping a small toolkit on hand makes future mounting faster.
People Also Ask
Do I need to remove the inner tube before mounting the tire?
For most routine mounting, you can mount with the tube in place and inspect for damage as you go. If the tube is punctured or old, replace it before finishing.
You can usually mount with the tube in place, but replace it if it’s punctured or aged.
What should I do if the bead won't seat after multiple attempts?
Pause to inspect the bead and rim for burrs, re-lubricate lightly, and re-position. Retry with slower inflation and even pressure.
If the bead won’t seat after several tries, check for rim burrs, re-lubricate, and retry with slow, even inflation.
Can tubeless tires be mounted without tire levers?
Tubeless tires can often seat with careful hand pressure and rim tape checks, but levers can help on stubborn beads. Follow rim tape guidance to prevent leaks.
Tubeless tires can sometimes mount with hands, but levers can help. Make sure rim tape is intact.
How should I start inflating to seat the bead?
Begin with gentle, short bursts and monitor the bead as it seats. Do not rush to high pressure before the bead sits evenly.
Start with light bursts and watch the bead seat evenly before increasing pressure.
Is mounting a tire risky without proper safety steps?
With proper safety steps and tools, mounting tires is safe. Wear gloves if desired and keep hands clear of pinch points.
Yes, with proper technique it’s safe; wear gloves and avoid pinch risks.
Watch Video
Quick Summary
- Gather the right tools before you begin.
- Inspect the tire and rim for damage to avoid seating issues.
- Deflate completely and break the bead to start mounting.
- Mount one bead first, then seat the second with care.
- Inflate in short bursts and recheck seating and pressure.