How to Get Bicycle Tire Off Rim: A Complete How-To
A practical, beginner-friendly guide from BicycleCost on safely removing a bicycle tire from the rim, with tools, steps, and pro tips. Learn how to get bicycle tire off rim with confidence, today.

According to BicycleCost, learning how to get bicycle tire off rim empowers riders to patch flats quickly and inspect bead seating. This guide teaches you the precise sequence, the essential tools, and safety checks needed to remove a tire without damaging the rim. You’ll find a clear, step-by-step process you can follow on any bike.
Why Getting the Tire Off the Rim Is Necessary
Understanding why you need to remove the tire helps you approach the task with purpose. Punctures, slow leaks, or bead seating issues often require tire removal so you can inspect the tube, replace the inner tube, or reseat the tire for tubeless setups. When you learn how to get bicycle tire off rim, you gain a valuable maintenance skill that reduces downtime on rides and extends the life of your wheel components. Based on BicycleCost research, removing the tire carefully reduces bead damage and rim nicking, especially on older rims with worn tape. This section sets the stage for why a controlled removal process matters as part of regular bike care and safety checks.
Before you start, acknowledge that the same technique can vary a little between road, mountain, and hybrid rims. Tubeless setups may require additional steps to avoid bead pinch or bead failure. If you’re not sure whether your wheel is tubed or tubeless, check for a tubeless valve stem and a rim strip designed for tubeless systems. The core idea remains the same: a calm, methodical approach minimizes risk and preserves your tire, tube, and rim.
Safety First: Prep Work and Workspace
Safety first means creating a clean, stable work area and wearing gloves to protect your hands. Secure the bike so it won’t roll and remove the wheel from the frame if you’re more comfortable working it on a bench or with a stand. Clear space around you, place a soft mat beneath the tire to avoid rim scratches, and have good lighting. If you’re on the road, consider laying a spare towel or mat on the ground to catch small parts. The goal is to avoid pinching the tube or fingers between hard edges while you pry the bead away from the rim. Keep a rag handy for cleaning the rim and hands as you work, and always deflate completely before prying.
When you inspect the tire, look for embedded glass, thorn, or sharp rim edges that could cut the tube during removal. If you notice a damaged rim tape or sharp protrusion inside the rim bed, stop and address that issue before continuing. A quick rim edge check reduces the chance of a new puncture once you reassemble. Remember: practice in a safe space makes you more confident on the road, and BicycleCost’s analysis shows that preparedness minimizes damage during the tire removal process.
Tools and Materials You’ll Need
Having the right toolkit ready before you begin is essential. The core tools are inexpensive, and having them on hand speeds up the process while reducing risk. Here is a practical list to keep by your work area: - Tire levers (2–3, preferably plastic or nylon to protect the rim) - Floor pump or CO2 inflator with gauge - Replacement inner tube or patch kit - Rim tape inspection/replacement if needed - Soap water or tire lubricant for bead release - Rag or towel for cleanup - Gloves for hand protection - Optional: bead breaker for stubborn beads or tubeless setups
Choosing quality levers matters: keep the levers at shallow angles to prevent puncturing the tube or gouging the rim. A well-lubricated bead releases more easily, especially on tight or cold tires. If you ride tubeless, you might also want a bead breaker tool and a tubeless repair kit. The gear you select should match your wheel type and riding style, but the basics are universal across most bicycles.
Step-by-Step Overview (High-Level)
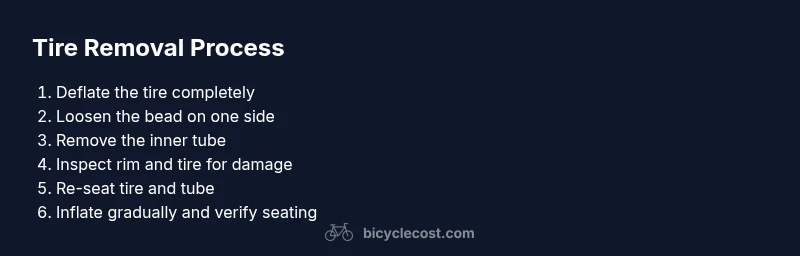
The full, explicit step-by-step instructions appear in the dedicated step-by-step section below, but here’s the high-level flow you’ll follow: deflate the tire completely, loosen the bead on one side starting near the valve stem, work the bead over the rim edge with tire levers, remove the inner tube (or tubeless insert) once one side is free, inspect the tire and rim for damage or debris, and finally reseat the tire and tube before re-inflating to the recommended pressure. This overview helps you picture the sequence and prepare mentally for the hands-on work. For tubeless setups, be mindful of bead seating and the need to re-check bead seating after reassembly. A calm, steady pace reduces risk and makes the process smoother. The exact bead-release point can vary by rim design, but starting opposite the valve stem often yields the best leverage. Remember: you’re aiming to separate the tire from the rim without tearing the tire bead or pinching the tube. BicycleCost emphasizes taking your time and verifying each step before moving on.
Common Pitfalls and How to Avoid Them
Common pitfalls include pinching the tube with tire levers, forcing beads over sharp rim edges, or rushing the deflation and bead-release steps. Pinched tubes are a leading cause of punctures after removal, so protect the tube with the levers and go slowly when releasing the bead. Avoid prying around the valve stem too aggressively, which can tear the valve core or valve base. If the bead is stubborn, switch to a second lever at a different location rather than forcing one lever too far. Always inspect the rim tape before reassembly; nicked tape can expose sharp edges that puncture the new tube or cause leaks. In tubeless systems, improper bead seating can lead to slow leaks or bead failure during inflation — take your time to ensure the bead seats evenly and recheck after initial inflation.
Reassembly, Testing, and Maintenance
With the tire removed and the tube inspected or replaced, you’ll begin reassembly. Start by aligning the valve with the rim hole and seating one bead along the rim. If you’re reusing the same inner tube, gently inflate just enough to give the tube shape and then positioning it inside the tire. Ensure the tire beads sit evenly in the rim well before you start full inflation. Gradually increase pressure, listen for bead seating and check for any bulges or gaps. Spin the wheel and check the bead on all sides to ensure a uniform seal. If you’re working on tubeless tires, reseat the bead and inflate to the recommended pressure, then check for leaks with soapy water. Finally, reinstall the wheel on the bike and test ride gently to confirm stability. The BicycleCost team recommends practicing this skill on a spare wheel under controlled conditions to build confidence for real-world flats.
Tools & Materials
- Tire levers (2–3)(Prefer plastic or nylon to protect the rim.)
- Floor pump or CO2 inflator(With gauge to verify inflation.)
- Replacement inner tube or patch kit(Carry the correct size for your tire.)
- Rim tape (or replacement kit for damaged rims)(Inspect or replace if torn.)
- Soap water or tire lubricant(Helps bead release.)
- Rag or towel(Catches debris and keeps area clean.)
- Gloves(Protects hands from sharp edges and pinch risks.)
- Bead breaker (optional)(Helpful for very tight beads or tubeless setups.)
- Spare tools for wheel removal (optional)(Hex keys or wrenches to remove the wheel from frame if needed.)
Steps
Estimated time: 20-40 minutes
- 1
Deflate the tire completely
Remove the valve cap and deflate the tire. If you have a Presta valve, loosen the valve core slightly only if you have the proper tool; otherwise, press the valve stem to release air gradually. Fully deflating reduces resistance and helps prevent the tube from expanding or popping as you work the bead away from the rim.
Tip: Deflate slowly to avoid sudden air bursts; keep hands clear of the valve stem. - 2
Loosen the bead on one side near the valve
Insert a tire lever between the tire bead and the rim, near the valve stem. Pry gently to loosen the bead, working your way around the wheel with the second lever if needed. The goal is to free one side of the tire from the rim without pinching the tube.
Tip: Start opposite the valve if possible to maximize leverage. - 3
Work the bead over the rim edge
Slide the lever along the rim while lifting the bead over the edge. Use another lever to continue prying bead until the entire side clears the rim. Be patient and avoid forcing the bead over sharp edges or the valve stem.
Tip: Keep pressure low and controlled to avoid pinching the tube. - 4
Remove the inner tube
Once one side is free, pull the tube out from inside the tire. If the tube is punctured, remove it fully and set aside for patching or replacement. If you’re maintaining a tubeless setup, you may be removing the tire entirely to inspect the rim and bead.
Tip: Don’t pull the valve too quickly; turn the wheel slightly to align the valve with the rim hole. - 5
Inspect the tire and rim for damage
Check the tire interior for embedded debris and inspect the rim tape for tears or exposed spoke nipples. Any sharp edge or tear on the rim tape can cause future punctures; replace tape if needed. Inspect the tire bead for cracks or damage that would affect seating.
Tip: Use a light to check the rim bed and look for indentations or burrs that could cut the tube. - 6
Reinstall the tube or tubeless assembly
If using a tube, insert the valve through the rim, tuck the tube into the tire evenly, and gradually redraw the tire beads over the rim. If tubeless, seat the bead carefully and inflate with controlled pressure to re-seat the bead.
Tip: Make sure the tube is not twisted and is evenly distributed inside the tire. - 7
Inflate and recheck bead seating
Inflate the tire to the recommended pressure gradually. Check that the bead sits evenly around the rim by visually inspecting the entire circumference and listening for a uniform seating sound. Spin the wheel and inspect for leaks or bulges. Reinstall the wheel on the bicycle and test ride gently.
Tip: Inflate in small increments and recheck bead alignment after each increment.
People Also Ask
Do I need to deflate the tire completely before removing it?
Yes. Fully deflating reduces resistance and helps prevent the tube from pinching or expanding as you pry the bead away from the rim. For Presta valves, remove the valve core only if you have the proper tool and stability to avoid sudden air bursts.
Yes. Fully deflate to make bead removal easier and safer. If needed, loosen the valve core carefully with the right tool.
Can I reuse the same inner tube after removing the tire?
If the tube is intact and not punctured during removal, you can reuse it after inspecting for damage. If there are punctures or sharp edges on the rim, replace the tube and patch the puncture if you have the kit.
Yes, provided the tube isn’t damaged. Check for punctures and rim damage before reusing.
What if the bead won’t come off the rim?
Try moving around the wheel with both levers and apply a little soapy water to reduce friction. If still stubborn, use a bead breaker or take a short break and come back with a fresh approach. Do not force the bead through sharp edges.
If the bead is stubborn, use soap water and try another lever position. Don’t force it.
What’s the difference between tubed and tubeless tires during removal?
Tubed tires require removing the inner tube, whereas tubeless tires involve bead seating and possibly careful bead breaking. Tubeless setups often need special tools to avoid bead damage and to reseat the bead after puncture repairs.
Tubed tires use an inner tube; tubeless tires focus on bead seating and seals without an inner tube.
How do I know when the bead is fully seated after reassembly?
Inflate gradually and inspect the bead circumference for even seating. You should hear a consistent air seal all around and see no gaps. If you notice leaks, deflate and reseat, then recheck.
Inflate slowly and check that the bead seats evenly all the way around the rim.
Watch Video
Quick Summary
- Deflate completely before prying the bead.
- Use two levers and work around the rim for even bead release.
- Inspect rim tape and rim edges to prevent future flats.
- Re-seat beads slowly and check for leaks before riding again.