How to Change a Bicycle Tire: A Practical Guide
Learn how to safely change a bicycle tire, whether tubed or tubeless. This practical guide covers tools, step-by-step instructions, tips, and safety considerations from BicycleCost.

You will learn how to safely and efficiently replace a bicycle tire, whether you have a flat tubed or tubeless setup. This guide covers tools, step-by-step actions, and when to seek help. Before you begin, ensure you have the right tire size, a compatible tube or tubeless repair kit, a pump, and a tire lever.
Tools and Setup Essentials
Before you touch a flat tire, gather the right tools. According to BicycleCost, the right setup reduces frustration and helps you fix the tube quickly on the roadside or at home. For most standard bikes, you’ll need a tire lever, a spare inner tube or a tubeless repair kit, a pump or CO2 inflator, and a repair patch kit if you’re patching rather than replacing a tube. Additional items include a multitool with a small screwdriver, a rim tape (if you're installing a new tubeless setup), and a chain-cleaning cloth. If you ride tubeless, you may also want a tubeless repair plug kit and a valve core remover. Organize tools in a compact saddle bag or a frame-mounted pouch so you can access them without dropping the bike.
Clear labeling is helpful: know your tire size (for example, 27x1 1/4 or 700x25c) and the correct inner tube width. Confirm that your pump can reach the pressure range your tires require and that the bead is intact. This preparation saves time and reduces the risk of pinching the tube during reinstall.
Tubed vs Tubeless: What to Know Before You Start
Bicycle tire technology has evolved, and understanding whether you ride tubed or tubeless changes how you change a tire. Tubed tires require replacing the inner tube when punctured, while tubeless setups rely on sealant and bead seating to stop small leaks. The tire removal steps are similar, but tubeless tires demand extra care when reseating beads and rechecking sealant levels. If you’re unsure, inspect your rims for a compatible bed and check that the tire bead sits evenly all around the rim. Tubeless tires can be repaired with plugs in many punctures, but certain damage may require replacing the tire or rim tape. Always carry a spare tube (even if you ride tubeless) just in case you pinch during removal or if you experience a sudden blowout.
BicycleCost analysis suggests flats happen most often when the bead is not seated properly or the tire is under-inflated. Knowing your setup helps you choose the right procedure and avoid common mistakes.
Safety First: Flats, Repairs, and Road Readiness
Safety is the foundation of any tire change. Wear gloves to protect your hands and eye protection if you’re near debris. Lock the bike securely and use a stable surface before you start. If you’re on the road, move to a safe area and set up your repair kit within reach. When reinstalling, ensure the wheel is properly aligned in the dropouts and the brakes do not rub the tire. After inflating, spin the wheel to confirm true rotation and no bead pinch. If you’re unsure about your tire condition or rim integrity, seek professional help before resuming ride.
Common Pitfalls and How to Avoid Them
Common mistakes include pinching the tube during bead seating, not fully unseating the bead, and damaging the tube by prying with lever too aggressively. Use plastic tire levers to avoid scratching rims, work beads evenly around the rim, and inflate gradually to prevent sudden tire blowouts. Check the rim strip for nicks or exposed spokes before reseating the tire. If the bead won’t seat, deflate slightly, re-center the tube, and try again from the opposite side. Always keep a spare tube and patch kit handy for immediate fixes on the road.
Maintenance to Prevent Flats
Regular maintenance is the best defense against flats. Inspect tires for cuts, embedded debris, or worn tread and replace tires when the sidewalls show cracking or thick wear. Keep tires inflated to the recommended pressure, check rim tape for damage, and ensure the bead seats evenly after every installation. Rotate tires where appropriate to distribute wear and consider tubeless sealants for puncture resistance on compatible wheels. A small routine can save you time and trouble on longer rides.
Authoritative Guidance and Further Reading
For safety and maintenance guidelines from trusted sources, consult:
- NHTSA Bicycle Safety: https://www.nhtsa.gov/road-safety/bicycle-safety
- Bicycling Magazine: https://www.bicycling.com
- Consumer Reports Cycling Tire Guide: https://www.consumerreports.org/cycling/
Tools & Materials
- Tire levers (plastic preferred)(2 levers recommended to avoid rim damage)
- Spare inner tube or tubeless repair kit(One spare tube sized to your tire; tubeless kit for sealant)
- Bike pump or CO2 inflator(Ensure compatible valve type (Presta or Schrader))
- Patch kit (optional)(For patching punctured tubes)
- Rim tape (if installing tubeless)(Check for wear and expose spokes)
- Gloves(Protect hands from sharp edges)
- Multitool(Screwdriver bits for valve core and screws)
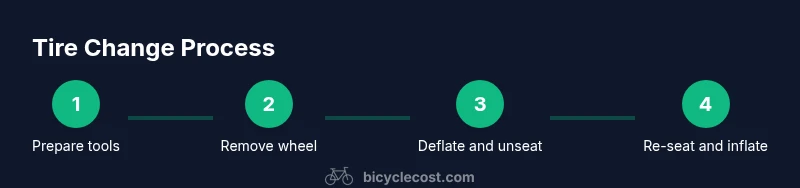
Steps
Estimated time: 20-40 minutes
- 1
Remove the wheel from the bike
Shift the bike to a safe position and open the brake if needed. Release the quick-release lever or axle nuts and carefully remove the wheel from the frame. This gives you clear access to the tire and tube for removal.
Tip: Keep the bike balanced on a stand or with a soft surface to avoid damaging the frame. - 2
Deflate and unseat the bead
Fully deflate the tire by pressing the valve core (if needed) and push the bead away from the rim with a tire lever. Work around the rim to loosen the bead so you can access the inner tube.
Tip: For stiff beads, a little soapy water can help the bead slide over the rim without tearing the tube. - 3
Remove the tube and inspect
Pull the tube out from the valve first, then completely remove it. Inspect the tire for embedded glass, nails, or sharp edges. If the tire is damaged beyond repair, replace it; otherwise, patch the tube if possible.
Tip: Check the valve stem for cracks; if damaged, replace the tube rather than patching a compromised stem. - 4
Inspect and prepare the tire and rim
Spin the rim and inspect the rim tape for tears. Mount the new tube (or patch the old one) and run your fingers around the tire to ensure there are no sharp objects. If tubeless, ensure sealant and bead seating are ready for reassembly.
Tip: Lubricate the bead with a tiny amount of soapy water to help seating and reduce friction. - 5
Reinstall the tire and tube
Tuck the tube inside the tire and begin mounting the bead from the opposite side of the valve. Avoid pinching the tube; use both levers to seat the bead evenly around the rim and ensure the valve sits straight.
Tip: Never twist the tube when seating; straighten the valve to prevent kinking. - 6
Reinstall wheel and inflate to pressure
Place the wheel back into the frame and hand-inflate to the recommended pressure. Check that the bead sits evenly all around and rotate the wheel to verify true rotation. Final check: the brakes should not rub and the tire should feel firm.
Tip: Inflate in small increments, checking seating after each burst to avoid over-expansion.
People Also Ask
Do I need to replace both the tire and the inner tube every time I get a flat?
Not always. If the tire is intact after removing the object and shows no cut or sidewall damage, you can simply replace the inner tube. If the tire is damaged or worn, replace the tire as well. Inspect the rim tape and bead for signs of wear before deciding.
Usually you only replace the inner tube, but inspect the tire and rim for damage before deciding to replace the tire as well.
Can I patch a punctured inner tube instead of replacing it?
Yes, for small punctures on the tube, you can patch it as a temporary fix. However, a patch may not hold up to ride conditions for long. If the patch fails or the puncture is large, replace the tube.
You can patch small punctures, but if the patch fails or the puncture is large, replace the tube.
What should I do if the tire bead won't seat after multiple tries?
Stop and recheck the tire for embedded objects, ensure the rim tape is intact, and verify the tube isn’t twisted. Use gentle pressure and try from multiple points around the rim. If stubborn, seek professional help.
If the bead won’t seat after several tries, recheck for debris, inspect the rim, and consider professional help if needed.
Are tubeless tires harder to repair on the road?
Tubeless systems can be more challenging to repair on the road due to sealant and bead requirements, but they are often self-sealing for small punctures. Carry a tubeless repair kit and a spare tube as backups.
Tubeless repairs are trickier on the go, so always carry a backup tube and repair kit.
What air pressure should I use for my tires?
Check the sidewall of your tire for the recommended range. Inflate within that range, starting lower and increasing gradually to avoid pinch flats and ensure good rim seating.
Always follow the tire’s recommended pressure range and inflate gradually.
How can I prevent flats in the future?
Regular inspection of tire tread, correct inflation, and timely tire replacement reduce flats. Consider tubeless setups if compatible with your rims and riding style, and keep a basic repair kit ready.
Keep tires properly inflated, inspect for wear, and carry a repair kit to handle flats quickly.
Watch Video
Quick Summary
- Gather the right tools before starting.
- Know whether your tire is tubed or tubeless.
- Seat the bead evenly and inflate gradually.
- Check for bead seating and brake clearance after reassembly.