How to Replace a Bicycle Tire Tube
Learn to replace a bicycle tire tube with a clear, safe, at-home process. This BicycleCost guide covers tools, step-by-step actions, safety tips, and troubleshooting to keep you riding.

By the end of this guide, you will successfully replace a bicycle tire tube. You’ll remove the wheel, deflate and remove the tire, swap in a new inner tube, and reseat the tire before a test ride. You’ll need a tire lever, a pump, and a new tube. According to BicycleCost, this repair is doable at home with proper precautions.
Why replacing a bicycle tire tube matters
Replacing a bicycle tire tube is a practical skill that can save you time, money, and frustration on the road. According to BicycleCost, it’s a common repair that riders of all levels can master with the right tools and a calm approach. A punctured or leaking tube means your ride ends sooner than expected, so knowing how to replace it quickly helps you stay in the saddle rather than waiting for a tow or a shop. Understanding when to replace versus patch is important: a severely worn tube, a large gash, or a valve that won’t seal reliably is a strong sign that replacement is the safer option. Beyond the immediate fix, regular inspections of the tire and rim help prevent future flats and extend the life of your wheel setup. When you replace a tube, you also have a chance to inspect the bead, the rim tape, and any embedded debris that could cause repeated punctures.
In this guide you’ll learn how to replace a bicycle tire tube with confidence. You’ll be guided through choosing the right tube, preparing your workspace, performing the removal and installation steps, and verifying seating and inflation. The process is straightforward, but a methodical approach reduces the risk of pinch flats and rim damage. With practice, most riders can complete the job in under an hour, even on the roadside.
Tire tube sizes and compatibility
Bicycle tire tubes come in various sizes, but the key compatibility factors are tire diameter (such as 700c) and tire width (for example 25mm to 38mm). Equally important is valve type: Presta valves are narrow and common on higher-end rims, while Schrader valves are wider and work on many city and mountain bikes. When selecting a replacement tube, match the tube size to your tire: the width range printed on the tube should encompass your tire width, and the valve should fit your rim hole. If you’re uncertain, bring the wheel and tire to a shop or use a precise tire sizing chart. A tube that is too small or too large can lead to poor seating, frequent punctures, or valve failure.
Sizing accuracy also matters for tubeless-ready rims and road setups. If you own a rim that accepts tubeless tires, ensure the tube you choose won’t interfere with tubeless bead seating. Some riders prefer a slightly wider tube for a robust fit, but you should never force a tube into a tire that is too tight. Proper sizing reduces the risk of pinch flats when the tire is inflated and the wheel is under load during riding.
Tools and materials you’ll need
Having the right tools at hand before you start makes the replacement smoother and faster. This section lists essential items, optional add-ons, and why they matter. The core kit is compact, portable, and inexpensive, which makes it easy to carry in a saddle bag for roadside repairs. Always choose tools that fit your bike’s setup (rim type, tire width, and valve type). A clean workspace and good lighting help you spot debris in the tire and ensure the bead seats evenly.
- Tire levers (at least 2) — essential for freeing the bead from the rim without pinching the tube; note that one lever alone often isn’t enough for tight beads.
- New inner tube — match the tire width, diameter, and valve type; bring a spare if you ride with unusual tires.
- Bike pump or CO2 inflator with gauge — accurate inflation helps prevent pinch flats and ensures a safe ride.
- Patches and patch kit (optional) — useful if you later decide to repair the punctured tube rather than discard it.
- Rag or paper towels — for cleaning the tire bead and rim, and wiping residue away.
- Lubricant or soapy water — helps locate slow leaks and eases tube insertion if beads are stubborn.
Optional but handy: tire boot for sharp rim bed damage, a small pocket multitool, and a spare valve core remover if your rim uses removable cores. Storing these in a lightweight bag keeps you prepared for roadside repairs as well as routine maintenance at home.
Preparing your workspace and safety
Before you start, choose a clean, flat surface to lay out your tools. If you’re indoors, cushion the floor with a mat to reduce the risk of scratching rims or bending spokes. Wear gloves to keep oil and grit off your hands and to protect your fingers when handling tires with sharp edges. Lay out a small tray or bin to keep removed parts organized. Make sure your bike is stable; if you’re working on a parked bicycle, use a bike stand or lean the bike securely against a wall with the chain in a gear that won’t move unexpectedly. If you’re performing roadside maintenance, turn on proper safety lights and wear high-visibility gear.
During inspection, check the tire for embedded glass, nails, or burrs that could puncture a new tube. Inspect the rim tape for any exposed spoke ends or sharp edges. If the rim tape is damaged, replace it before inserting a new tube. This step reduces the chance of punctures and prolongs the life of your setup. Keep a clear space for your tools and a place to lay the removed tire so you can easily locate items later.
Step-by-step overview: wheel and tire removal
Knowing how to remove the wheel and the tire is the foundation of tube replacement. Start by removing the wheel from the frame or fork. If you’re on a rear wheel, shift to the smallest chainring and smallest cog to relieve tension on the chain and make wheel removal easier. Once the wheel is free, deflate the tire completely by pressing the valve core (on Presta valves, you’ll need to loosen the core slightly to release air more quickly). Loosen the bead along the rim using a tire lever. Work your way around the wheel, inserting the tire lever under the bead at several points to gradually free the tire from the rim. When the bead is free on one side, push the tire down and off the rim to reveal the inner tube. Take care not to pinch the tube with the lever.
Step-by-step: removing punctured tube and selecting replacement
With the tire free, pull out the punctured inner tube from inside the tire. If the tube is torn, inspect the tire for the object that caused the puncture and remove it. If you cannot locate the object, insert a new tube and check for potential sharp edges that could puncture again. Compare the new tube with the old one to ensure the valve type and length match your rim’s valve hole and depth. If you have a cylindrical valve core remover, you can adjust a stubborn valve core to ensure proper seating. Before installing the new tube, slightly inflate it to give it some shape; this helps prevent it from getting pinched during installation and makes it easier to seat the tube inside the tire.
Step-by-step: reinstalling tire and tube, ensuring seating
Next, insert the new inner tube into the tire, being careful not to twist the tube. Starting at the valve stem, place the tube inside the tire and ensure the tube is not twisted or pinched. Begin reseating the bead by pushing the tire bead back onto the rim with your thumbs, moving around the wheel. If the bead snags, use a tire lever carefully to avoid pinching the tube. Once the tube is inside and the bead is evenly seated, inflate gently to seat the tire and check for leaks. Finally, reinstall the wheel onto the bike and hand-tighten the quick-release or axle nuts as required.
Inflation, seating, and test ride
Inflate the tube to the correct pressure using a gauge. Avoid over-inflation, which can blow the tube or burst the bead; under-inflation increases the risk of pinch flats and poor handling. Spin the wheel to ensure the tire beads seated evenly and there are no bulges or tight spots. Inspect the rim for any protruding spoke ends or sharp edges that could cause another puncture. Take a short test ride on a quiet surface to confirm that the tire stays inflated and that there are no unusual noises indicating improper seating. If you notice slow leaks, recheck the bead and valve connection.
Common mistakes and how to avoid them
Even experienced riders make avoidable mistakes with tire tube replacements. Common issues include pinching the tube during installation, not fully seating the bead, and inflating too quickly, which can cause the tube to pop. To avoid these, ensure the tire is clean and free of debris, insert the tube smoothly without twisting, and use a slow, methodical inflation rate. Another frequent error is over-tightening the wheel in clamps or quick-release skewers; ensure proper torque and alignment. Finally, never ride with a damaged rim tape or sharp rim edges visible inside the wheel.
Aftercare, storage, and longer-term tips
After completing a replacement, you’ll want to store spare tubes and tools in a dedicated bag or compartment so you’re ready for the next ride. Regularly check for punctures by inspecting the tire’s exterior while rotating the wheel to uncover embedded debris. Maintain proper tire pressure for the type of ride you do; under-inflated tires wear more quickly and are more prone to punctures, while over-inflation can reduce traction. Consider carrying a small patch kit for quick temporary repairs if you’re far from a shop. Periodically check the rim tape and valve stems to ensure everything is in good condition. By taking these steps, you’ll extend the life of your tires and tubes and reduce downtime on the road.
Tools & Materials
- Bike tire levers(At least 2; plastic or metal options are fine, but choose gentle plastic to avoid rim damage.)
- New inner tube(Match tire width and diameter; ensure valve type (Presta or Schrader) matches your rim.)
- Bike pump(With gauge is preferred to monitor inflation accurately.)
- Rags or paper towels(For wiping the rim and bead residue; helps with inspection.)
- Soap water or lubricant(Aids in seating and locating slow leaks.)
- Patch kit (optional)(Useful for temporary repairs if you want to reuse a punctured tube later.)
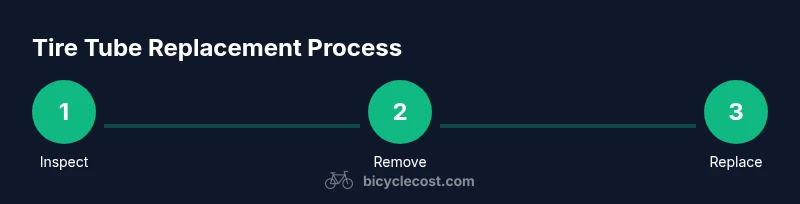
Steps
Estimated time: 30-60 minutes
- 1
Inspect tire and rim for damage
Examine the tire surface for embedded objects and inspect the rim tape for exposed edges. Look for bulges, cracks, or wear that could cause another puncture. Do not proceed if you find significant rim damage.
Tip: Use good lighting and a mirror to look behind the spokes for hidden hazards. - 2
Secure bike and remove the wheel
Shift to the smallest gear on the rear wheel, loosen the brake if needed, and remove the wheel from the frame. Keep the bike stable by supporting it against a wall or using a stand.
Tip: If you’re new to this, have a helper hold the bike steady during wheel removal. - 3
Deflate and separate the tire bead
Fully deflate the tube by depressing the valve core if needed, then insert a tire lever under the bead and pry the bead away from the rim. Work around the wheel to free one side of the bead.
Tip: Do not rush; work gradually to avoid pinching the tube. - 4
Remove the punctured tube
Pull the tube out of the tire, keeping it intact if possible to help locate punctures. Inspect the tire for sharp objects that could cause repeated punctures.
Tip: Gently press the valve to release air as you pull the tube out to avoid stretching or tearing. - 5
Install the new tube
Lightly inflate the new tube to give it shape, thread the valve through the rim, and tuck the tube into the tire all around the wheel. Ensure the tube lies flat and isn’t twisted.
Tip: Leave a small amount of slack in the tube at the valve to prevent pinching during bead seating. - 6
Reseat the tire bead and wheel
Re-seat the tire bead onto the rim, starting opposite the valve and working around. Make sure the bead sits evenly and the tube is not pinched. Rotate the wheel to ensure smooth seating.
Tip: If the bead fights you, use a light amount of soapy water on the bead to help it slide into place. - 7
Inflate and check for leaks
Inflate to the recommended pressure in three increments, checking for leaks around the valve and bead each time. Spin the wheel to ensure even seating and watch for bulges or beads not fully seated.
Tip: Never exceed the tube’s rated pressure; check your sticker or tire sidewall for the max psi. - 8
Reinstall wheel and test ride
Mount the wheel back onto the frame, re-tighten the quick release or axle nuts, and test ride on a safe surface. Listen for any hissing sounds or unusual vibrations that might indicate a seating issue.
Tip: Take a short loop first to confirm inflation and seating before a longer ride.
People Also Ask
Do I always need to remove the tire to replace the inner tube?
Typically yes. Removing the tire allows you to access the inner tube, inspect for puncture causes, and replace it safely.
Usually you need to remove the tire to access the inner tube and replace it safely.
Can I patch a punctured tube instead of replacing it?
Patching can be a temporary fix, but replacement is generally recommended for reliability and peace of mind.
Patching can work short-term, but replacement is usually more reliable.
What’s the difference between Presta and Schrader valves?
Presta valves are narrow and common on road bikes; Schrader valves are wider and common on many mountain and city bikes. Choose a tube with the compatible valve.
Presta is narrow, Schrader is wider. Match the valve to your rim.
How can I avoid pinch flats during installation?
Keep the tube smooth, seat the tire evenly, and inflate gradually. Avoid twisting the tube as you reinstall the tire.
Keep the tube smooth and seat the bead evenly while inflating slowly.
How long does it typically take to replace a tube?
Most riders complete the process in under an hour, depending on experience and bike setup.
It usually takes under an hour, depending on your setup.
How should I dispose of an old inner tube?
Recycle or discard per local guidelines; many recycling programs accept rubber, but check with your municipality.
Recycle old tubes per local guidelines; some places accept rubber, others don’t.
Watch Video
Quick Summary
- Gather essential tools before starting.
- Match tube size to tire width and rim type.
- Seat the bead evenly to avoid pinches.
- Inflate gradually and test ride safely.
- Inspect for puncture causes to prevent recurrence.