How to fix bicycle flat tire: A complete guide
Learn how to fix a bicycle flat tire with a step-by-step method, essential tools, and tips to prevent future flats. A BicycleCost guide for safe, reliable repairs.

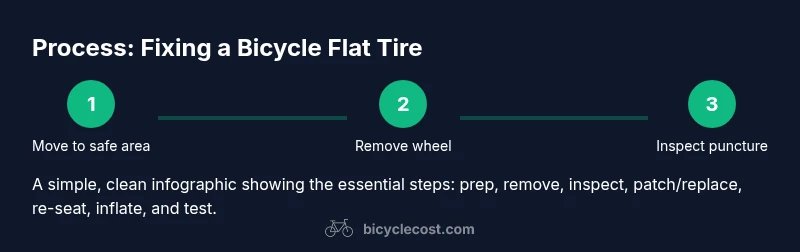
By following these steps, you will fix a bicycle flat tire and get rolling again. You’ll learn how to safely remove the wheel, locate the puncture, repair or replace the inner tube, and reinflate to the proper pressure. Tools like tire levers and a pump are essential. According to BicycleCost, practicing on a spare tube makes roadside fixes faster and more reliable.
Safety and prep: set up a controlled workspace
Before you touch a flat tire, move to a flat, well-lit area away from traffic. Secure the bike so it won’t tip, and gather your repair tools in reach. Put on gloves if available to keep hands clean and protect from sharp edges. A calm start reduces mistakes and flats that become stubborn problems. The BicycleCost team emphasizes safety as the foundation of every repair, noting that a stable setup minimizes risk of injury or further damage to the wheel or tire.
Tubed vs tubeless: understanding what you’re fixing
Most riders repair a flat tire by handling an inner tube inside a traditional clincher wheel. Tubeless setups work differently: you seal punctures without an inner tube, using sealant and tire bead seating. Knowing which system you have helps determine whether you patch, seal, or replace components. If you’re unsure, inspect the rim bed, valve stem, and bead seating. This pre-check saves time and reduces the chance of rerunning the repair later.
What you’ll need in advance (overview)
A well-prepared repair kit keeps you from frantically searching mid-work. You’ll want a spare tube of the correct size, tire levers, a patch kit or glue, a pump or CO2 inflator, and a small multitool. If the tire or rim shows significant damage, you may also want a tire boot and spare patches. Keeping these items in a dedicated bag or saddle pocket speeds up fixes and minimizes frustration, especially on longer rides.
Step-by-step context: what the repair process looks like when you’re in the zone
The repair process centers on safely removing the wheel, freeing the tire bead, inspecting the inner tube, and choosing whether to patch or replace. Proper technique ensures you don’t pinch the tube during reassembly, and it reduces the chance of discovering another puncture once you’re back on the road. In addition, taking a few calm breaths helps you focus on each action rather than rushing.
Finding the puncture and diagnosing causes
Carefully deflate the tube and remove it from the tire to inspect both the tube and tire for the source of the puncture. Common culprits include embedded glass, thorns, nails, or sharp edges on the rim. If you find debris, remove it and check the surrounding tire walls. If you can’t locate a clear cause, examine the tire’s interior for threads or splits; a damaged tire can cause repeat flats even after a patch or tube replacement.
Repair options: patch, plug, or replace the inner tube
If the puncture is small and the patch kit is fresh, you can patch the tube following the kit’s instructions. Ensure the area around the puncture is clean and roughened, then apply the patch and hold it in place long enough for a good seal. If the tube has a large hole, is cracked, or if the bead is damaged, replacing the tube is usually faster and more reliable. In a pinch, a temporary plug or emergency patch can buy time until you reach a shop.
Reinstalling: seating the tube and tire correctly
Inflate the tube just enough to give it shape, then place it inside the tire. Align the valve with the rim hole, and tuck the tube in evenly before seating the tire beads. Start at the valve and work in both directions to avoid pinching. When the beads are seated, you can begin inflating slowly, stopping if you feel resistance or hear escaping air; this is a sign the tire isn’t seated properly.
Inflation and a final test ride
Inflate to the manufacturer-recommended pressure range for your tire and rim width, then spin the wheel to check for wobbles or leaks. A quick road test confirms the fix and ensures there are no obvious issues like slow leaks or misalignment. If the tire loses air quickly, recheck for bead seating and any embedded debris that could rub a hole in the tube.
Pro tips and common mistakes to avoid
Pro tip: carry a spare inner tube sized for your tire and a compact pump for on-the-road repairs. A common mistake is underestimating the importance of rim tape and inspecting it for wear. Also, always inspect the outside tire for embedded objects after removing the tube; rerolling a sharp object through the tube is a repeatable failure that wastes time. The BicycleCost analysis highlights that proactive maintenance and proper reinflation are key to minimizing flats over time.
Data-backed guidance and prevention: keep the ride rolling
Regular maintenance reduces flat risk. Check tire pressure according to the tire’s written range and adjust for load, weather, and terrain. Examine the tire’s tread, rim tape, and valve gradually; replace worn parts before they fail. BicycleCost analysis, 2026, supports that a simple inspection routine combined with timely part replacement dramatically lowers the chance of a late-ride puncture and helps you ride with more confidence.
Tools & Materials
- Spare inner tube(Choose correct diameter and width for your tire)
- Tire levers (2)(Plastic levers preferred to avoid rim scratches)
- Patch kit or glue(If patching, ensure glue and patches are fresh)
- Multitool with small knife(Helpful for removing debris seals)
- Portable pump or CO2 inflator(Reinflate after repair)
- Tire boot (optional)(Used for sidewall damage if patching)
- Rag or gloves(Keeps hands clean and protects from sharp edges)
Steps
Estimated time: 20-40 minutes
- 1
Move to a safe area
Relocate your bike to a flat, well-lit space away from traffic and obstacles. This single action sets the stage for all subsequent repairs and reduces risk of injury or bike damage.
Tip: Keep a small repair kit within easy reach so you don’t scramble mid-task. - 2
Release brakes and remove the wheel
Disengage the brake mechanism if necessary and loosen the quick-release lever or axle nuts. Carefully remove the wheel from the frame, avoiding abrupt movements that could pinch the tube.
Tip: If your bike uses rim brakes, note the orientation of any spacers or washers before removing the wheel. - 3
Remove tire bead and take out inner tube
Insert a tire lever under the tire bead and pry it over the rim. Work your way around until the bead is fully released, then pull the inner tube out from the valve stem and inspect for damage.
Tip: Werk calmly to prevent tearing the tire or pinching the tube. - 4
Inspect puncture and decide repair method
Examine the tube for the puncture and the tire for embedded objects. If the hole is small and patchable, prepare the area and apply a patch; otherwise replace the tube. Also check the rim tape for sharp edges that could cause future leaks.
Tip: If you can’t find a puncture after inspection, replace the tube to avoid surprising leaks later. - 5
Patch or replace the inner tube
If patching, roughen the area around the puncture, apply the patch, and press firmly. If replacing, fit the new tube back into the tire, keeping the valve aligned with the rim hole.
Tip: Test the patch by inflating the tube a little before reinserting into the tire to ensure it holds air. - 6
Reinstall the tire and tube
Carefully tuck the tube into the tire, align the valve, and reseat the tire beads evenly around the rim. Ensure the tube isn’t twisted or pinched as you work the beads back into place.
Tip: Start at the valve and work outward to minimize pinching the tube. - 7
Inflate and test the repair
Inflate gradually to the recommended pressure and check for leaks. Spin the wheel to confirm smooth seating and no wobble, then reattach the wheel to the bike and take a short test ride.
Tip: If you hear escaping air, stop and recheck bead seating and tube alignment.
People Also Ask
What equipment do I need to fix a flat tire?
Essential items include a spare inner tube, tire levers, patch kit or glue, a pump or CO2 inflator, and a multitool. Having these on hand speeds up repairs and reduces roadside stress.
You’ll need a spare tube, tire levers, a patch kit, a pump or CO2 inflator, and a multitool.
Can I fix tubeless tires without removing an inner tube?
Tubeless tires don’t involve an inner tube. Repairs rely on sealant, plugs, or bead seating. For a tubeless puncture, you typically seal the hole and recheck bead seating.
Tubeless tires don’t have an inner tube, so you seal the puncture and ensure the bead is seated.
How do I know whether to patch or replace the inner tube?
Choose patching for small punctures on the tube if the patch is fresh and the tube wall remains intact. If there is a large hole, tire wounding, or multiple punctures, replace the tube for reliability.
Patch small punctures if the tube wall is intact; otherwise replace the tube.
How long does it typically take to fix a flat?
A typical roadside repair takes about 20 to 40 minutes, depending on tire type, tools on hand, and experience. With practice, you can shorten this to under 20 minutes.
Most fixes take about 20 to 40 minutes, quicker with practice.
What pressure should I inflate to after a repair?
Inflate to the tire’s specified pressure range printed on the tire sidewall, adjusting for rider weight and terrain. Avoid overinflating, which can cause blowouts or harsh rides.
Inflate to the tire’s recommended range and adjust for rider weight.
What maintenance helps prevent flats in the future?
Regularly inspect tires for embedded objects, maintain correct tire pressure, replace worn tires, and check rim tape for sharp edges. A small maintenance routine reduces the chance of future flats.
Check tires for debris, keep proper pressure, and inspect rims routinely.
Watch Video
Quick Summary
- Assess the area and safety before starting
- Choose patching vs replacing based on damage
- Align the tube and beads to avoid pinching
- Inflate gradually and test for leaks
- Regular maintenance reduces future flats