Bicycle Chain Cleaning: A Practical How-To Guide 2026
Learn to clean your bicycle chain effectively with this educational guide. Discover the right tools, safety tips, and a clear step-by-step process to keep your drivetrain quiet, efficient, and long-lasting.

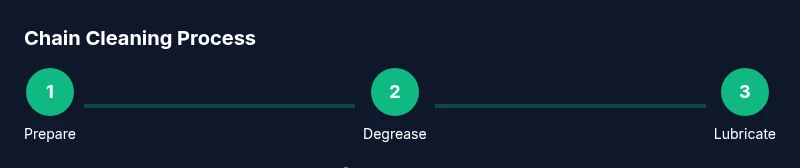
Within minutes, you’ll learn to clean and relubricate a bicycle chain using degreaser, brushes, and a suitable lubricant. A clean chain shifts more smoothly, lasts longer, and protects your drivetrain. This guide covers both on-bike and off-bike methods, essential safety tips, and a clear step-by-step process you can repeat weekly or monthly.
What is bicycle chain cleaning and why it matters
Bicycle chain cleaning is the process of removing dirt, grime, and old lubricant from the chain to restore smooth operation. According to BicycleCost, regular bicycle chain cleaning helps maintain drivetrain efficiency and prolongs chain life. A clean chain reduces wear on the sprockets and chainrings, improves shifting accuracy, and lowers the risk of rust and chain slip. For most riders, a weekly or monthly routine is sufficient, depending on riding conditions and climate. In this guide, we’ll cover why it matters, what tools you need, and a clear, step-by-step method that works on most bikes, including road, mountain, and hybrid setups. Regular cleaning also protects your investment by minimizing metal-on-metal wear and reducing drag that can sap power during climbs.
BicycleCost’s approach emphasizes safety, simplicity, and repeatability. By building a routine around your riding schedule, you’ll keep the drivetrain in good shape and avoid expensive repairs later. Keep a dedicated cleaning area, use the right degreasers, and choose lubrication appropriate for your climate and riding conditions. This foundation helps you ride with confidence and reduces the chance of stubborn grime affecting performance.
How dirt affects your drivetrain
Dirt and grime act like abrasive particles when they get between chain links and gears. Over time, this grit wears away the pins, rollers, and tooth profiles, accelerating chain stretch and sprocket wear. A dirty chain also attracts more dirt, creating a vicious cycle that bogs down shifting and increases chain slip. In dry, dusty environments, neglecting cleaning can shorten chain life by weeks rather than months; in wet, muddy climates, buildup accelerates wear even faster. Regular chain cleaning reduces friction, ensures more precise shifts, and helps maintain the efficiency of every pedal stroke. The result is a smoother ride and less energy wasted fighting a gritty drivetrain.
Essential tools for bicycle chain cleaning
To perform effective bicycle chain cleaning, you’ll need a small toolkit dedicated to this task. The essentials include a bike-specific degreaser, a stiff brush or chain-cleaning brush, lint-free rags, a bucket or basin of warm water, and a lubricant suited to your riding conditions. Optional but helpful items include a chain-cleaning tool, an old toothbrush for stubborn grime, and a chain wear gauge to monitor chain stretch over time. Invest in a pair of nitrile gloves to protect your hands from solvents. With the right tools, you can achieve a thorough cleaning without damaging surrounding components.
On-bike cleaning vs. removing the chain
On-bike cleaning is convenient for quick maintenance, especially when you don’t want to remove the chain. It works best with a chain-cleaning tool or a rag wrapped around the chain while the bike is stationary. Off-bike cleaning (removing the chain) allows for a more thorough scrub, inspection of each link, and easier access to inner roller surfaces. If you ride a modern drivetrain with sealed bearings, on-bike cleaning with a dedicated spray degreaser is often sufficient for routine maintenance. For deep cleaning, removing the chain provides the clearest view of wear and allows you to check for stiff links or damaged plates.
Deep cleaning with chain scrubber vs. degreaser
Degreasers are designed to dissolve old lubricants from the chain, but their strength varies. A dedicated bike degreaser is gentler on plastics and bearings than household solvents. A chain scrubber tool can hold degreaser and rotate the chain through the solvent for uniform cleaning. For best results, apply degreaser, let it sit for a minute or two, then scrub all sides of each link, focusing on the inner plates where grime hides. Rinse with clean water and dry thoroughly before relubricating. Always follow the manufacturer’s instructions and work in a well-ventilated area.
Step-by-step approach: on-bike chain cleaning
On-bike chain cleaning is efficient for routine maintenance. Start by securing the bike, applying degreaser to the chain while preventing spray from hitting the brakes and derailleur. Use a brush to scrub the outer plates, then rotate the crank to bring new areas into contact with the cleaner. Wipe away loosened grime with a rag and repeat until the chain surfaces look clean. Finally, rinse off residue with a damp cloth and let the chain dry before applying lubricant. This approach keeps the drivetrain functional without disassembly for most riders.
Lubrication and timing after cleaning
Lubrication is the final essential step after a thorough clean. Choose a lubricant suited to your riding conditions: dry lube for dry climates to minimize dust attraction, and wet lube for wet conditions to maintain film strength. Apply a drop to each link as you slowly rotate the pedals, ensuring even coverage on the inner and outer plates. Allow a few minutes for the lubricant to penetrate, then wipe off any excess with a clean cloth. Excess lubricant attracts dirt and can cause splatter on your frame and components.
Common mistakes and safety tips
Common mistakes include using too much degreaser, neglecting to dry the chain completely, and applying lubricant in a thick, uneven coat. Always work in a well-ventilated area when using solvents, and wear gloves to protect your skin. Avoid getting degreaser on braking surfaces or pulleys, and never force the chain through tight links when removing it. If a link feels stiff or sounds gritty after cleaning, inspect the chain for wear or misalignment and replace if necessary.
Maintenance frequency and long-term care
A general maintenance cadence is to clean and relubricate the chain every one to four weeks, depending on riding conditions and mileage. In dry, dusty environments, more frequent cleaning is beneficial, while in clean, dry conditions less frequent cleaning may be sufficient. Periodically inspect the chain for stretch using a wear gauge and replace the chain before excessive wear stretches to the point of gear misalignment. Pair cleaning with regular drivetrain checks to keep everything running smoothly.
Advanced options and cost considerations
Investing in a quality chain-cleaning tool can save time and ensure consistent results. If budget allows, consider a spray degreaser that minimizes waste and a high-quality dry or wet lubricant appropriate for your climate. For cyclists with coated or sealed drivetrains, pay attention to the manufacturer’s recommendations on lubrication frequency and type. Replacing worn chains promptly prevents accelerated wear of the cassette and chainrings, offering long-term cost savings even if upfront expenses are higher.
Quick reference and troubleshooting
If you notice persistent squeaking after cleaning, recheck for residual grime, ensure complete drying, and verify that you didn’t remove a safety clip or misalign a derailleur cage. If shifting remains gritty, inspect the cassette teeth and chain for wear and consider replacing both if wear is evident. For rusty chains, assess whether cleaning restores function or if replacement is warranted based on the degree of rust and chain stretch.
Extra tips from BicycleCost
A simple routine—designate a dedicated cleaning area, gather your tools, and set aside 20–30 minutes per session—can dramatically improve drivetrain reliability. Document your maintenance, track chain wear with a gauge, and adjust your lubrication frequency with the seasons. With consistent care, you’ll enjoy smoother shifts, quieter operation, and longer chain life. The BicycleCost team recommends building this habit into your weekly or monthly maintenance cycle.
Tools & Materials
- Bike-specific degreaser(Choose a product labeled safe for bike parts and avoid acetone.)
- Stiff brush or chain-cleaning brush(Prefer stiff nylon or brass for durability; avoid metal scrapers.)
- Lint-free rag or microfiber cloth(Several for wiping and drying.)
- Bucket or basin of warm water(Mildly warm water helps lift grime.)
- Chain-cleaning tool (optional)(Holds degreaser and rotates chain for thorough cleaning.)
- Old toothbrush (optional)(Good for stubborn grime in tight links.)
- Nitrile gloves(Protect hands from solvents.)
- Lubricant (wet or dry, based on climate)(Apply after cleaning and drying the chain.)
- Chain wear gauge (optional)(Helps determine when to replace the chain.)
Steps
Estimated time: 25-45 minutes
- 1
Prepare workspace and safety gear
Set up a clean, ventilated area. Put on gloves and safety glasses if desired. This reduces skin contact with solvents and keeps your area tidy.
Tip: Arrange tools within arm's reach to minimize movement and spill risk. - 2
Clear the workspace
Remove any items that could be damaged by solvents or brushed grime. A stable surface prevents accidents while you work on the bike.
Tip: Protect the floor with a drop cloth or old towel. - 3
Position the bike and secure it
Shift to the smallest chainring and largest rear cog to provide slack on the chain. Use a stand or balance the bike on a solid surface if a stand isn’t available.
Tip: If available, use a bike stand to keep wheels off the ground. - 4
Apply degreaser to the chain
Direct degreaser onto the chain while keeping spray away from brakes and pulleys. Allow a brief dwell time to loosen old lubricant and grime.
Tip: Avoid soaking bearings; keep degreaser off carbon components. - 5
Scrub the chain thoroughly
Use a stiff brush or chain-cleaning tool to scrub all sides of each link. Rotate the crank slowly to expose every link to the cleaner.
Tip: Focus on inner plates where grease hides. - 6
Rinse and dry the chain
Rinse away loosened grime with clean water. Wipe the chain dry with a clean rag and let it air-dry for a few minutes to ensure no moisture remains.
Tip: Drying is essential before lubrication to prevent solvent trapping. - 7
Inspect for wear and damage
Check for stiff links, bent plates, or noticeable wear. Use a chain wear gauge if available to decide whether to replace the chain.
Tip: Replace chain if stretch is noticeable to avoid cassette wear. - 8
Reinstall the chain (if removed)
If you removed the chain, reinstall it ensuring full engagement with both chainrings and the cassette. Spin the crank to confirm smooth movement.
Tip: Double-check that the chain isn’t twisted or kinked. - 9
Lubricate the chain
Apply a thin layer of lubricant to each link as you slowly rotate the crank. Ensure coating on inner plates but avoid thick buildup.
Tip: Only a light film is needed; excess attracts dirt. - 10
Wipe off excess lubricant and test ride
Wipe away any visible excess and lightly test shift through gears. A quiet, smooth chain indicates successful lubrication.
Tip: Take a short test ride to verify shifting in different gears.
People Also Ask
How often should I clean my bicycle chain?
Frequency depends on riding conditions. Daily riders or dusty environments may benefit from weekly cleanings, while casual riders can opt for monthly maintenance. Use your experience to tailor a routine that keeps the chain quiet and shifts clean.
Clean your chain regularly based on riding conditions; more frequent cleaning for dusty or wet environments helps keep shifting smooth.
Can I clean the chain without removing it?
Yes. On-bike cleaning with a chain-cleaning tool or rag wrapped around the chain can be effective for routine maintenance. For a deeper clean, remove the chain.
You can clean the chain without removing it for quick maintenance, but remove it if you need a deep clean.
What lubricant should I use after cleaning?
Choose a lubricant suited to your climate: dry lube for dusty, dry conditions and wet lube for wet or muddy conditions. Apply sparingly and wipe off excess after a few minutes.
Use dry or wet lube depending on weather, and apply a thin coat, then wipe off the excess.
Is a chain wear gauge necessary?
A wear gauge helps you determine when the chain has stretched beyond the safe limit, protecting your cassette and chainrings from accelerated wear. It’s a useful diagnostic tool but not strictly required for casual riders.
A wear gauge can help you know when to replace the chain to protect other drivetrain parts.
Is it safe to use household degreasers?
Prefer bike-specific degreasers as they are formulated for bike components. Avoid acetone or caustic household cleaners that can degrade seals and plastics.
Stick to bike degreasers to avoid damaging components.
What if my chain is rusty?
Light surface rust can sometimes be cleaned off, but heavy rust or stretched chains should be replaced to avoid failure. Inspect and replace as needed to protect your ride.
If the chain is heavily rusty, replace it to prevent derailleur and cassette damage.
Watch Video
Quick Summary
- Clean chains reduce wear and improve shifting
- Choose degreaser and lubricant based on climate
- On-bike cleaning is convenient for quick maintenance
- Drying before lubrication prevents solvent trapping
- Regular checks with a wear gauge help prevent cassette damage