How to Cycle at Home: Indoor Riding Guide for Beginners
Learn how to cycle at home with a safe setup, proper bike fit, warm-ups, and beginner drills. This BicycleCost guide covers space, equipment, maintenance, and starter workouts for confident indoor riding.

By the end, you’ll cycle at home safely and effectively with a properly set up indoor bike, correct seating and handlebar position, and a focused warm‑up cadence routine. You’ll perform essential safety checks, beginner drills, and simple maintenance you can do indoors. Ready to ride at home? This guide covers gear, technique, and injury prevention.
Setting up your space for indoor cycling
Creating a safe, comfortable space is the first step in learning how to cycle at home. Clear a dedicated area with at least 3 feet of clearance on all sides, a non-slip mat under the bike, and good ventilation. Position the bike so you can mount and dismount without twisting, and keep a water bottle within reach. A fan or open window can help regulate temperature during longer sessions. Remember that a well-lit, organized space reduces distractions and lowers the risk of accidents. Basic setup is the foundation for consistency, safety, and progress.
According to BicycleCost, the majority of indoor cyclists report higher adherence when their space feels dedicated rather than improvised. Start with a simple setup you can expand later: a bike or trainer, a stable floor mat, a clear path for safe mounting and dismounting, and a place to store your gear. Planning this before you ride makes your first session smoother and safer, and it signals to your body that indoors riding is a real training activity, not a casual chore.
Choosing the right indoor bike setup
Indoor cycling options range from a basic stationary bike to a wheel-on or direct-drive trainer that uses your regular bike. Your choice should fit your space, noise tolerance, and budget, but core principles apply to all: stability, smooth resistance, and a secure lock for the pedals. Ensure your bike or trainer is level on the floor; if you’re using a trainer, verify that the handlebars and saddle are aligned with your joints. Fit is critical: saddle height should allow a slight knee bend at the bottom of the stroke, fore-aft position should keep the knee over the pedal axle, and handlebar height should support a comfortable upright or slightly forward posture. For most beginners, starting with a basic setup and gradually adding features (like a cadence sensor or fan) helps sustain motivation and adherence.
Warm-up and basic cycling technique
Begin every session with a deliberate warm-up: 5-10 minutes of easy spinning at a light resistance, followed by dynamic hip and ankle mobilizations. Aim for a cadence of about 60-90 RPM, depending on comfort, so you can maintain a smooth pedal stroke without bouncing in the saddle. Focus on a neutral spine, relaxed shoulders, and a natural breathing rhythm. As you pedal, think about circular motion—pull up with the hamstrings slightly as you push down with the quads—to promote efficiency and reduce knee strain. Practice shifting gears progressively if your equipment allows, keeping transitions smooth and avoiding abrupt resistance changes.
Training plans for beginners
A solid beginner plan balances consistency and gradual progression. Start with 3 sessions per week, each 20-30 minutes, and gradually increase to 30-45 minutes as your confidence grows. Include one steady, moderate-effort ride (RPE 4-5/10) and one light interval session (e.g., 1-2 minutes hard, 2 minutes easy, for 4-6 cycles). The third ride can be a longer, continuous session at a comfortable pace. Progressive overload is key: increase either duration by 5-10 minutes or slightly raise resistance every 1-2 weeks. Keep a simple log of distance, time, and perceived effort to visualize progress and stay motivated.
Safety and injury prevention
Proper form minimizes injury risk. Maintain a neutral spine, avoid “sinking” the chest, and keep elbows soft rather than locked. Knees should track in line with the feet, with no excessive inward or outward movement during the pedal stroke. If you experience knee, hip, or lower back pain that persists after a few minutes of riding, stop and reassess fit and technique. Hydration, adequate rest, and gradual progression help prevent overuse injuries. If you have pre-existing conditions, consult a clinician or physiotherapist before starting indoor cycling.
Maintenance and care
Regular maintenance extends the life of your indoor bike or trainer. Wipe sweat from the frame and drivetrain after each session to prevent corrosion. Check bolts (saddle, handlebars, and pedals) weekly and tighten as needed with an appropriate tool. If you ride a bike-on-trainer, inspect the resistance mechanism and any contact points for wear. Keep the chain lubricated (as appropriate for your drivetrain) and ensure the belt or flywheel remains clean and free of debris. A quick monthly check of tire pressure (for real bikes on trainers) helps prevent flats and preserves rolling efficiency.
Common mistakes and how to fix them
Common missteps include a high, rigid upper body posture, excessive grip on the handlebars, and letting the knees drift inward during the pedal stroke. Fix: reset your posture with a light, balanced grip and a spine-lengthening cue, keep your shoulders relaxed, and guide your knees over the pedals rather than letting them angle in or out. Another frequent error is riding at too high resistance too soon; start with lower resistance and focus on pedal technique before adding overload. Finally, inconsistent breathing can steal stamina; practice steady, diaphragmatic breathing to improve endurance and performance.
Quick workouts you can try at home
Begin with a 20-minute, three-part structure: 5 minutes easy warm-up, 10 minutes moderate steady effort, 5 minutes easy cooldown. For variety, swap in a 4x1-minute intervals (1 minute hard, 2 minutes easy) twice per week. If your equipment supports it, add one longer ride on the weekend of 40-50 minutes at a comfortable pace. Always finish with light mobility work for ankles, hips, and back to improve recovery and flexibility.
Progress tracking and motivation
Tracking progress helps you stay motivated and accountable. Record time, distance, cadence, and perceived exertion after each ride. Set short-term goals (two more minutes of steady riding this week) and long-term targets (a 60-minute ride with consistent cadence). Periodically review your log to identify patterns and adjust plans. Based on BicycleCost research, cyclists who track metrics tend to maintain adherence and experience faster skill gains. The BicycleCost team also recommends pairing rides with a simple mobility routine to support endurance and prevent stiffness.
Tools & Materials
- Indoor cycling bike or trainer(Ensure stability and quiet operation; confirm compatibility with your space)
- Floor mat(Non-slip, 1-2 cm thick; protects floor and reduces noise)
- Water bottle(Within reach; stay hydrated during sessions)
- Towel(Small, absorbent; handy for quick dries)
- Fan or cooling device(Maintain comfortable temperature; helps prevent overheating)
- Allen wrenches / basic bike tools(For adjustments and safety checks)
- Heart-rate monitor (optional)(Useful for pacing and training zones)
- Proper cycling shoes (optional)(If pedals support SPD or similar systems)
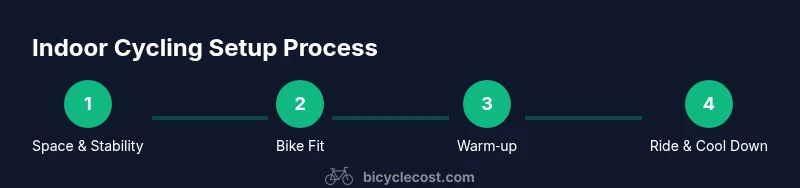
Steps
Estimated time: 30-45 minutes
- 1
Prepare your space and equipment
Clear the area, position the bike, and gather water and a towel. Check that the mat is flat, the bike is stable, and the route for mounting is free of obstacles. This preparation reduces distractions and sets you up for a safe session.
Tip: Do a quick visual check for loose cables or items that could trip you. - 2
Set up bike fit
Stand beside the bike and adjust the saddle height so there’s a slight bend in the knee at the bottom of the pedal stroke. Align the knee with the pedal axle and ensure the fore-aft position keeps your knee over the foot. Set handlebar height to a comfortable, neutral position.
Tip: Make small adjustments and test ride for 2–3 minutes before committing. - 3
Warm up
Pedal at a low resistance for 5–10 minutes, gradually increasing cadence to reach a light sweat. Include a few ankle circles and hip openers to mobilize joints and improve range of motion.
Tip: Aim for a cadence that feels easy and controlled, not rushed. - 4
Begin a beginner workout
Start with 15–20 minutes at a moderate pace, maintaining a steady breathing pattern. If you’re using intervals, try 1–2 minutes of work followed by 2 minutes of easy pedaling, repeating 3–5 times.
Tip: Monitor effort with perceived exertion; you should be able to talk in short sentences. - 5
Cool down and stretch
Gradually reduce resistance and pedal slowly for 3–5 minutes, then perform gentle stretches for calves, quads, hamstrings, and lower back. Hydrate and wipe down the bike to prevent sweat damage.
Tip: Hold each stretch for 15–30 seconds and breathe deeply. - 6
Maintenance & safety checks post-ride
Inspect bolts, clean sweat from the frame, and ensure pedals and drivetrain are secure. Store your gear neatly to avoid clutter and reduce stumble risks during the next session.
Tip: Record any adjustments needed for the next ride.
People Also Ask
Do I need a special bike to cycle at home, or can I use any bike?
You can start with a basic indoor bike or a trainer using your own bike. Fit and stability matter most, so ensure the setup is secure and comfortable.
You can start with a basic indoor bike or trainer using your own bike. Focus on a secure, comfortable fit.
How long should a beginner ride on their first weeks?
Begin with 15–20 minutes per session, 3 times a week, and gradually increase to 30–45 minutes as you build endurance.
Start with 15 to 20 minutes, three times a week, then increase as you feel stronger.
What clothing or gear is essential for indoor cycling?
Comfortable athletic wear and a pair of well-fitted cycling shorts help reduce friction. Shoes that fit your pedals improve efficiency if you have compatible cleats.
Wear comfortable clothes and, if possible, cycling-specific shorts and compatible shoes.
Can indoor cycling aggravate knee pain?
Knee pain can indicate poor fit or technique. Stop riding if pain persists, reassess saddle height, and consult a professional if needed.
If knee pain persists, stop riding and check your fit; consult a professional if needed.
Is a heart-rate monitor necessary for beginners?
A heart-rate monitor is optional but helpful for pacing. In its absence, use perceived exertion to guide effort.
Not required, but useful for pacing. If you don’t have one, use how hard you feel you’re working.
Watch Video
Quick Summary
- Create a dedicated, safe cycling space.
- Get a proper bike fit before riding.
- Warm up, ride with steady cadence, and cool down.
- Progress gradually to avoid injury.
- Maintain and inspect equipment after each session.