How to Bike at Home: The Complete Indoor Cycling Guide
Learn how to bike at home with a safe setup, proper gear, and a progressive workout plan. This guide covers space, bike fit, workouts, progression, and motivation for all levels.

You can bike at home using a stationary bike or a wheel-on trainer. Set up a safe, well-ventilated space with a mat, fan, water bottle, and towel. Ensure proper bike fit, pedal straps, and a stable trainer. Start with a 5–10 minute warmup, then structured intervals, and finish with a cooldown and stretch.
Why bike at home: benefits and safety
Riding at home gives you flexibility and reliability, especially during weather changes or busy schedules. It also lets you tailor workouts to your own goals, whether you’re chasing endurance, cadence, or FTP. According to BicycleCost, consistent indoor cycling can help you preserve cardio fitness when outdoor rides are impractical. The BicycleCost team notes that indoor sessions reduce variability caused by terrain, wind, and traffic, enabling precise training loads and safer progression. Before you start, acknowledge safety: clear a space, secure equipment, and ventilate the room. Indoor riding is not a substitute for real-world riding in all contexts, but for most cyclists it’s an effective, convenient complement. In this guide, you’ll learn how to establish a robust indoor setup, choose the right gear, and follow a progressive workout plan that fits your schedule and space. Think about your goals: if you’re training for endurance rides, you’ll emphasize longer steady rides; for sprints, you’ll use short, high-intensity intervals. Consider your home layout: a quiet corner with good ventilation reduces distractions and accident risk. If you’re hesitant about buying new gear, start with what you have—some riders use a sturdy bike mounted on a basic trainer with a floor mat. The key is consistency: a regular rhythm beats sporadic, long sessions.
Essential gear and space setup
Create a dedicated space with enough room to swing your legs freely and to move off the bike without bumping walls or furniture. A non-slip floor mat helps protect the floor and stabilizes the trainer. Position the setup near a fan or open window for ventilation and airflow. Keep a water bottle within arm’s reach and have a towel handy. A timer or smartphone stand makes it easier to structure workouts and track progress. If you own a traditional bicycle instead of a dedicated indoor bike, ensure you have a compatible trainer or stand and a front-wheel riser to keep the bike level during workouts. The goal is a simple, safe, and repeatable arrangement that you can use consistently, regardless of weather or schedule. A well-organized space reduces setup time and increases adherence to your plan. The BicycleCost team emphasizes that a consistent, safe environment is the foundation of effective indoor training.
Bike fit and trainer setup
A proper fit is the backbone of comfortable, efficient indoor riding. Start by checking saddle height: when seated, your leg should have a slight bend at the bottom of the pedal stroke. Adjust fore-aft position so you can pedal smoothly without rocking your hips. Ensure handlebars place you in a comfortable reach that doesn’t strain your neck or shoulders. If you’re using a wheel-on trainer, center the rear wheel carefully and secure it so it does not slip. For direct-drive trainers, ensure the cassette aligns correctly with your chain and that the trainer’s clamps are tight. Check that the crankset and pedals are secure, and consider using pedal straps if your shoes don’t clip in. Finally, set a moderate initial resistance so you can maintain good form without bouncing in the saddle. A stable, comfortable setup makes longer sessions sustainable and reduces the risk of injury.
Workout structure: building a beginner-to-advanced plan
Indoor workouts can be organized around three core phases: warm-up, main set, and cooldown. Start with a light warm-up to prepare your muscles and joints, then move into a main set that alternates between moderate steady efforts and easier recovery periods. As you gain comfort, introduce longer efforts, cadence-focused blocks, and occasional higher-intensity intervals to improve power and speed. End with a cooldown to gradually reduce heart rate and stretch major muscle groups. Throughout, keep cadence as a guiding metric—aim for a comfortable, sustainable rhythm that allows you to maintain form. If you track zones, use them to structure each session so you train safely and effectively. The key is gradual progression and consistency, not extreme sessions. BicycleCost’s framework supports a steady build in indoor cycling that complements outdoor rides and helps you stay on track year-round.
Weekly plan and progression
A practical weekly rhythm includes multiple indoor sessions interspersed with rest or light activity days. Begin with a modest number of sessions per week and progressively build frequency or duration as your body adapts. Use variety to address endurance, cadence, and power development: some days focus on longer, steadier efforts; others emphasize faster, shorter intervals; and still others emphasize technique and form. Pair workouts with mobility work and easy recovery strategies such as light stretching and adequate sleep. Tracking your sessions helps you stay motivated and aware of progression. The BicycleCost team stresses that steady, repeatable routines outperform sporadic, lengthy efforts when building long-term habits. Over time, you’ll notice improvements in comfort, cadence control, and perceived exertion during both indoor and outdoor rides.
Common mistakes and troubleshooting
Common mistakes include letting a loud trainer or a poorly aligned setup distract you, neglecting a proper warm-up, and riding with poor posture that stresses the back or neck. Noise can be minimized by tightening bolts, using a mat for vibration dampening, and ensuring the bike sits squarely on the trainer. If you feel saddle soreness, revisit saddle height, fore-aft position, and padding; a small adjustment can make a big difference. Drivetrain noise can indicate misaligned chain or loose components—check maintenance basics and re-lube if needed. If ventilation is insufficient, use a larger fan or adjust room placement to improve airflow. Finally, avoid overreaching during intervals by keeping your shoulders relaxed and your wrists straight. These small checks and adjustments help keep indoor riding comfortable and safe across sessions.
Safety, ventilation, and recovery
Safety begins with a solid setup and clear space boundaries. Install your trainer or bike on a stable surface, away from walls, and keep a clear exit path. Ventilation matters: a fan or window helps with cooling and sweat management. Hydration is essential, so keep water close and take fluids between efforts. Recovery features in as much as you do: allow your muscles to rest between sessions and prioritize sleep, nutrition, and mobility work. If you have any history of joint problems or back pain, consult a clinician before starting an intensified indoor regimen. Consistent, balanced routines with adequate rest reduce injury risk and improve long-term adherence.
Track your progress and stay motivated
Tracking progress is about more than miles or watts; it’s about consistency, form, and personal growth. Maintain a simple log of each session: what you trained, how you felt, and any adjustments you made to fit or position. Periodically reassess fit and technique to ensure ongoing comfort. Milestones—like easier cadence maintenance or longer intervals—signal progress even when the numbers stay modest. Use music, a motivational playlist, or virtual cycling events to stay engaged, and celebrate small wins along the way. The BicycleCost team recommends tying your indoor progress to your outdoor goals, so you see a clear through-line from your home workouts to real-world cycling performance.
Tools & Materials
- Stationary bike or bike trainer(Choose one that fits your bike size and space.)
- Anti-slip floor mat(Protects floor and stabilizes equipment.)
- Water bottle(Stay hydrated during workouts.)
- Towel(Wipe sweat as needed.)
- Fan or ventilation(Keeps you cool and comfortable.)
Steps
Estimated time: 45-75 minutes
- 1
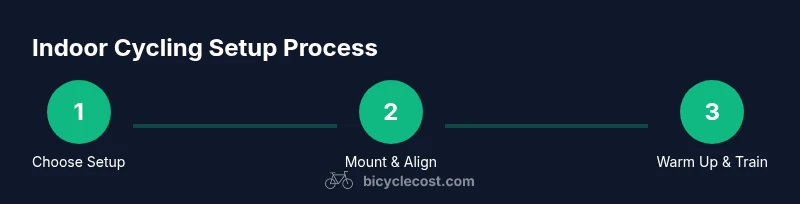
Choose and prepare your indoor setup
Identify a comfortable, ventilated corner with enough space to move around the bike. Clear clutter, position the mat, and ensure the trainer or bike is stable. This step sets the stage for safe, repeatable workouts.
Tip: Double-check stability before mounting the bike. - 2
Mount the bike onto the trainer or set up the bike
Secure the bike to the trainer or position the stationary bike on a flat surface. Make sure rear wheel height and centering align with the trainer’s clamps or frame mounts.
Tip: Tighten all clamps and mount points firmly to prevent slippage. - 3
Adjust saddle height and fore-aft position
Set saddle height so your knee has a slight bend at the bottom of the pedal stroke. Move the saddle forward or back to align knee over pedal spindle during the pedal circle.
Tip: Small adjustments can dramatically improve comfort and efficiency. - 4
Align handlebars and center your weight
Position the handlebars so you aren’t leaning excessively forward or hunching your back. Your torso should feel balanced over the pedals with light, relaxed shoulders.
Tip: Keep a neutral spine; avoid locking your elbows. - 5
Set resistance and cadence cues
Choose a baseline resistance that allows you to maintain good form without bouncing. If you use a cadence sensor, aim for a steady, comfortable rhythm rather than maxing out effort.
Tip: Focus on smooth, controlled pedal strokes rather than raw power. - 6
Warm up properly
Begin with a light, easy pedal to wake up muscles and joints. Gradually raise intensity to prepare your body for the main set.
Tip: Avoid jumping into high effort; build readiness gradually. - 7
Run a structured workout (intervals or steady work)
Implement your planned workout structure, alternating between effort blocks and recovery periods as appropriate for your goals.
Tip: Prioritize form over speed during intense blocks. - 8
Cool down and stretch
Ease back to an easy pace and finish with gentle stretches for the hips, hamstrings, and lower back to aid recovery.
Tip: Hydrate and rehydrate post-workout. - 9
Cleanup and store equipment
Wipe down the bike, check bolts, and store the mat and trainer away from direct heat or moisture after workouts.
Tip: Keep a regular maintenance checklist to extend gear life.
People Also Ask
Can I bike indoors without special equipment?
Yes, you can begin with what you have if you don’t own a trainer, but for a stable setup a bike trainer or a stationary bike is highly recommended. It will improve safety and allows you to maintain proper form.
Yes, you can start with basic gear, but a trainer or stationary bike makes indoor riding safer and more effective.
How do I ensure my bike fits on a trainer?
Check that the frame is supported securely, the rear wheel is centered, and the trainer clamps are tightened. Adjust saddle height and reach after mounting to maintain proper alignment.
Secure the frame, center the wheel, and adjust height and reach after mounting.
What is a safe warm-up for indoor cycling?
Begin with a light spin to wake up muscles, gradually increasing pace and resistance until you feel ready for the main set. This reduces injury risk and improves performance.
Start easy, then gradually increase pace and resistance.
How long should beginner indoor cycling sessions last?
Begin with shorter sessions and gradually extend as your fitness improves. Focus on consistency and form rather than duration in the early stages.
Start short and build up gradually, focusing on form and consistency.
How do I prevent saddle soreness?
Ensure proper saddle height and fore-aft position, use padding if needed, and alternate saddles or shorts to reduce pressure points. Take breaks if soreness appears.
Adjust your position and padding, and don’t ignore persistent soreness.
What if my space is small?
Choose a compact trainer or foldable bike and keep the area tidy. Use wall anchors or corner placement to maximize room without compromising safety.
Maximize a tight area by opting for compact gear and smart placement.
Watch Video
Quick Summary
- Set up a safe, dedicated indoor space before training
- Prioritize proper bike fit to maximize comfort and performance
- Follow a structured, progressive workout plan
- Track progress and stay motivated with consistent logs
- Maintain equipment and stay hydrated for safe sessions