Womens Bicycle Size Chart: Find Your Ideal Fit
Discover a comprehensive women's bicycle size chart to map inseam, stand-over height, and reach. Learn how to choose frame sizes, read charts, and test-fit for safer, more efficient rides with guidance from BicycleCost analyses (2026).

The primary data point is that women's bikes use inseam-based frame sizes (XS–XL) rather than men’s sizing, with stand-over clearance typically around 2–5 cm. Use a women's bicycle size chart to map your inseam to frame height and top-tube length; adjust with reach and stack as needed for comfort and pedaling efficiency.
Why sizing matters for women riders
Sizing is the foundation of comfort, efficiency, and safety on a bicycle. For women riders, sizing often centers on inseam-based frame heights and geometry that differs from unisex or men’s models. The BicycleCost team found that when fit isn’t addressed, riders report knee and lower-back strain during longer rides, reduced power transfer, and saddle discomfort. A precise size chart helps you translate measurements into a recommended frame range and then fine-tune with saddle height, setback, and handlebar reach. Beyond comfort, correct sizing improves pedal efficiency, weight distribution, and bike control on climbs, descents, and sprints. For most riders, starting with a chart that accounts for inseam and stand-over clearance can cut trial-and-error time in half. According to BicycleCost, using a size chart as a starting point also helps you compare brands and styles more effectively, which is essential in a market with dozens of women-specific frames.
- The inseam-to-frame link is the most reliable first-pass connector for frame height.
- Stand-over clearance ensures you can stop quickly without contacting the top tube.
- Reach and stack determine how comfortably you ride with proper saddle height and bar position.
- Style (road vs. hybrid vs. mountain) shifts the ideal frame geometry, so refer to brand-specific charts.
- Always test ride when feasible to validate fit beyond static measurements.
For riders seeking accountability in the process, a structured size chart reduces ambiguity and supports safer, more enjoyable cycling. The BicycleCost team recommends collecting measurements in a consistent set of conditions (barefoot, stand straight, no shoes) and cross-checking against at least two reputable charts before purchasing a new frame.
How to take accurate measurements
Getting precise measurements is the bridge between your body and a correctly sized bike. Start with an accurate inseam measurement, then gather height, torso length, and arm length to understand reach and standover. Use the following practical steps:
- Inseam: Stand with feet shoulder-width apart, a hardcover book between your legs, spine against the wall. Measure from the top edge of the book to the floor. Do this twice and record the average. This is your inseam.
- Stand-over height: With the bike upside down or during a fitting session, check the clearance between the top tube and your crotch when you stand flat-footed. The common goal is about 2–5 cm (1–2 in) of clearance for quick dismounts.
- Torso length and reach: Have a friend measure from your sternum to your wrist with arms extended forward to estimate reach. This helps refine top-tube length decisions and handlebar position.
- Height and arm length: Record your overall height and arm span to adjust lever reach and brake/shifter ergonomics.
When you finish measurements, map them to a size chart that correlates inseam and stand-over to frame sizes. If a chart uses centimeter inseams with a scale (e.g., XS–XL), select the frame size range that includes your inseam and then verify the stand-over clearance on the bike you test ride. Remember that fit isn’t just frame height; stack, reach, and saddle setback also drive overall comfort and efficiency.
Practical tip: Keep a small notebook with your measurements and your fit notes from test rides. This data helps you compare different brands and models reliably over time, reducing the chance you’ll buy a frame that feels wrong after your first few rides.
Reading a women's bicycle size chart: key metrics
A typical size chart translates a rider’s body measurements into frame geometry. The most critical metrics include inseam length, stand-over height, top-tube length, reach, and stack. Inseam length guides the seat-to-pedals relationship and frame height; stand-over height ensures you can straddle the bike with ease. Top-tube length and reach define how far you must lean forward to reach the handlebars, affecting core and neck comfort on longer rides. Stack height determines handlebar height relative to the bottom bracket, influencing riding posture and visibility. When you read charts, remember:
- Inseam-based sizes (XS–XL) are common for women’s frames, but not universal. Always cross-check with brand charts.
- Some brands list size by frame height only; others provide a recommended rider height, inseam, and preferred riding style.
- Rope in additional measurements (torso length, arm length) to ensure the cockpit is balanced for your body.
Structure your comparison by listing each chart’s recommended inseam range, stand-over height, and top-tube length. This practice makes it easier to see which models align with your measurements and riding goals. When possible, compare charts from at least two brands to identify consistent sizing signals and to spot brands that run notably larger or smaller than others. Pair chart data with a hands-on test ride to confirm that the frame geometry feels natural for your daily routes and chosen biking style.
How frame geometry affects fit: seat tube, top tube, reach
Frame geometry is the silent driver of comfort and efficiency. Subtle shifts in seat tube angle, top-tube length, and head tube angle translate into meaningful differences in how a bike responds under you. For women riders, a shorter top tube and a slightly different seat tube angle can improve steering control and reduce reach fatigue. Here’s how key elements affect fit:
- Seat tube length and angle influence saddle height and how far you sit forward or back on the saddle. A steeper seat tube can bring you closer to the handlebars, increasing reach.
- Top-tube length determines how stretched you are toward the handlebars. A longer top tube can improve stability at speed but may cause neck or back discomfort for shorter torsos.
- Reach and stack describe the actual distance to the handlebars and the vertical height of the handlebars respectively. Incorrect reach can create excessive back arch or compressed shoulders, leading to fatigue over long rides.
- Stand-over height interacts with top-tube geometry to ensure safe mounting and dismounting, especially for shorter riders.
When testing, evaluate not just the numbers on a chart but how your body feels during a short ride. If you experience persistent tension in the neck, lower back, or wrists, you may need a shorter top-tube size, a different stem length, or a taller handlebar. A well-fit bike will support a stable cadence, comfortable breathing, and confident control on varied terrain.
Step-by-step: using a size chart to pick your bike
Follow these practical steps to translate measurements into a concrete bike choice:
- Collect measurements: inseam, stand-over clearance, height, torso length, and arm length. Keep them organized.
- Identify the size range on a brand’s chart that aligns with your inseam and stand-over height. If you’re between sizes, note the geometry differences between options.
- Assess cockpit geometry: top-tube length and stack/reach must feel comfortable for your torso and arms. If you have long arms, you might prefer a longer reach, while shorter arms may benefit from a compact cockpit.
- Consider riding style: road bikes generally require different reach and stack than hybrids or mountain bikes. Choose a model whose geometry aligns with your intended use.
- Test ride and adjust: during a test ride, verify saddle height, fore-aft saddle position, and handlebar reach. Adjust the stem, seatpost, and saddle if needed.
- Validate with multiple sources: compare charts from at least two brands to identify sizing patterns and confirm you’re choosing within a robust sizing system.
By following these steps and staying mindful of your own comfort cues, you will select a frame that supports efficient power transfer, better control, and longer, happier rides. The goal is to transform a number on a chart into a truly comfortable, safe, and efficient riding experience.
Common mistakes and how to avoid them
New riders often rely solely on stand-over height or rely on a single chart without cross-checking. Common mistakes include selecting a frame that is too tall, ignoring cockpit geometry, and failing to account for riding style. To avoid these pitfalls:
- Do not rely on a single measurement; cross-check inseam with stand-over and top-tube length.
- Always validate fit with a test ride; static measurements cannot capture dynamic balance and pedal force.
- If between sizes, favor a smaller frame with a shorter stem or adjustable components rather than a larger frame with poor reach.
- Remember that charts vary by brand; a size labeled S on one brand may be closer to M on another. Use a two-brand cross-reference when possible.
- Consider ergonomic accessories (saddle with proper setback, handlebar grips, and bar width) to fine-tune fit instead of forcing a wrong frame size.
With careful measurement, cross-brand comparison, and test riding, you can avoid common fit mistakes and enjoy a comfortable, efficient cycling experience aligned with your body and riding goals.
Example sizing guide mapping inseam and stand-over to common bike styles
| Frame Size | Inseam Range (cm) | Stand-Over Height (cm) | Best For |
|---|---|---|---|
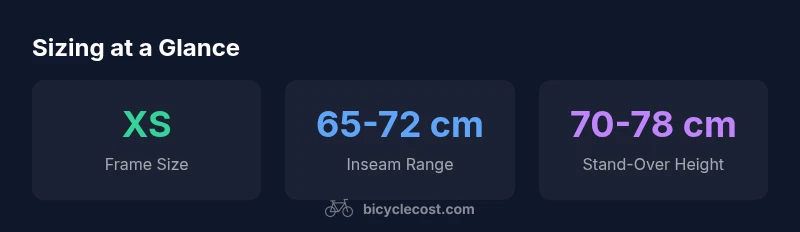
| XS | 65-72 | 66-72 | Road / City |
| S | 72-79 | 70-78 | Hybrid / Commuter |
| M | 79-87 | 78-86 | Road / Gravel |
| L | 87-94 | 86-94 | Touring / Mountain |
People Also Ask
What measurements do I need to determine my size?
You’ll want your inseam, stand-over height, height, torso length, and arm length. Use these measurements to map to a brand’s size chart and then verify with a test ride. Consistency in measurement method matters for reliable results.
Measure inseam, stand-over height, height, torso, and arm length; map to charts and confirm with a test ride.
Why are women's sizes not the same as men's sizes?
Women’s sizing often accounts for different frame geometry and proportions. That means charts for women may emphasize different top-tube lengths, reach, and stand-over clearance than men’s charts. Always consult brand-specific women’s sizing guidance.
Women’s sizes reflect different geometry; check brand-specific women’s charts for fit.
Can stand-over height alone determine size?
Stand-over height is important but not sufficient alone. It ensures you can straddle the bike safely, but you also need to consider reach, stack, and saddle height to avoid discomfort or overreaching.
Stand-over matters, but you must also check reach and saddle height.
What if I fall between two sizes?
If you’re between sizes, test ride both options. A smaller frame with a shorter stem can feel more responsive, while a larger frame offers stability. Accessories like adjustable stems or a different saddle may help.
Between sizes? Test both; consider stem changes or a different saddle.
Do size charts vary by brand?
Yes. Size charts vary across brands due to geometry and labeling conventions. Compare at least two brand charts and read both inseam and stand-over recommendations to avoid surprises.
Brand charts vary; compare multiple charts.
How should riding style influence size choice?
Your riding style influences required reach and cockpit comfort. Road bikes prioritize efficiency and a longer reach, while city or commuter bikes may benefit from a shorter top-tube for easier handling.
Riding style changes how much reach and height you need.
“Size accuracy isn't cosmetic—it's essential for efficiency and safety. Start with a women's size chart, then validate the fit with a real-world test ride and component adjustments.”
Quick Summary
- Measure inseam precisely and map to the chart.
- Check stand-over height for safe clearance.
- Consider reach and top-tube length for comfort.
- Test ride multiple sizes when between options.
- Brand charts vary; compare sources before buying.