What is wrong with my bike? An urgent troubleshooting guide
Urgent, practical guide to diagnose and fix common bike problems—from power and brakes to tires and drivetrain. Learn quick checks, a step-by-step troubleshoot flow, and prevention tips to get back on the road safely.

Most bike problems come from three quick-checks: a power or drive issue on e-bikes, worn brakes or gears, and a punctured or underinflated tire. Start with basics: verify power on pedal-assist systems, inspect brakes for rubbing, and test drivetrain movement. If symptoms persist, stop riding and seek professional assessment.
Symptoms you might notice and what they mean
When you ask, what is wrong with my bike, the first step is to describe what happened and what you felt. Common symptoms map to a handful of underlying issues. For instance, if the bike won't turn over or the motor won't engage on an e-bike, power delivery or battery problems are high on the list. If the brakes rub or drag, the braking system or wheel alignment is likely off. A soft, flat, or hard-to-roll tire points to tire pressure issues or a puncture. If gears won’t shift smoothly or chain skips, the drivetrain or derailleur might be misadjusted. If you hear grinding at the pedals or cranks, there could be a loose bottom bracket, worn bearings, or foreign debris in the crankset. By noting the exact symptom and when it happens (start-up, while riding, during braking, or under load), you can triage faster and avoid unnecessary repairs. According to BicycleCost, most bike problems come down to a few predictable categories: power/drive, contact and friction, and components wearing beyond their service limits. The BicycleCost team found that addressing the simplest, most common causes first saves time and reduces risk. In many cases, a 10–15 minute baseline check is enough to confirm whether a ride is safe to attempt or needs a pro.
Safety-first checks you can do on a stand
Before you ride again, put the bike on a repair stand or turn it upside down so you can inspect without weight on the wheels. Start with the basics: ensure the brakes are not engaged while pedaling, and check for any loose bolts on the handlebars, stem, seatpost, or crank arms. Verify that the front and rear wheels spin freely without rubbing and that the tires are properly inflated to the recommended pressure. If you notice wobble in the wheel, inspect for a loose quick-release skewer or loose nipples in the rim. For any electrical system, unplug the charger if you’re testing while the bike is powered down. Keep hands away from the chain while adjusting components, and wear gloves to prevent pinches. If any quick check reveals a dangerous condition—brakes that fail to release, a cracked frame, or a motor that overheats—do not ride and seek professional help immediately. These steps aren’t a substitute for a professional inspection, but they help you determine whether it’s safe to continue riding or if urgent repair is needed. Remember, routine maintenance reduces the odds of sudden failures.
Drivetrain and brakes: common failure modes
Shifting problems, chain skipping, or a crank that won’t turn smoothly are frequent symptoms of drivetrain wear or misalignment. Check that the chain is clean and properly lubricated, the derailleur hanger is straight, and the cassette or chainrings are not excessively worn. Worn brake pads reduce stopping power and can cause rotor scoring if the rotor is glazed or contaminated. Inspect brake rotors for warping and check that the pad contact is even on both sides. If you hear a rubbing sound when you pedal, look for a misaligned wheel or loose brake caliper. A dragging brake can heat up and deform rims or damage tires; fix or replace accordingly. If diagnosis suggests worn components, replace them in recommended order—pads first, then rotors, then drive components. Always test after adjustments with a slow, controlled ride to confirm resolution. When in doubt, consult a mechanic to verify precise alignment and component compatibility.
Electrical system (for e-bikes) and charging basics
For electric bikes, power issues can be subtle: a depleted battery, loose connectors, or a fault in the controller can prevent the motor from engaging. Start by checking battery level on the display and ensuring the battery is seated correctly in the frame or rack. Inspect the charging connector for dirt, corrosion, or bent pins. If the bike still won’t power on, try a different charger if you have one and reset the system per the manufacturer’s instructions. Check the fuse or main harness for signs of wear, and inspect for dashboard error codes. If a motor or battery fault persists after basic checks, contact a trained technician. For safety, never attempt high-voltage repairs on a modern e-bike component; miswiring can cause injury or further damage. Regular firmware updates and correct charging habits prolong life and reduce unexpected failures.
Tires, wheels and alignment
Low tire pressure is one of the most common bike problems because it makes steering feel sluggish and increases the risk of pinch flats. Check both tires for punctures, embedded glass, or sharp objects, and replace tubes if necessary. Confirm the wheels are true by spinning them and watching for side-to-side wobble; if the rim rubs on the brake pads, the wheel may be out of true or the spoke tension may be off. Inspect the quick-release skewers and axle nuts to ensure wheels are firmly secured. If tires are old or show cracking, replace them to prevent sudden blowouts. Regularly inspect spoke tension and hub bearings for smooth rotation. The goal is a balanced wheel that spins true, with tires inflated to the recommended pressure and free of damage. A well-maintained wheel and tire setup reduces multiple risk factors that cause unpredictable handling.
Diagnosis flow: from symptom to solution
Use a symptom-driven flow to identify root causes. Start with safety: can you ride at a slow pace? If yes, move to physical checks: move each brake lever, check for drag, inspect for rubbing. Then test drivetrain: shift through all gears, verify chain alignment, and observe any skips. If the problem is power-related on an e-bike, verify battery connection, charge level, and display codes. When you identify the likely cause, apply the corresponding fix from the diagnostic flow and retest. If a single fix doesn’t resolve the issue, proceed to the next likely cause. This iterative approach helps you narrow down issues quickly while avoiding unnecessary replacements. End with a thorough road-test on a safe, closed space before returning to normal riding. If uncomfortable or unsafe, contact a professional immediately.
Prevention and maintenance routine to avoid future issues
Create a simple weekly and monthly schedule that covers essential checks: tire pressure, brake function, chain cleanliness and lubrication, drivetrain smoothness, and frame hardware tightness. Keep a small toolkit and spare tube or patches on hand for quick fixes. Replace worn components proactively rather than waiting for failure, including chains, cables, brake pads, and tires as recommended by the manufacturer. Document any repairs in a maintenance log so you can spot recurring issues and plan professional service accordingly. Use the diagnostic flow after every long ride or after riding in extreme conditions (mud, rain, heat). Regular inspections reduce the chance of sudden failures and extend the life of your bike.
Steps
Estimated time: 60-90 minutes
- 1
Power and safety check
Ensure the bike is powered down before inspection. If applicable, verify battery charge and verify the drive unit engages without resistance. Check for any error codes on the display and note them for reference.
Tip: Always disconnect the charger before handling electrical components. - 2
Inspect power electronics
Check battery seating, connectors, and charger compatibility. Look for loose pins, corrosion, or damaged housings. Re-seat and secure all connections firmly.
Tip: Do not force connectors; align pins carefully before connection. - 3
Check tires and inflation
Scan both tires for embedded objects and inspect for wear. Inflate to the recommended pressure and verify there are no slow leaks.
Tip: Use a reliable gauge; underinflation alters handling and increases pinch risk. - 4
Assess brakes and wheels
Squeeze each brake lever and ensure the caliper releases. Spin each wheel; look for rubbing or wobble and check quick-release skewers for tightness.
Tip: If brakes rub continuously, avoid riding and adjust before test ride. - 5
Evaluate drivetrain basics
Shift through all gears and observe for skipping or hesitation. Inspect the chain for wear and the derailleur alignment for straightness.
Tip: Lubricate the chain if it’s dry but avoid over-lubrication. - 6
Retest with a slow ride
Take a careful test ride in a safe area. Note if the issue persists, repeat checks or move to the next potential cause.
Tip: Ride slowly and consciously; avoid high speeds while diagnosing. - 7
Document and escalate if unresolved
Record the symptom, what you checked, and what solved it or not. If the problem remains, schedule a professional diagnosis.
Tip: Keep receipts and maintenance notes for future reference. - 8
Finalize safety and maintenance plan
Create a short maintenance routine based on likelihoods and wear. Schedule professional service for components beyond home repair.
Tip: Prevention reduces emergency calls and keeps you safe.
Diagnosis: Bike won't move, rides poorly, or shows abnormal behavior while riding
Possible Causes
- highPower issue or dead battery (on e-bikes)
- highBrakes rubbing or seized causing resistance
- highFlat or underinflated tire
- mediumDrivetrain misadjustment or worn components
- lowLoose or damaged cables/wiring (electrical) or frame issue
Fixes
- easyCheck battery/drive unit connections, reseat battery and test power
- easyInspect brakes for drag or misalignment; adjust calipers and pad position
- easyInflate tires to recommended pressure and inspect for punctures; repair or replace tube
- mediumInspect drivetrain (chain, derailleur, cassette); adjust tension and replace worn parts
- hardInspect electrical connectors and harness; reseat plugs and look for damaged wiring; if unresolved, seek professional service
People Also Ask
What should I check first when my bike won't start or move?
Start with power (battery or drive unit), safety interlocks, and ensure there is no brake drag. Then examine tires for proper inflation and inspect the chain and derailleur for obvious misalignment.
First check the power, brakes, and tire inflation. Look for obvious issues like brake drag or a loose battery, then inspect the drivetrain.
How can I tell if brakes are worn?
Check pad thickness and listen for squeal or grinding when braking. Also inspect rotors for scoring or glazing and ensure both wheels stop evenly when you pull the levers.
Check pad depth, rotor condition, and whether both brakes stop evenly. Look for uneven wear or noises.
Why does my chain slip or derail?
Chain slip usually means wear or misadjustment in the drivetrain. Inspect for stretched chain, worn cassette or chainrings, and ensure the derailleur alignment is straight.
If the chain slips, check for wear and derailleur alignment, then adjust or replace worn parts.
Can I diagnose electrical issues myself on an e-bike?
You can perform basic checks like reseating connectors and inspecting for loose wires. If the motor or battery shows fault codes or persists after simple checks, contact a trained technician.
You can check connectors and the display, but if faults persist, seek professional help.
When should I replace a chain and tires?
Replace a chain or tires when you observe obvious wear, cracking, or frequent skipping, or after significant mileage. Use manufacturer guidelines for replacement timing.
Replace chain or tires when wear is evident or issues recur; follow manufacturer guidance.
Is it safe to ride a bike with a flat tire?
Riding on a flat can cause rim damage and sudden blowouts. If you notice a flat, repair or replace the tube before riding again.
No, don’t ride on a flat. Fix the tube before riding again.
Watch Video
Quick Summary
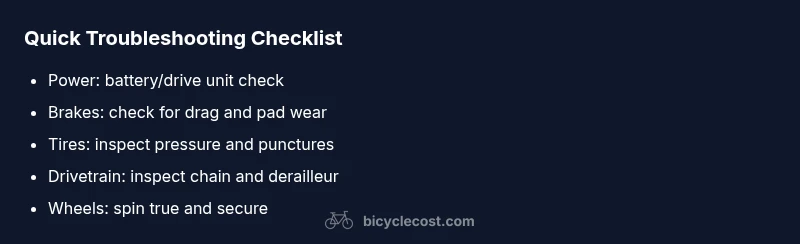
- Start with power, brakes, and tires for quick triage.
- Use a symptom-driven flow to identify root causes.
- Don’t ride with known safety issues; get them fixed first.
- Maintain a regular routine to prevent failures.
- When in doubt, seek professional diagnosis promptly.