What Bike Gears to Use: A Practical Guide
Learn how to choose the right bike gears for road, mountain, and hybrid riding. This practical guide covers gearing basics, terrain-based ranges, cadence, and step-by-step setup to improve efficiency and reduce fatigue. Includes maintenance tips, a gear-planning template, and tester tips from BicycleCost.

Learn how to choose the right bike gears for your terrain and riding goals. This guide covers gearing basics, how to select front and rear ranges, and a practical step-by-step plan to dial in your setup for hills, flats, and mixed terrain. Whether you ride road, mountain, or hybrid, you’ll get actionable ranges, setup tips, and cadence-friendly guidance to ride more efficiently.
Why selecting the right bike gears matters
Gearing is the bridge between your legs and the road. The right setup helps you maintain a steady cadence, conserve energy on long rides, and tackle hills with confidence. A well-chosen gear range keeps you in a comfortable resistance band, so you don’t have to push unusually hard or spin too fast. According to BicycleCost, riders who tune their gears to their terrain experience smoother shifts and more predictable effort, which translates to better consistency in pace and comfort on mixed terrain.
Understanding derailleur gears: front chainrings and rear cogs
Modern bikes use a front derailleur (chainrings) and a rear derailleur (cogs on the cassette) to create multiple gear ratios. The combination of your front chainring(s) and the number of teeth on the rear cassette determines how hard or easy it feels to pedal at a given speed. A larger front chainring or a smaller rear cog makes pedaling harder (higher gear), while a smaller front or larger rear makes pedaling easier (lower gear). The goal is to keep your cadence within a sustainable range while matching the terrain and your fitness level.
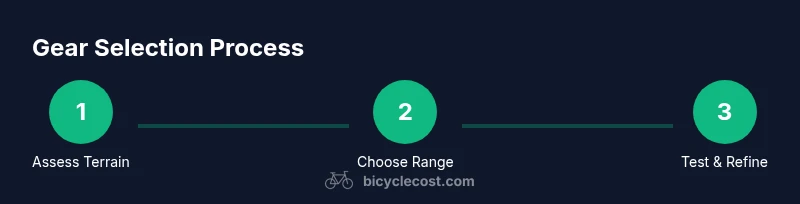
How to determine your gearing needs by terrain
Terrain is the primary driver of gearing choices. On flat sections, you’ll want gears that allow a comfortable, steady cadence without chasing every last watt. On uphill sections, lower gears prevent you from grinding and help you conserve energy. On descents, higher gears enable you to maintain speed without spinning out. Start by identifying the typical terrain you ride and the cadence you can sustain; then translate that into a gear range that keeps you in the middle of your comfort zone.
Road, mountain, and hybrid gearing profiles
Road bikes typically prioritize light, tight shifting with narrower ranges, while mountain bikes favor a wide range to climb steep grades and descend rough trails. Hybrids strike a balance for mixed surfaces. If you ride mostly flats, a compact setup with a modest front ring and a medium cassette can provide efficient cruising. For hilly routes, a wider range (more options on the rear) helps you stay in an easy gear when the grade changes frequently. Tailor your choice to your typical rides and fitness goals.
How to choose a front chainring setup
Front chainrings are fewer in number than rear cogs, but they have a big impact on feel. A single chainring (1x) simplifies shifting and reduces weight, but it limits the top and bottom end. A double (2x) or triple (3x) front setup expands your range, making it easier to find a comfortable gear for diverse terrain. If you value simplicity and low maintenance, start with a 1x setup and add a wider rear range to compensate; if you frequently ride hills, a 2x with a wider cassette may be preferable.
How to pick a rear cassette range
Rear cassettes provide the bulk of your gearing range. A wider cassette (more teeth at the high end and low end) gives you more options for steep climbs and fast descents. If you ride in mixed terrain, aim for a cassette that allows you to hold a steady cadence around your preferred rpm without jumping gears. Consider your current power output and typical ride length when selecting teeth counts; upgrading your rear can often yield noticeable improvements without changing your front setup.
Cadence and shifting: dialing in your cadence
Cadence—how fast you pedal—drives efficient riding. A steady cadence helps you maintain power without exhausting leg muscles. Shifting should feel natural and seamless, keeping you in a comfortable cadence band as terrain changes. If you find yourself undergeared on climbs or overgeared on flats, adjust either front or rear gearing or fine-tune cable tension to align shifts with your cadence goals.
Setting up and indexing your derailleur
Indexing ensures each shift aligns the chain with the intended cog. Start by seating the derailleur correctly, then adjust the high and low limit screws so the derailleur aligns with the smallest and largest cogs. Next, fine-tune cable tension so every shift lands cleanly on the next gear without rub or hesitation. This step may require riding and incremental tweaks to reach perfect alignment across the full range.
Testing your gearing on a ride
Take a familiar route and shift through the full gear range, noting any rub, miss-shifts, or hesitation. Pay attention to how the bike feels on climbs, flats, and descents. If a particular gear combination causes lag or slipping, re-check the cable tension and alignment, then re-test. Document your observations so you can make purposeful adjustments rather than iterative guesswork.
Common mistakes and how to avoid them
Avoid cross-chaining by keeping the chain in a comfortable middle area of the cassette and chainrings. Don’t rely on a single gear for all terrain; instead, map a few go-to combinations that cover hills, flats, and descents. Regularly inspect the chain, cassette, and chainring for wear, as stretched components degrade shifting quality. Keep your drivetrain clean and lubricated to ensure smooth operation.
Maintenance tips to keep gears running smoothly
Regular cleaning and lubrication prevent rust and stiff shifts. Wipe the chain after wet rides, lubricate sparingly to avoid attract dirt, and check for worn teeth or stretched links. Periodically inspect derailleur hangers and cable housings for signs of wear. A well-maintained drivetrain shifts more reliably and lasts longer, helping you stay in the right gear when it matters most.
Quick-start gearing plan you can apply now
If you’re starting from scratch, choose a simple, reliable configuration: one of your front chainrings for most riding and a wide but manageable rear cassette. Practice smooth cadence by staying within a comfortable RPM band and use a cadence-friendly target as your guide. As you gain experience, you can experiment with alternative front-rear pairings to optimize performance for your most common routes.
How to tailor gearing for different goals
Your goals shape your gearing choices. If you focus on climbing efficiency, emphasize lower gears and a wider rear range. If you want higher top speeds on flats, increase the top-end gears by slightly larger front or smaller rear cogs where appropriate. For mixed training, a flexible setup that balances cadence, weight, and maintenance simplicity tends to deliver the best long-term results.
Tools & Materials
- Bike with functioning derailleur(Any bike with at least a basic shifting system)
- Allen keys (set)(Common sizes: 4mm, 5mm, 6mm)
- Phillips screwdriver(Useful for derailleur limit screws in some setups)
- Cable cutters(Optional if you plan to replace cables)
- New cables and housing (optional)(Only if you’re upgrading or replacing worn cables)
- Chain wear gauge(Helps determine when to replace the chain)
- Bike lubricant (lube) for chain(Light weight lube suitable for chain metal surfaces)
- Rags or microfiber cloth(For cleaning drivetrain components)
- Bike stand or stable work surface(Helpful but not mandatory)
- Notebook and pen(Record gear settings and shifts after tuning)
Steps
Estimated time: 60-120 minutes
- 1
Gather tools and prepare the bike
Assemble your tools, secure the bike on a stand or solid surface, and ensure brakes are disengaged for safe shifting. A clean workspace makes it easier to see cable connectors and derailleur alignment.
Tip: Organize your tools in a logical order so you don’t search for a wrench mid-adjustment. - 2
Inspect current gearing and wear
Check the chain, cassette, and chainrings for wear. Worn components can mimic misalignment and complicate tuning. Note any gear combinations that skip or rub during shifts.
Tip: If the chain or cassette shows noticeable wear, plan to replace them soon to improve shifting reliability. - 3
Determine your target gearing range
Based on your riding terrain, decide whether you need a broader or narrower range. This helps you choose a front chainring count and rear cassette width that fit your typical routes.
Tip: Aim for a cadence-friendly range rather than chasing the lightest gear on steep climbs. - 4
Set the rear derailleur limit screws
Loosen the high and low limit screws so the derailleur can align with the smallest and largest cogs without overshifting. This prevents the chain from dropping off the cassette.
Tip: Make small, incremental turns and test after each adjustment. - 5
Tune the rear derailleur indexing
Shift through the gears and observe where the chain sits on each cog. Use cable tension to bring each shift cleanly onto its cog without rubbing.
Tip: If shifts rub at multiple gears, re-check limit screws first before adjusting tension. - 6
Check front derailleur alignment
Ensure the front derailleur cage aligns with the chainrings and doesn’t rub when shifting across rings. Misalignment can cause poor front shifts even with a well-tuned rear.
Tip: A slight outward tilt of the derailleur can improve shifting for large chainring gaps. - 7
Test shifts across the full range
Pedal lightly and shift through every gear. Note any hesitations, rub, or missed gears. Record the gear combinations that feel off for targeted tweaks.
Tip: Use a smooth pedaling cadence during tests to isolate shifting issues. - 8
Fine-tune tension and limits as needed
Return to the cable tension and limiter screws based on test results. Small tweaks can yield big improvements in shift quality.
Tip: Be patient—dialing in indexing often takes multiple short test rides. - 9
Validate on a real ride
Go for a brief ride that includes hills and flats similar to your typical routes. Confirm that shifts feel reliable and cadence stays comfortable.
Tip: Listen for unusual chain rubbing or noise as you ride; these often signal minor misadjustments. - 10
Document your stable setup
Record the final gear combinations you prefer and the corresponding RPM or cadence you target. This becomes your go-to reference for future maintenance.
Tip: Keep notes for future upgrades or component wear checks.
People Also Ask
Do I need a professional to adjust bike gears?
Many riders can tune gears at home with basic tools, especially for standard 2x or 1x setups. If you encounter persistent rubbing, misalignment, or dropped chains, a professional adjustment is recommended to avoid further damage.
Most riders can adjust gears at home, but seek a shop if shifting issues persist or you notice abnormal wear.
What is the best gearing for hills?
A wider rear range with a smaller front ring helps maintain a comfortable cadence on steep climbs. Consider a 2x setup or a wide 1x cassette depending on your terrain and cadence target.
For hills, aim for easier gears that keep your cadence steady and comfortable.
Can I convert to a 1x drivetrain later?
Yes, many bikes can convert to 1x with careful selection of chainring size and a compatible cassette. You may need new shifters, derailleurs, and a chain that matches the new setup.
Converting to 1x is common, but check compatibility with your frame and derailleurs.
How often should I service gear indexing?
Check indexing at least once every few months or after any major ride or gear change. Regular checks help keep shifts crisp and reliable.
Indexing checks every few months are a good habit, especially after upgrades.
What maintenance improves shifting most?
Clean and lubricate the chain, inspect the cassette and chainrings for wear, and ensure cables are clean and tensioned correctly. These steps have the biggest impact on shift quality.
Clean, lubricate, and check wear on key drivetrain parts for best shifts.
Is a 1x setup enough for mountain riding?
A 1x setup can work for many riders, especially with a wide-range cassette. However, some riders prefer 2x for tighter gear steps on very steep, technical terrain.
1x can work for mountains, but 2x offers more precise gearing on steep grades.
Watch Video
Quick Summary
- Know how front and rear gears work together
- Tailor gearing to terrain and cadence
- Indexing and limit screws are essential
- Regular maintenance improves shifts
- Test ride and document your preferred setup