How to Use a Bicycle Chain Tool: Step-by-Step Guide
Practical, beginner-friendly guide to using a bicycle chain tool for removing, repairing, and reassembling bike chains with safety tips and troubleshooting.

By the end of this guide, you'll know how to use a bicycle chain tool to remove, repair, and reassemble a chain, diagnose worn links, and restore smooth shifting. This step-by-step method covers tool setup, alignment, pin driving, and safety checks for both single-speed and multi-speed bikes.
What is a bicycle chain tool and when to use it
A bicycle chain tool, also called a chain breaker, is a compact device designed to push a chain pin out of a roller link so you can detach or remove links. According to BicycleCost, understanding how to use this tool is essential for routine maintenance, replacing a worn chain, or repairing a chain after a derailment. Whether you ride a single-speed or a geared bike, a chain tool helps you manage chain length, replace damaged links, and fix stiff links that cause poor shifting.
To decide when to use a chain tool, inspect the chain for stiff links, kinks, chain wear, or obvious damage. If the chain shows excessive stretch, missing rollers, or a bent plate, it’s safer to replace the entire chain rather than attempt risky repairs. The chain tool is not a solvent for rust; you should clean the chain first, removing grit that can score the pin or derailer. Always set up a stable workspace, secure the bike, and wear gloves and eye protection. By mastering this tool, you can service your bike more quickly, prevent downtime, and extend the life of your drivetrain.
Types of bicycle chain tools
There are a few common varieties of chain tools, but they all work on the same principle: drive a pin against a chain link until it exits. The standard chain tool is a small, portable unit with a threaded screw that pushes a pin through the chain. Some tools are designed specifically for master links, allowing quick assembly without driving pins. A few advanced tools combine a built-in chain checker or a tension arm to prevent over-pushing the pin. When choosing a tool, consider your chain width (1/8" for single-speed vs 3/32" for most multi-speed chains) and the number of speeds on your cassette. For most hobby riders, a basic chain tool that matches your chain width is sufficient. If you frequently work on heavy bikes or bikes with unusual chains, you might benefit from a higher-end tool with a smoother screw and a reversible anvil. Regardless of the model, a clean, well-lubricated tool makes the job easier and safer.
Safety and workspace setup
Before you touch the chain, prepare a stable workspace. Use a bike repair stand or clamp the bike securely in a workbench vise to prevent movement. Wear eye protection and gloves to guard against sharp pins and rotating chain. Keep a clean rag handy to wipe away grit and old lubrication. Work in a well-lit area and keep small parts in a tray so they don’t roll away. A tidy setup reduces mistakes and speeds up repair, letting you complete the process with confidence.
Preparing your tools and environment
Gather your chain tool, lubricant, rag, gloves, and a clean, dry surface. Check that your chain tool is compatible with your chain width, and inspect the tool for any worn threads or bent parts before starting. Have a spare master link or replacement pin if your chain uses a non-master link design. Lay out a mat to catch parts and a small container to hold the chain once detached. A short warm-up of the tool by turning the screw a few times can help verify smooth operation.
Step-by-step overview and expectations
The following steps outline the general approach to using a bicycle chain tool. You’ll understand the sequence: prepare, align, drive out the pin, detach, reassemble, and test. This high-level plan helps you anticipate common hurdles and decide when to replace an entire chain instead of attempting a repair. The speed of each step depends on your experience, chain type, and bike’s drivetrain, but with steady practice you’ll gain confidence quickly. Always start by inspecting the chain for wear and determining whether you should simply remove a length or replace the entire chain. If the chain shows significant stretch or stiff links, consider replacing it rather than attempting multiple delicate pin drives. Remember that some chains require a master link, while others rely on pinned connections. In all cases, ensure the work area is clean and stable, and keep extra links and pins within reach. This overview sets the stage for safer, more precise work and reduces the chance of damaging components during disassembly or reassembly.
How to remove a chain using a chain tool
First, identify whether you need to remove a link or break the chain entirely. Secure the bike and place the chain in the tool's anvil with the pin to be driven aligned with the tool’s driving pin. Slowly turn the screw to push the chain pin out just enough to release the link; avoid pushing the pin completely out unless you intend to use a replacement pin. Once the link is separated, gently separate the chain and wipe away grime with a rag.
How to rejoin or replace a chain
If you’re shortening the chain, remove the necessary links and rejoin with a master link or connector pin, following the manufacturer’s recommendations. Align the master link plates with the chain rollers and snap the link closed using master link pliers or by pressing the pin back in with the tool if your chain uses a pin. After reassembly, check the link’s movement and ensure the chain sits evenly on the sprockets.
Common mistakes and how to avoid them
Common mistakes include pushing the pin out too far, which can loosen the chain’s inner plates, or misaligning the chain with the tool, leading to pin damage. Avoid forcing the tool or using excessive pressure; this can slip and injure your hand or bend the tool. Never work on a chain while it's in motion; always secure the bike. Regularly clean and lubricate the chain after repairs to prevent rust and stiffness.
Maintenance and long-term care of your chain tool
To keep your chain tool performing well, clean it after use to remove chain grit and old lubrication. Lubricate the screw mechanism sparingly and wipe away excess oil to prevent dust adhesion. Store the tool in a dry place and periodically check for worn threads or misalignment. A well-maintained tool reduces the risk of pin damage and ensures consistent performance over many repairs.
Tools & Materials
- Chain tool (chain breaker)(Choose width-compatible model (e.g., 11-speed chain).)
- Master link pliers(Helpful if your chain uses a quick link.)
- Lubricant (bike-specific)(Dry or wet lube depending on conditions.)
- Rag or shop towel(For cleaning grit and excess oil.)
- Gloves(Protect hands from sharp pins and grime.)
- Allen/hex wrenches(Common sizes: 3/32'', 4 mm, etc.)
- Stable work surface or bike stand(Prevents movement during pin driving.)
- Replacement pin or pin-compatible master link(Only if your chain needs a new pin or connector.)
Steps
Estimated time: 20-40 minutes
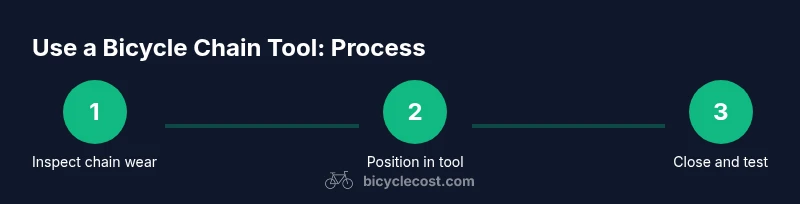
- 1
Inspect chain wear and determine repair approach
Check the chain for stretch, stiff links, and obvious damage. Decide whether you need to remove length, replace the entire chain, or use a master link. This initial assessment helps prevent unnecessary work and saves time.
Tip: If in doubt, err on the side of replacement to protect the drivetrain. - 2
Secure the bike and workspace
Position the bike in a stable stand or clamp, ensuring the chain area is accessible. Clear the area of clutter and lay out tools within easy reach. Securing the setup reduces the risk of pin misalignment during the drive.
Tip: A clean, well-lit area speeds up the process and improves accuracy. - 3
Confirm chain width and tool compatibility
Double-check that your chain tool matches your chain’s width (1/8" for single-speed, 3/32" for most multi-speed chains). An incompatible tool can damage the chain and tool fittings. If you’re unsure, consult your chain’s manufacturer specs.
Tip: Using the right tool size prevents pin damage and helps you complete the task smoothly. - 4
Position the chain in the tool
Open the chain tool, place the chain on the anvil, and align the pin you intend to drive with the driving pin. The chain should sit flat without twisting. This alignment ensures an even pin drive and avoids bending the chain.
Tip: Take a moment to visually confirm alignment before turning the screw. - 5
Drive the pin out partially
Slowly turn the tool’s screw to push the chain pin outward, stopping as soon as the pin protrudes beyond the link. Do not force the pin completely out unless you’re replacing it. Partial removal keeps rollers intact and reduces risk of damage.
Tip: Use gentle, steady turns rather than rapid cranks to control pin extraction. - 6
Detach the link and inspect
Remove the pin far enough to separate the link, then inspect the chain for wear, bends, or damaged rollers. Wipe away dirt with a rag and check the neighboring links for stiffness. If any link shows wear, consider replacing the chain.
Tip: Clean links before reinstalling to ensure smooth operation. - 7
Rejoin the chain or add a replacement
If shortening, remove extra links and rejoin with a master link or pin. Align the plates with the chain rollers and close the link per your chain design. If replacing, install a new pin or connector and verify the joint sits flush.
Tip: Test the joint by gently rotating the crank after assembly to confirm smooth movement. - 8
Lubricate and test on the bike
Wipe excess lubricant from the chain after applying a light coat. Spin the crank to ensure the chain runs smoothly across all gears. If anything binds or skips, recheck alignment and tension before riding.
Tip: Always ride slowly after a repair to confirm performance before a long ride.
People Also Ask
What is a bicycle chain tool and what does it do?
A bicycle chain tool pushes a chain pin out to detach or reattach links. It’s essential for removing damaged links, shortening or repairing a chain, and maintaining drivetrain performance.
A chain tool pushes the pin out of a link to detach or reattach the chain, which helps with repairs and maintenance.
Can I reuse a chain pin after removal?
Reuse is generally not recommended. Pins can lose integrity after being driven and removed, which may weaken the chain. Use a replacement pin or a master link when possible.
Usually better to replace the pin rather than reuse it, to keep the chain strong.
What widths do chain tools support?
Most tools support common widths like 1/8" for single-speed chains and 3/32" for many multi-speed chains. Always verify your chain’s width before buying a tool.
Check your chain’s width and match it to the tool’s specifications.
Is special care needed after repairing a chain?
Yes. Clean the chain, apply a thin layer of lubricant, and test the drivetrain under light load before returning to normal riding.
Clean and lubricate, then test the drivetrain gently.
How long does a typical chain repair take?
With practice, a basic chain repair or replacement can take about 15-30 minutes depending on chain type and conditions.
About 15 to 30 minutes with some practice.
When should I replace the entire chain instead of repairing it?
If the chain shows significant wear or stretch, or if multiple links are damaged, it’s safer and more cost-effective to replace the whole chain.
Replace the chain if wear is extensive or many links are damaged.
Watch Video
Quick Summary
- Master the basic chain tool setup before working on a ride-ready bike
- Choose the correct tool width for your chain
- Align the chain carefully to avoid pin damage
- Differentiate between master links and pins for reassembly
- Lubricate and test the chain after repair