How to Put a Bicycle Chain: Step-by-Step Guide
Learn how to properly install a bicycle chain with our step-by-step guide. We cover tools, chain length, alignment, tension, and derailleur setup to keep your bike shifting smoothly and safely.

Goal: Learn how to put a bicycle chain safely and correctly. This guide covers chain length, routing around chainrings and derailleur, joining with a master link or pin, and testing the drivetrain. You’ll need basic tools and a well-lit workspace. Follow the steps in order to avoid misalignment, dropped chains, or broken links.
Understanding chain anatomy and why proper installation matters
A bicycle chain is a flexible loop made of inner and outer plates linked by pins, with rollers that engage the sprockets. When you learn how to put a bicycle chain, you are aligning every moving part so that the chain shifts smoothly, resists derailment, and wears evenly. According to BicycleCost, understanding chain anatomy helps riders avoid common mistakes that lead to dropped chains or misalignment during maintenance. This section breaks down the chain into its core components and explains how each part interacts with the chainring, cassette, and derailleur. Recognizing parts like the master link, pins, and sideplates helps you plan the installation with fewer surprises and better results for your drivetrain.
Tools and safety basics
Before you touch the chain, gather the essentials and set up a safe workspace. A stable bike stand or a well-supported bike on a level surface makes access easier and reduces the chance of slips. Wear gloves to protect your hands; use a clean rag to wipe components; and keep a compatible lubricant nearby. Basic tools include a chain tool or master-link pliers, hex keys (usually 5mm and 6mm), needle-nose pliers, and a chain checker to assess wear. Safety reminders: keep fingers clear of the chain and gears, release any disc brakes or quick-release levers when needed, and avoid forcing the chain through tight spaces. A tidy, well-lit area helps you see the chain’s path clearly and reduces mistakes.
Determine chain type, length, and compatibility
Chains come in different widths and are designed for specific drivetrain configurations (e.g., number of gears, front chainrings, and rear cogs). Check your derailleur compatibility and the chain’s pin length or link count to ensure it will fit your setup. If you’re replacing an old chain, count the links or compare to the new chain’s length recommendation from the manufacturer. Avoid guessing: an improper length causes poor shifting and premature wear. Take a moment to verify that your chain is compatible with your cassette and chainrings to avoid compatibility issues that complicate installation.
Cleaning and inspecting the drivetrain
A clean drivetrain makes installation easier and more reliable. Wipe the chain, derailleur pulleys, chainrings, and cassette with a degreaser and a clean rag. Inspect for wear on the chain, chainrings, and sprockets; replace worn components before continuing. Look for stiff links, bent plates, or stretched pins. A worn chain can slip or skip, complicating reinstallation. If you notice any significant wear, consider replacing the chain and perhaps the chainrings or cassette in tandem to maintain smooth shifting and a quiet ride.
Removing the old chain or preparing a new chain
If you’re replacing the chain, use a chain tool to press out a pin or connect with a master link per the chain type. For a brand-new chain, inspect the master link and ensure it’s compatible with your chain type. When removing a chain, secure the chain tool firmly and work slowly to avoid damaging the chain or stretching other links. If you’re installing a new chain, note that some chains require precise routing around the derailleur and chainrings before you begin threading the chain.
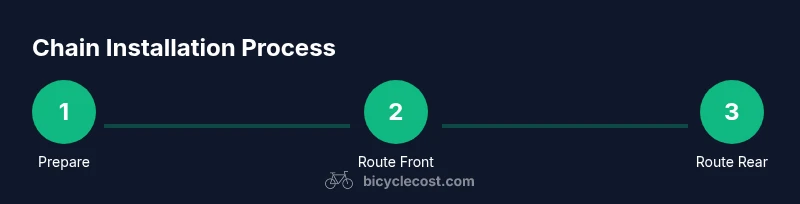
Positioning the chain for the front chainring
Start by threading the chain through the front derailleur cage and around the largest chainring without forcing it. If your chain is too long, you’ll see extra links hanging; if too short, it won’t engage the smallest chainring. This step is foundational for proper shifts and drivetrain efficiency. Ensure the chain sits flat along the chainring teeth and doesn’t loop under the chainring bolts. Visual checks here save you from later frustration when routing the chain to the rear.
Routing the chain over the rear cassette and derailleur
Next, guide the chain over the rear cassette and through the derailleur jockey wheels. Pay close attention to the lower pulley path; a common mistake is missing a bend around the derailleur or letting the chain sit in the wrong tension area. If you have a derailleur with a guide pulley cage, follow the manufacturer’s routing diagram. Route the chain so it engages the first few cogs smoothly during rotation. This step often benefits from a second set of eyes to verify the path.
Joining the chain with a master link or pin
For many chains, you’ll join the chain with a master link or pin, depending on the link type. Align the master link and connect the chain ends cleanly; if using a pin, push it fully into place with a chain tool. Some chains require an orientation where the link plates face the correct direction; improper orientation can cause poor shifting or the link to detach. After joining, gently pull the chain to confirm it’s seated, and use a finger or needle-nose pliers to seat any stubborn tips.
Dialing in tension and derailleur alignment
With the chain in place, adjust the rear derailleur tension and limit screws to ensure shifts start and finish correctly without overshoot. If you notice rub, misalignment, or chain slipping when you shift, re-check the tension and chain path. A well-tuned derailleur reduces chain drop risk and prolongs drivetrain life. Use a derailleur hanger alignment tool if you suspect misalignment, and verify that the chain follows the intended gears smoothly when pedaling forward.
Testing, tuning, and preventive maintenance
Take the bike for a slow test ride in a safe area to confirm that every gear shifts cleanly. Listen for rubbing, skipping, or binding sounds, which can indicate misrouting or improper chain length. If needed, revisit steps to re-route the chain or adjust tension. Regular maintenance—cleaning the chain, lubricating after rides, and checking for wear—extends chain life. Routine checks save time and prevent unexpected drivetrain issues during rides.
Common mistakes and how to avoid them
A few frequent errors include misrouting the chain around the derailleur, using an incorrect chain length, or failing to seat the master link properly. Double-check alignment before riding, and never force a chain through a tight bend. Wipe away excess lubricant to keep the chain clean and quiet. Remember that every drivetrain is unique; consult your bike’s manual or a trusted guide if you’re unsure.
Conclusion and quick maintenance tips
By following a structured approach to installing a bicycle chain, you improve shifting performance and drivetrain longevity. Regularly check chain wear with a chain checker and replace as needed. Keep the drivetrain clean, lubricate appropriately, and store your tools in a dedicated kit. The BicycleCost Team recommends building a habit of routine checks to maintain peak performance.
Tools & Materials
- Chain tool or master-link pliers(Essential for joining or breaking the chain; choose the tool compatible with your chain type)
- Hex wrenches (5mm, 6mm)(Used for derailleur and crank components; carry a small, portable set)
- Chain lubricant(Lubricate after installation and periodic rides; choose a wet or dry lubricant suited to conditions)
- Degreaser and rag(Clean drivetrain before installation for accurate seating and wear assessment)
- Chain checker(Check chain wear to decide if replacement is needed)
- Bike stand or stable support(Keeps bike steady while you work; reduces risk of accidents)
- Gloves(Protect hands from sharp links and grease)
- Safety glasses(Optional protection during pressing pins or cutting links)
Steps
Estimated time: 30-60 minutes
- 1
Prepare workspace and assess chain
Set up a clean, well-lit area and inspect the current chain for wear or damage. If you’re replacing, ensure you have a compatible chain and correct length. This initial check helps prevent wasted effort.
Tip: Take photos of the old routing to reference when reassembling. - 2
Secure the bike
Place the bike on a stand or sturdy support so the drivetrain is accessible from the side. Loose balance here can cause injuries or damage to components.
Tip: Verify the stand clamps are tight before starting. - 3
Remove or position the chain
If removing, use the chain tool to push a pin out; if installing, thread the chain through the front derailleur and around the chainring. Ensure the chain is clear of the crank arms.
Tip: Work slowly to avoid bending a link or damaging the chain. - 4
Route the chain over the front chainrings
Guide the chain around the outer chainring, ensuring it seats between each tooth properly. Do not force it into place if it binds.
Tip: Use a light touch and rotate the crank to help seating. - 5
Route the chain through the rear derailleur
Pass the chain through the derailleur cage and over the rear sprockets. Confirm it’s following the intended path without crossing itself.
Tip: If your derailleur has a guide pulley, follow the manufacturer’s routing diagram. - 6
Join the chain
Connect the chain ends with a master link or pin according to your chain type. Make sure the link is oriented correctly and seated fully.
Tip: Once joined, gently rotate the crank to check seating before tightening any bolts. - 7
Check chain tension and alignment
Inspect that the chain moves freely without rubbing while in different gears. Adjust derailleur tension and limit screws as needed.
Tip: A misaligned derailleur often causes shifting issues; fix before test ride. - 8
Lubricate and wipe excess
Apply a thin layer of lubricant and wipe off excess to prevent dirt buildup. Let it settle for a few minutes before riding.
Tip: Lubricate after each wash or ride in wet conditions for best results. - 9
Test ride and troubleshoot
Take a short ride in all gears to verify smooth shifting and no chain drops. If issues appear, re-check path, length, and tension.
Tip: Address any rubbing promptly to avoid chain wear.
People Also Ask
What tools do I need to put a bicycle chain?
Typical tools include a chain tool or master-link pliers, hex wrenches, a chain checker, lubricant, a rag, and a stand. Having a degreaser on hand helps prep the drivetrain. Always ensure tool compatibility with your chain type.
You’ll need a chain tool, hex wrenches, lubricant, and a stand. A chain checker helps assess wear before you begin.
How do I know what chain length I need?
Consult your chain manufacturer’s spec or compare the new chain to the old one by laying it on a flat surface. A correct length allows the derailleur to move through all gears without pulling the chain tight or leaving excess slack.
Check the manufacturer’s guide or compare the new chain with the old one to match length.
What if the chain won’t join after alignment?
Recheck the joining link orientation and ensure the pins are fully seated. If using a master link, verify the clip or pin is securely engaged. If issues persist, replace the master link or consult a professional.
Make sure the link is oriented correctly and fully seated; replace the master link if needed.
Can I install a chain without removing the rear wheel?
In many bikes you can, depending on frame clearance and derailleur type. However, removing the rear wheel can simplify routing around the cassette and reduce the risk of kinks.
Often you can, but removing the rear wheel can make routing easier.
When should I lubricate the chain after installation?
Lubricate after installation and after any significant cleaning or riding in wet conditions. Wipe off excess lube to prevent dirt buildup.
Lubricate after installation and after rides in wet conditions.
Watch Video
Quick Summary
- Understand chain anatomy to install correctly
- Use the right tools and a clean workspace
- Check chain length and routing before joining
- Test shifts in all gears to verify setup
- Maintain the drivetrain with regular cleaning and lubrication