How to Tell If Bicycle Cassette Is Worn
Learn practical, step-by-step methods to identify worn bicycle cassettes, understand impacts on shifting, and decide when to replace. Practical checks, visuals, and tools from BicycleCost for riders who want a smooth drivetrain.

With this guide, you’ll learn how to tell if bicycle cassette is worn and when replacement is due. You’ll inspect tooth wear, chain stretch, shifting performance, and wear patterns across sprockets, plus how to check for burrs or slipping. By following the steps, you’ll diagnose wear confidently and avoid preventable drivetrain damage.
Signs Your Cassette Might Be Worn
According to BicycleCost, routine checks help riders catch wear early and avoid surprising drivetrain failures. Common indicators include uneven or hooked teeth on the sprockets, slipping under load when you accelerate, and unusual noise like grinding or clicking during shifts. If shifting feels less precise across multiple gears, or you notice the chain riding high on certain teeth, it is a strong signal that the cassette deserves closer inspection. The BicycleCost team found that wear often starts subtly on the middle rings and becomes more pronounced on the largest sprockets as miles accumulate. By keeping an eye on tooth shape, you’ll detect wear before it accelerates other drivetrain components. Additionally, look for burrs, cracks, or cogs that have become noticeably narrower at the tip. These visible signs correlate with degraded engagement and reduced power transfer, especially under heavy riding conditions or when climbing hills.
This section helps you establish a mental checklist: listen for shifts that skip or hesitate, observe tooth profiles for rounding or hooked edges, and note any changes in chain alignment or tension while pedaling. Early detection saves you money and frustration by allowing for timely maintenance rather than sudden, costly failures on the road or trail. Pro tip: perform a quick weekday check after a long ride when components are hottest, as heat can temporarily exaggerate wear patterns and masking problems.
Visual Cues: What Worn Teeth Look Like and Why It Matters
The most immediate evidence of a worn cassette is tooth wear. Worn teeth often display rounded tips, ptched or hooked shapes, or asymmetrical wear where one side of a tooth looks visibly flatter than the other. A worn cassette cannot grip the chain reliably, which leads to slipping under load, especially when the power is high on hills or during hard accelerations. Another telltale sign is the presence of fine burrs or micro-chips along the leading edge of the teeth, which can cause poor engagement and chain skip. When you notice any of these cues across multiple gears, it’s a strong indicator that the cassette is past its prime and should be tested further or replaced. The BicycleCost team emphasizes that consistent wear across adjacent sprockets is more concerning than a single cog showing wear, because it indicates a broader pattern affecting the whole cluster.
For context, worn teeth often coincide with a stretched chain, which compounds the problem by not matching the current tooth profile. If the chain appears to ride off the teeth or skip abruptly when you pedal hard, the verdict is likely that the cassette has reached the end of its service life. Remember that a visually clean chain can still indicate wear on the cassette if the chain engages poorly with the teeth, so don’t rely on a spotless chain alone as a sign of good health.
How to Visually Inspect the Cassette: Step-by-Step Visual Review
Start with a good light and a clean chain. Shift to the smallest rear cog and inspect each cog from the outermost to the innermost. Look for teeth that appear rounded, hooked, or chipped, and check for teeth that seem thinner than their neighbors. Pay attention to any cogs that show inconsistent wear or gaps in engagement when you rotate the crank. Cracking or buildup of metal shavings around the gear tips can indicate accelerated wear. If the cassette shows obvious damage or you notice significant tooth rounding across several cogs, that is a clear signal to replace. The presence of shiny, razor-like edges along the tooth tips is another warning sign, as it can indicate recent wear exposure. If you’re uncertain, compare the cassette to a new or known-good example to gauge the level of wear more objectively.
A practical check is to rotate the chain slowly and watch how it tracks along each tooth. If the chain tends to climb or skip on any cog during the test, that’s a sign you should inspect more deeply. Finally, consider the wear pattern: uniform wear across all cogs is common with long-term use, while excessive wear on one cog suggests misalignment or chain issues that could be accelerating wear on that specific gear.
Tip: A magnifying glass can help spot micro-chips and tiny burrs that the naked eye might miss. If you wear prescription glasses, use them; clarity matters when assessing subtle tooth shapes.
Measuring Chain Wear and Why It Matters for the Cassette
Chain wear and cassette wear go hand-in-hand. A stretched chain rides differently on the tooth profile, accelerating wear and creating shifting anomalies. Use a chain wear gauge or a ruler to check elongation by measuring the length between certain chain pins and comparing against your gauge’s indicators. If the gauge shows elongation beyond the acceptable mark, the chain is likely wearing the cassette as well; replacing the chain without addressing the cassette can lead to early wear on a new chain. Based on BicycleCost Analysis, 2026, proactive checks that consider both chain wear and cassette wear yield the best outcomes for drivetrain longevity. A worn chain often accelerates cassette wear because the chain’s effective pitch becomes inconsistent with the cog teeth.
When you measure, pay attention to how evenly wear appears across all gears. A chain with uneven wear can produce slipping or poor engagement on select cogs, signaling a more nuanced diagnosis than a single cog worn. If you’ve recently replaced the chain but still observe poor engagement in certain gears, the cassette is a prime suspect. In some cases, a worn cassette forces the chain to skip or slip even when the chain itself looks fine. This is a sign that you should consider a cassette replacement to restore clean, reliable shifting.
When to Replace: Practical Guidelines and Decision Making
If you observe significant tooth wear, repeated slipping, or persistent misalignment across multiple gears, replacing the cassette is usually warranted. The decision hinges on wear patterns, your riding conditions, and whether you’re willing to replace the chain to maintain compatibility. Replacing the cassette before it causes chain skip or drivetrain damage saves you from more complex repairs later. If you ride in harsh conditions or frequently climb steep grades, you may prefer to replace slightly earlier to preserve shifting performance. Always verify compatibility with your chain and derailleur; a mismatched setup can cause further wear regardless of whether you replaced the cassette. The BicycleCost team recommends a cautious approach: if wear is evident on two or more cogs and the chain shows measurable elongation, plan a cassette replacement and consider a new chain for optimal performance. If you’re unsure, consult a bike shop for a precise assessment based on your riding profile and equipment.
When you do replace, you may opt for a full drivetrain refresh (cassette, chain, and possibly chain rings) to ensure even wear and smooth shifting. Budget constraints are real, so weigh the expected lifespan of the new parts against your typical riding terrain and frequency. Regular cleaning and lubrication extend the life of your drivetrain and help you monitor wear more accurately over time. The goal is reliable, quiet shifts and efficient power transfer rather than delayed, jolt-prone gear changes.
Tools, Setup, and Safe Practices for Inspection
Having the right tools on hand makes the inspection smoother and safer. A chain wear gauge, a ruler or caliper, a bright light, a clean rag, and a bike stand or solid maintenance stand are all useful. If you plan to remove the cassette for deeper inspection, you’ll need a chain whip, a lockring tool, and the appropriate wrenches. Do not force components; if a tool doesn’t fit, re-check alignment or seek professional help. Wear eye protection when handling chain tools and gloves to keep hands clean. A clean workspace helps you see signs more clearly and reduces the risk of dropping small parts. If you don’t have the tools to remove the cassette, you can still perform a thorough external inspection and test the chain’s engagement on all gears. For most riders, a basic visual check plus a chain wear gauge provides substantial guidance on replacement timelines.
When you finish the inspection, clean and lubricate the chain and apply appropriate torque settings when reassembling. If you’re unsure about the torque specs or compatibility, refer to your derailleur’s manual or a trusted mechanic. The goal is safe riding with consistent, predictable shifting across the entire cassette range.
Common Mistakes and Quick Fixes
One common mistake is assuming a clean chain means a clean cassette. Chain wear can mask cassette wear, so always check both. Another error is delaying replacement until noticeable skipping occurs; small signs accumulate, and delaying can lead to chain ring or derailleur damage. Rushing to replace only the chain while neglecting the cassette can shorten the life of the new chain as well. A quick fix for minor issues is to adjust derailleur indexing or limit screws, but this won’t fix worn teeth.
To avoid these errors, perform a holistic assessment that includes visual inspection, chain wear checking, and, if possible, a test ride to see how the drivetrain responds under actual loads. If you don’t have the proper tools or aren’t confident in your assessment, seek professional help. The goal is to prevent driveline faults from catching you off-guard on the road.
Final Considerations: Quick Recap for Easy Reference
In short, inspect both chain wear and cassette wear, assess how the wear patterns look across gears, and decide whether to replace based on whether you’re seeing consistent wear across multiple cogs and chain elongation. Regular checks help you catch wear before it escalates and protect other drivetrain components. The BicycleCost team emphasizes that a proactive approach, paired with the right tools, yields longer component life and smoother shifts. Practice consistency in your checks, and you’ll maintain a dependable, efficient drivetrain season after season.
Tools & Materials
- Chain wear gauge(Essential to quantify chain elongation and infer cassette wear)
- Ruler or caliper(For measuring chain stretch and verifying gauge readings)
- Bright flashlight or headlamp(Better visibility for tooth profiles and micro-chips)
- Clean rag(Remove grease to see wear clearly and prevent contamination)
- Chain whip(Required if you plan to remove the cassette during inspection)
- Lockring tool(Needed for cassette removal when accessing inner teeth)
- Bike stand(Helps keep the bike stable during inspection)
Steps
Estimated time: 30-60 minutes
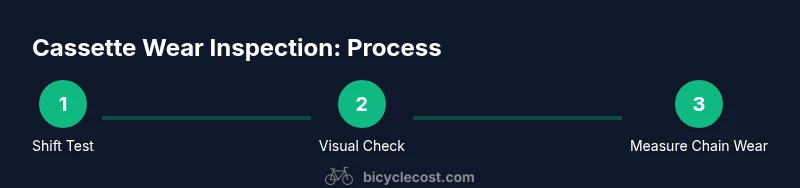
- 1
Position bike and test shifts
Place the bike on a stand or secure it upright. Shift smoothly through all gears from smallest to largest rear cog while pedaling lightly to observe engagement and any skipping or hesitation.
Tip: Use bright lighting to catch subtle misalignment; listen for grinding sounds as you shift. - 2
Visually inspect cassette teeth
Rotate the rear wheel and examine each cog for hooked, rounded, or chipped teeth. Note teeth that look uneven or worn compared to neighboring gears. Check for burrs along the tooth edges.
Tip: Compare with a new or known-good cassette for reference; even wear across cogs is typical with extensive use. - 3
Measure chain wear with gauge
Place the chain wear gauge on the chain as directed and check elongation indicators. If you see elongation beyond the gauge's marks, the chain (and possibly the cassette) is worn.
Tip: Take multiple measurements across different sections of the chain to ensure consistency. - 4
Assess wear patterns across gears
Look for excessive wear concentrated on middle and outer cogs, which often indicates extended use and chain misalignment. If wear is concentrated on one gear, examine derailleur alignment and chain routing.
Tip: If the chain engages poorly on multiple gears, plan a cassette replacement and consider a chain change as well. - 5
Decide on replacement strategy
If wear is evident on two or more cogs and the chain shows elongation, replace the cassette and potentially the chain. Ensure compatibility with your derailleur and chainring. If unsure, seek professional assessment.
Tip: Avoid mixing worn and new components; a consistent setup yields the best shifting experience.
People Also Ask
How often should I inspect my cassette for wear?
Regular checks after long rides or seasonal storage help catch wear early. Inspect each cog and test shifts to catch subtle signs before issues worsen.
Check your cassette after long rides or at the start of each season; inspect all cogs and listen for shifting issues.
Can a worn cassette damage my chain?
Yes. A worn cassette can wear a new chain faster by not meshing correctly with the chain’s plates, leading to poor engagement and more skipping.
A worn cassette can cause a new chain to wear quickly due to poor engagement and skipping.
Is it necessary to replace chain and cassette at the same time?
Replacing both at once is often recommended for best performance and longevity, especially if chain wear is advanced. If the chain is fresh, you may be able to replace just the cassette.
Often replacing both at once gives the best performance, but if the chain is new you may replace only the cassette.
Do I need special tools to replace the cassette?
Yes, a chain whip and lockring tool are typically required. If you don’t have these tools, visit a bike shop to have the cassette replaced.
You usually need a chain whip and lockring tool, and a shop can handle it if you don’t have them.
What should I do after replacing the cassette?
Clean and lubricate the chain, re-check derailleur alignment, and test ride across gears to ensure smooth shifting.
After replacement, clean and lube the chain, re-check alignment, and test shift through all gears.
Can a worn cassette affect braking performance?
Wear on the cassette primarily affects shifting and power transfer, not braking. However, loss of efficiency can affect overall riding feel.
Worn cassettes mainly affect shifting, not braking, though overall drivetrain efficiency may drop.
Watch Video
Quick Summary
- Inspect both chain wear and cassette wear for accuracy
- Uniform wear across cogs signals broader drivetrain wear
- Replace cassette when multiple cogs show wear and chain elongation
- Use proper tools and safety practices during inspection
- Consult a professional if in doubt to avoid damage