When to Change Bicycle Cassette: Signs, Timing, and Replacement Guide
Learn when to change bicycle cassette, signs of wear, and how to replace it safely with practical guidance from BicycleCost. This guide helps gauge wear and plan maintenance.

Change your cassette when shifting is noisy, gears skip, or the teeth appear worn. Chains cause accelerated wear, so inspect chain wear and derailleur alignment. Replacement cadence varies by riding style and maintenance—check regularly and plan a proactive replacement strategy.
Why the cassette wears out
Cassettes wear as part of normal riding, but the rate depends on chain wear, drivetrain cleanliness, riding conditions, and how you shift. A stretched chain accelerates cog wear by skipping teeth and creating uneven contact. Dirt and grit trapped between the chain and sprockets grind away teeth, especially in wet or muddy rides. According to BicycleCost, understanding wear patterns helps you time replacements before performance drops dramatically. Regular inspection of the chain and chainrings alongside the cassette gives you a clear signal that the drivetrain is aging. Proactive maintenance—cleaning, lubricating, and gentle shifting—extends life. If you ride aggressively or frequently ride in poor conditions, plan more frequent checks. The BicycleCost team emphasizes that predicting exact lifespan is tricky, so base your plan on observed wear and shifting quality rather than a fixed mileage target.
Signs it’s time to change the cassette
Look for visible wear on the sprockets: teeth with rounded, hooked, or hooked edges, especially on the larger cogs. If shifting becomes noisy, or the chain skips under load, it’s a strong indicator the cassette is worn. A pronounced mismatch between chain wear and cog wear means the chain is elongating and chewing the sprockets unevenly. If you notice slipping when you pedal hard in a given gear, or you consistently need to adjust the derailleur to keep gears aligned, these are signals to evaluate a cassette replacement. Regular checks in your routine maintenance—especially after seasons of heavy riding—keep you on top of wear before it worsens. BicycleCost’s guidance is to treat wear symptoms as a practical early warning rather than waiting for a specific age or mile marker.
How to inspect a cassette carefully
Begin with a visual inspection: rotate the crank and inspect each cog from the smallest to the largest. Look for hooked or shark-fin shapes on the teeth and any missing or chipped tooth tips. Use a chain wear gauge to assess whether your chain has elongated beyond the drivetrain’s tolerance; if the chain shows noticeable wear, it will accelerate cassette wear. Remove the rear wheel if needed to inspect the freehub area for grime or spline damage. Check for excessive wobble in the sprockets when backpedaling. A clean cassette and freehub free of old grease or grit makes wear signs easier to spot. The goal is to determine if the cassette alone is worn or if the chain and other components are contributing to poor shifting.
Replacing the cassette vs keeping an old chain
While a worn chain can wear a new cassette quickly, a new cassette paired with a worn chain won’t perform optimally and may wear into the new cassette faster. If chain wear is evident, plan to replace the chain at the same time as the cassette to maximize life and maintain accurate gear shifts. If you can’t tell whether the chain is stretched, err on the side of replacing the chain; it’s a relatively low-cost hedge against premature cassette wear. Your riding style and the terrain you commonly encounter influence the decision: aggressive riders in hilly or mixed terrain should evaluate cassette life more often than casual riders on flat roads. BicycleCost recommends a practical approach—base replacement on shifting performance and visible wear rather than a fixed schedule.
Choosing the right cassette for your setup
Cassettes come in different speeds and compatibility standards. Match the number of speeds to your drivetrain (e.g., 9-, 10-, 11-, or 12-speed) and ensure the new cassette is compatible with your chain and derailleur. Consider your gear range and the kind of riding you do most: flatter terrains may benefit from a wider gear spread, while hilly routes might require tighter gearing. Check for compatibility with your hub and freehub body—some modern hubs require specific cassette types. Also verify your chain’s width matches the cassette speed to preserve smooth shifting. If you plan to switch to a different speed count, you may need a new chain, shifters, or even a new derailleur to maintain optimal indexing. Brands differ in tolerances, so consult your bike’s manual or manufacturer guidance for precise compatibility.
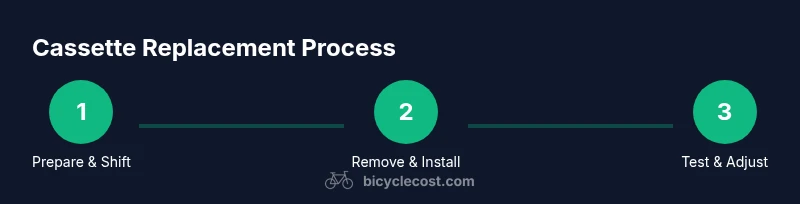
How to replace the cassette safely and effectively
Begin by securing the bike and removing the rear wheel to access the cassette. Use a chain whip to hold the sprockets and a cassette lockring tool to loosen the lockring. Once the lockring is loosened, slide the cassette off the freehub, clean the splines, and install the new cassette in the correct orientation. Reinstall the lockring with the proper torque and reassemble the wheel. Shift through the gears and check for smooth operation; fine-tune the derailleur as needed. If you’re unsure about torque specifications or tool compatibility, consult the service manual for your group set. After install, test ride to ensure confident shifting and no chain drop in any gear.
Maintenance tips to extend cassette life
Keep the drivetrain clean and well-lubricated to minimize wear. Wipe away grit after rides, especially in muddy or wet conditions. Avoid cross-chaining by using appropriate gears to reduce sprocket and chain stress. Replace the chain when it shows elongation or when you notice rapid wear on the cassette. Regularly inspect the chain, cassette, and derailleur alignment; small issues left unchecked can cascade into more expensive repairs. Storing the bike properly and protecting the drivetrain from the elements also helps extend cassette life. Consistency in maintenance—cleaning, lubrication, and timely replacements—yields smoother shifts and longer component life.
Tools & Materials
- Cassette lockring tool(Compatible with your hub standard (Shimano/HG, Campagnolo, SRAM))
- Chain whip(Keeps the sprockets from turning during removal)
- Chain wear gauge(Assess chain elongation before deciding replacement)
- Adjustable wrench or socket(For turning the lockring tool)
- New cassette(Choose correct speed and compatibility)
- Lubricant/grease(Light grease for freehub splines, if desired)
- Rags or shop towels(Clean workspace and wipe residue)
Steps
Estimated time: Estimated total time: 45-70 minutes
- 1
Prepare the bike and shift to the smallest cog
Place the bike on a stand or stable surface. Shift the chain to the smallest rear cog to reduce tension and make removal easier. Engage the brakes and ensure the bike won’t move during the procedure.
Tip: Wear gloves to avoid cuts from sharp sprockets. - 2
Remove the rear wheel
If needed, detach the rear wheel to access the cassette area. This step varies by wheel type (quick-release vs through-axle). Ensure the wheel is secure before continuing.
Tip: Take a photo of the wheel orientation to simplify reassembly. - 3
Loosen the lockring
Place the chain whip on the sprockets and fit the lockring tool into the lockring. Hold the chain whip steady and turn the lockring tool counterclockwise until it loosens. Do not force if it resists; double-check you are turning the correct direction.
Tip: Apply a little wax or anti-seize on the lockring threads before reinstalling next time. - 4
Remove the cassette
Carefully slide the cassette off the freehub body. If it’s stuck, gently tap it with a wooden mallet or use a non-marking hammer to free it—avoid metal-on-metal force that could damage the freehub.
Tip: Keep the spacers in order to avoid mixing sprockets during reassembly. - 5
Inspect and clean
Clean the freehub splines and inspect for damage or wear. Check the replacement cassette for any defects. Wipe away old grease or grit that may hinder installation.
Tip: Inspect the chainrings for wear; excessive wear there can influence shifting as well. - 6
Install the new cassette
Slide the new cassette onto the freehub in the correct orientation. Thread the lockring by hand, then tighten with the lockring tool to the manufacturer’s recommended torque, using a torque wrench if available.
Tip: Ensure the cassette indexing matches your derailleur; misalignment can cause poor shifting. - 7
Reassemble and adjust
Reinstall the rear wheel and ensure it is seated properly. Shift through the gears to check alignment and make minor derailleur adjustments if needed. Confirm smooth operation across the full range.
Tip: Test under load by a short ride to confirm behavior before fully trusting the setup. - 8
Post-install cleanup
Wipe away any residue, apply a light lubrication to the chain, and store tools securely. Keep a log of the replacement date to plan future maintenance.
Tip: Record the exact cassette model and gear count for future reference.
People Also Ask
How do I know if my cassette is worn out?
Look for teeth that appear rounded or hooked, and notice shifting that is noisy or noisy in specific gears. If the chain slips under load in any gear, consider cassette wear as a contributing factor. Regular inspection helps catch wear early.
Look for round or hooked teeth and slippage when under load. If you hear grinding or skipping, inspect the cassette and chain for wear.
Should I replace the chain when I replace the cassette?
Yes. Replacing the chain together with the cassette minimizes wear on the new cassette and preserves shifting quality. If the chain is already stretched, a new chain will help maximize the life of the new cassette.
Yes—replacing the chain when you replace the cassette helps the drivetrain work smoothly longer.
Can I use a different speed cassette than my current setup?
Compatibility matters. If you switch speeds (for example from 11 to 12), verify chain width, derailleur capacity, and freehub compatibility. In some cases, you may need a chain, derailleur, or shifter upgrade as well.
Make sure your chain, derailleur, and freehub support the chosen speed; you may need other parts.
What tools do I need to replace a cassette?
Basic tools include a cassette lockring tool, chain whip, adjustable wrench, and a replacement cassette. A torque wrench helps ensure correct torque on the lockring.
You’ll need a lockring tool, a chain whip, an adjustable wrench, and the replacement cassette.
How long does cassette replacement typically take?
Time varies by experience and setup, but expect a focused session lasting about an hour for most riders. Planning for a little extra time during first attempts helps avoid rushed mistakes.
Usually around an hour for a careful replacement, depending on your setup.
Is it okay to replace only the cassette if the chain is worn?
If the chain is stretched, a cassette-only replacement may wear the new cassette quickly. It’s generally better to replace both to maintain optimal shifting and prevent premature wear.
Replacing both chain and cassette gives the best performance and longevity.
Watch Video
Quick Summary
- Know wear signs: noisy shifts, skipped gears, and visibly worn teeth.
- Inspect chain wear to time cassette replacement effectively.
- Replace cassette and chain together when wear is confirmed.
- Choose compatible gear count and ensure derailleur compatibility.
- Test ride and fine-tune derailleur after installation.