How to Tell If Bicycle Sprocket Is Worn
Learn practical steps to tell if a bicycle sprocket is worn. Signs, simple tests, and replacement timing to keep your drivetrain efficient and safe on every ride.

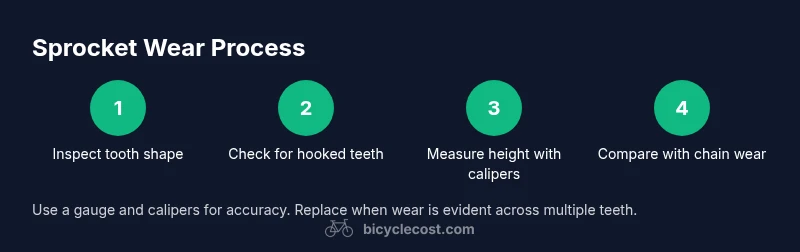
By the end of this guide you will know how to tell if a bicycle sprocket is worn, what signs to look for, and how to compare wear with the chain. You'll need good lighting, a clean drivetrain, and a basic chain wear gauge to assess teeth shape and engagement accurately. Steps follow.
Understanding Sprocket Wear
Sprockets wear as the chain continually engages and disengages with teeth. Over time, small mechanical actions, grit from the road, and mismatched maintenance decisions wear down the points of contact. Worn teeth reduce engagement surface, cause the chain to ride up and skip, and accelerate wear on the chain itself. A careful inspection reveals more than cosmetic damage; it tells you how to avoid bigger problems later. According to BicycleCost, a methodical wear-check routine saves money by preventing misalignment and late replacements that catch you mid-ride. By understanding the gear-tooth family, you can evaluate which cogs in the cassette show the most wear and prioritize replacement for the ones that are hardest to keep clean and most prone to slip. The practical takeaway is that wear is gradual, not sudden, so regular checks are your best defense.
Visual Signs of Wear
Visible wear on sprockets is most apparent when you closely compare teeth across the cassette. Look for hooked or shark-fin shapes, which indicate teeth thinning from the tip inward. Teeth that have become rounded, chipped, or show flat, shaved edges are a red flag. If multiple teeth exhibit uneven wear, or if the space between teeth appears slightly wider than on untouched teeth, that’s another sign the sprockets are past their prime. A worn sprocket can cause the chain to skip or slip especially under load, and the drivetrain may feel ‘gritty’ or hesitant when shifting. Remember to inspect all jockey wheels and the cassette as a whole—wear can vary from one sprocket to another, often due to cross-chaining or alignment issues. Regular cleaning helps reveal wear patterns that might be hidden by grime. According to BicycleCost analysis, neglecting wear can accelerate chain wear and reduce overall efficiency, making early detection worthwhile for riders who ride frequently on mixed terrain.
How to Measure Wear with Simple Tools
Reliable wear assessment doesn’t require fancy gear. Start with a chain wear gauge to gauge elongation, and a digital caliper or precision ruler for tooth dimensions. Place the gauge against a representative tooth and record whether it clears the go/no-go marks; compare results across adjacent teeth. Use calipers to measure tooth height at the tip and base; significant reductions in height or asymmetry between teeth signal wear. For more accuracy, compare the cassette with a fresh sprocket sample (from a friend or shop) to visually spot differences. Always inspect the entire cassette, not just the most worn tooth, because wear is often uneven. If you don’t have a chain wear gauge, you can approximate by measuring the movement of the chain on the sprocket under light tension, but a gauge is far more reliable for consistent checks.
Sprocket Wear vs Chain Condition
Chain wear often precedes sprocket wear, but the relationship is bidirectional. A stretched chain converts to poor engagement with teeth, which accelerates sprocket wear; conversely, a worn sprocket makes new chains wear faster. If the chain shows noticeable elongation, plan to inspect the sprockets closely as well. Similarly, if you notice frequent derailment or misalignment, don’t assume it’s only the chain—check the sprockets for tip thinning and missing teeth. Replacing chain without addressing worn sprockets yields suboptimal shifting and can shorten the life of a new chain. The goal is to balance both parts to maintain clean engagement and minimize friction.
Step-by-Step Inspection Routine (Practical Workflow)
This section offers a practical routine you can follow during a weekend maintenance session. Start by prepping your workspace, then remove the rear wheel if necessary to access the cassette. Clean the area to remove grime that obscures teeth shape. Inspect each sprocket for hooked, chipped, or rounded teeth. Use a chain wear gauge to assess elongation and compare tooth height with a caliper. If wear is evident on multiple teeth or if the chain shows significant elongation, prepare for replacement planning. Finally, reassemble and test-ride to confirm smooth shifting. BicycleCost’s team emphasizes documenting wear patterns to guide future maintenance decisions and avoid unexpected drivetrain failures.
Maintenance and Replacement Guidelines
Replacement decisions hinge on the degree of visible wear and the chain’s condition. If teeth show pronounced rounding, chipping, or a consistent shark-fin profile across several cogs, plan for new sprockets. When the chain exhibits clear elongation or the cassette shows numerous worn teeth, replacing both chain and sprockets is often the most efficient choice to minimize wear mismatch. Always evaluate shifting performance after replacement; smooth, predictable shifts indicate a healthy drivetrain. If you ride in harsh environments—sand, salt, or mud—inspect more frequently and factor in faster wear. The BicycleCost team recommends aligning replacement timing with your riding style and terrain, rather than waiting for dramatic failure cues.
Common Mistakes and Safety Considerations
Rushing through the inspection without proper lighting can miss subtle wear. Avoid using harsh chemicals that can degrade rubber seals or derailleur components; use a degreaser and a clean rag to reveal tooth profiles. Don’t assume that a single worn tooth means immediate replacement—the wear pattern matters. Worn sprockets can slip suddenly if the chain is under load, so take precautions when testing shifting. Always wear gloves to keep hands clean and protect your skin from sharp edges. When in doubt, consult a trusted bicycle mechanic or the manufacturer’s guidelines to determine the best replacement strategy for your specific drivetrain.
Conclusion and Next Steps
A systematic wear-check routine helps preserve drivetrain efficiency and prolongs the life of your chain. By understanding how sprockets wear, recognizing visual cues, and using simple measurement tools, you can make informed replacement decisions before damage escalates. The BicycleCost team recommends routine inspections as part of a proactive maintenance habit. With the right tools and a clear process, you can keep your bike’s gearing precise and reliable for many rides to come.
Tools & Materials
- Bright work light or headlamp(Direct lighting for detailed tooth inspection)
- Chain wear gauge(Go/no-go gauge to assess elongation)
- Digital caliper or precision ruler(Measure tooth height and gaps)
- Allen wrenches set (e.g., 5mm, 6mm)(Remove rear wheel or cassette if needed)
- Degreaser and clean rag(Clean drivetrain for clear inspection)
- Replacement sprockets and/or new chain(Have on hand if wear is confirmed)
- Gloves(Protect hands from grime)
- Bike stand or secure work surface(Stability during inspection)
Steps
Estimated time: 25-40 minutes
- 1
Prepare workspace and tools
Set up a well-lit area and gather all tools. Wipe down the drivetrain to remove grime that could obscure wear signs. This makes inspection safer and more accurate.
Tip: Secure the bike to prevent movement during steps. - 2
Access the rear sprockets
If needed, remove the rear wheel or sliding derailleur to expose the cassette. Keep track of any spacers and bolts for reassembly.
Tip: Use proper wrench sizes to avoid damaging components. - 3
Clean the cassette thoroughly
Degrease and wipe each sprocket clean so teeth edges are clearly visible. Dirt can hide worn profiles and mislead your assessment.
Tip: Take a photo for future reference of wear patterns. - 4
Inspect each sprocket's teeth
Look for hooked, chipped, rounded, or shark-fin teeth. Compare wear across teeth on the same cog and between neighboring cogs.
Tip: Pay special attention to the smallest and largest cogs where wear often concentrates. - 5
Measure with wear gauge and calipers
Use the chain wear gauge on representative teeth and measure tooth height with calipers. Note any significant deviations from new sprocket profiles.
Tip: Record measurements for multiple cogs to identify patterns. - 6
Compare chain wear with sprockets
If the chain shows elongation, sprockets are likely worn too. Replacing both can prevent rapid re-wear and improve shifting.
Tip: Do not rely on chain wear alone to decide replacement. - 7
Decide on replacement and reassemble
If wear is evident on multiple teeth or chain elongation is significant, plan replacement. Reassemble the wheel and test ride to confirm smooth shifting.
Tip: Test shifting under load in a safe area before riding on the road.
People Also Ask
What are the most obvious signs of sprocket wear?
Hooked or shark-fin teeth, rounded tips, and uneven tooth wear across the cassette indicate wear. If several teeth show these signs, plan replacement.
Look for hooked teeth and uneven wear across the cassette; multiple worn teeth mean it's time to replace.
Can a worn sprocket damage the chain?
Yes. Worn teeth can cause the chain to engage poorly, increasing chain wear and the likelihood of slipping.
Worn sprockets can cause the chain to slip or wear faster, so replacement is wise.
How often should I inspect sprockets?
During regular maintenance, especially after rides on rough terrain or after cleaning the drivetrain.
Check sprockets during routine maintenance, particularly after rough rides or thorough cleans.
Should I replace chain and sprocket at the same time?
Often yes. Replacing both reduces mismatched wear and improves shifting performance.
Yes—replacing both helps keep your drivetrain in balance and shifts cleanly.
Is it possible to repair worn sprockets?
Worn sprockets typically require replacement. Repairs are not generally feasible for significant tooth wear.
Worn teeth usually need replacement; repairs aren’t reliable for significant wear.
What causes sprocket wear the most?
Chain elongation, dirt, cross-chaining, and misalignment accelerate sprocket wear.
Chain wear, dirt, cross-chaining, and misalignment drive sprocket wear fastest.
Watch Video
Quick Summary
- Inspect sprockets regularly for tooth shape changes.
- Use simple tools to quantify wear and guide replacement.
- Replace chain and sprockets together when wear is evident.
- Document wear to plan future maintenance.