How to Make a Bicycle with Waste Material: A Practical Guide
Learn how to repurpose waste materials into a functional bicycle. This educational guide covers sourcing salvaged parts, safety considerations, a step-by-step workflow, and maintenance tips for responsible upcycling.

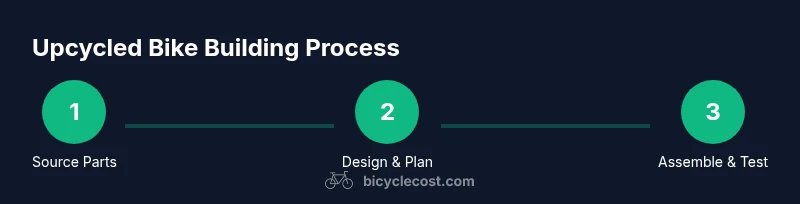
You can make a bicycle from waste materials by repurposing salvaged parts and following a careful, modular workflow. Start by gathering compatible components, inspecting each for cracks or wear, and planning a safe frame design. Then assemble the frame, drivetrain, braking system, and steering, and test in a controlled environment before riding.
Concept and safety overview
Building a bicycle from waste material is a feasibility-driven, safety-first project. It combines upcycling with basic mechanical design, requiring careful assessment of load paths, material integrity, and compatibility. The BicycleCost team emphasizes that such projects should prioritize rider safety and structural soundness above all else. Before you begin, outline the intended use, rider weight range, braking requirements, and steering geometry. This upfront planning helps you identify which waste components can be repurposed without compromising safety. By taking a methodical approach, you can reduce risk while promoting sustainable cycling.
Key ideas to guide your work include: design for predictable failure modes, document inspections of reused parts, and test in controlled environments. As you progress, refer to BicycleCost analyses and safety guidelines to keep decisions grounded in practical experience. This approach not only protects riders but also demonstrates responsible upcycling that aligns with best maintenance practices and sustainability goals.
Sourcing waste materials and assessing suitability
Sourcing waste materials for a DIY bicycle project starts with a clear checklist: identify material types that are structurally sound, inspect for cracks or corrosion, and verify compatibility with your intended ride profile. Salvaged frames, rims, and components can be repurposed if they pass a thorough inspection. Look for metal frames with no visible cracks, undamaged welds, and rims that are true and round. Wood and bamboo might be explored for frame concepts in very controlled prototypes, but require advanced techniques and testing. Always prioritize components with known service histories or those from salvage sources that allow inspection. When in doubt, consult a professional or experienced community workshop. BicycleCost’s approach highlights safety and documentation as pillars of responsible upcycling, ensuring you understand the limitations of recycled parts and the risks involved.
Feasible components and design options
Not all bike parts are suitable for upcycling, but several components can be responsibly reused with proper evaluation. Salvaged frames or tubing can form the core structure if their integrity is intact, while wheels or rims must be true and free of cracks. Braking systems, chains, and gears should be tested for wear and compatibility with chosen frame geometry. For a safer starting point, many builders opt for a modular design that uses ready-made, tested components for critical functions like brakes and steering, while experimenting with non-critical subsystems. This approach reduces risk while still delivering the satisfaction of building with recycled materials. The BicycleCost team notes that modularity helps isolate potential failures and simplifies maintenance later on.
Tools, workspace, and safety practices
A safe workspace and the right tools are essential when turning waste into a bicycle. Set up a clean, well-lit area with secure clamps, proper ventilation for any cutting or soldering, and a first-aid kit accessible at all times. Obtain PPE such as a certified helmet, eye protection, gloves, and sturdy footwear. Keep fire safety equipment nearby if you plan any metalworking. Before starting any cutting or joining, ensure you have a clear plan and know the sequencing of steps to minimize rework and hazardous situations. Consistent lubrication and cleaning during assembly will improve longevity and reliability. The BicycleCost philosophy emphasizes careful preparation and safety to support durable, responsible upcycling projects.
Step-by-step build philosophy: modular and safe
Embrace a modular workflow that emphasizes safety-first choices, repeatability, and easy maintenance. Start with a basic, tested drivetrain and braking system from salvaged parts where feasible, then gradually add non-critical components. Regularly verify alignment, torque specs, and fastener security as you assemble. Document each step and adjust your plan if you encounter unexpected fit issues. This mindset—modular, cautious, and well-documented—helps manage risk and increases the chance of a successful, road-worthy build.
Testing, adjustments, and ongoing maintenance
After assembly, test the bike in a controlled environment before any road use. Check frame alignment, brake responsiveness, gear indexing, and wheel true. Perform slow-speed tests on flat surfaces and avoid busy roads until you confirm stability and reliability. Maintain a routine inspection schedule, particularly after the first few rides, to identify wear patterns and address weak spots. Keep records of inspections and maintenance to support long-term safety and performance. The BicycleCost guidance emphasizes that proper testing and ongoing maintenance are essential parts of any upcycling project.
Tools & Materials
- Safety gear (helmet, gloves, eye protection)(Ensure certification and proper fit)
- Salvaged bike frame or tubing(Inspect for cracks, corrosion, and weld integrity)
- Salvaged wheels/rims(Check rim true, spoke count, and hub condition)
- Drivetrain components (chain, gears, crankset)(Verify compatibility with frame geometry)
- Braking components (calipers, pads, cables, rotors)(Test for adequate stopping power)
- Hand tools (wrenches, pliers, screwdrivers)(Pack a complete set for on-the-fly adjustments)
- Measuring tools (caliper, ruler, tape)(Accurate measurements are critical for fit)
- Welding equipment or mechanical joining method(Only if you have training; prefer bolted joints if unsure)
- Sandpaper/file/metal cleanup tools(Prepare surfaces for joining)
- Bike lubricant and cleaning supplies(Prevent corrosion and ensure smooth operation)
- First-aid kit and fire extinguisher(Essential safety backups in a workshop)
- Paint/finish materials (optional)(For corrosion protection and aesthetics)
Steps
Estimated time: 4-6 hours (excluding advanced fabrication)
- 1
Assess feasibility and plan
Define rider weight range, intended use, and safety requirements. Create a high-level plan for frame geometry, braking, and drive system using salvaged parts. Document what will be reused and what will be replaced, and set a realistic timeline.
Tip: Begin with a simple, proven frame concept before attempting complex geometries. - 2
Gather recyclables and inspect
Collect salvaged frame sections, rims, and components. Inspect each piece for cracks, corrosion, wear, and compatibility with your design. Set aside items that fail inspection and redesign your plan to accommodate only sound parts.
Tip: Use a bright light and magnification to reveal hairline cracks. - 3
Draft modular frame design
Sketch a frame concept that accommodates modular joints and clear load paths. Plan where bolts or welds will be placed, and ensure joints can be inspected and maintained. Build a simple wooden or mock-up model first to validate geometry.
Tip: Favor bolted joints in early prototypes to simplify testing and adjustments. - 4
Prepare critical components
Clean, measure, and verify critical parts like head tube, bottom bracket area, and wheel hubs. Ensure dimensions align with chosen drivetrain and brakes. Prepare fasteners and spacers for precise assembly.
Tip: Keep spare bolts of the correct grade handy for quick changes. - 5
Assemble a test frame and ride-ready subset
Assemble a basic frame skeleton using safe joints and provisional fasteners. Fit a temporary drivetrain and braking subset to verify geometry and fit. Do not ride with an incomplete safety system.
Tip: Proceed slowly and check for binding or misalignment after each attachment. - 6
Test, adjust, and document
Conduct controlled tests in a safe area. Check brake response, steering alignment, and wheel stability. Record findings and iterate on fit and safety before any road use.
Tip: If anything feels off, pause and reassess rather than forcing a ride.
People Also Ask
Is it safe to build a bicycle from waste materials?
Yes, it can be safe if you thoroughly inspect, test, and validate every component. Prioritize load paths, braking, and steering safety, and seek professional help for critical joints.
Yes—safety comes first. Inspect all parts, test the assembly in a controlled area, and consult a pro for critical joints.
What materials work best for a DIY frame?
Metal salvaged frames or tubing with no visible cracks are the most reliable starting point. Bamboo frames are possible in theory but require advanced techniques and rigorous testing.
Metal salvage is the most reliable starting point; bamboo requires specialized methods and thorough testing.
Do I need professional welding for the frame?
Not necessarily. Bolted joints or mechanical fasteners are safer options for beginners. If welding is required, seek a qualified welder and verify weld integrity.
Welding can be risky if you’re not trained. Use bolts where possible and hire a pro if welding is needed.
How long does the project take?
Time varies with material availability and skill. Plan several sessions, totaling roughly half a day to a full weekend for a basic, road-worthy build.
It can take a weekend or more, depending on materials and skill level.
How should I test ride before real use?
Begin with low-speed tests in a controlled area, check brakes, steering, and wheel stability, and gradually increase intensity only after passing safety checks.
Test in a safe space first, check brakes and steering, and only then try basic riding.
What are common risks with upcycled bikes?
Structural weakness, compromised brakes, and misaligned steering are common risks. Avoid overloading the frame and regularly inspect all joints.
Common risks include frame weakness and brake issues; routine inspection is essential.
Watch Video
Quick Summary
- Assess safety before sourcing materials.
- Prioritize structural integrity and braking reliability.
- Test in controlled environments before riding on streets.
- Document the process for safety and sustainability.