How to Know If Your Bicycle Tire Is Tubeless
Learn how to identify a tubeless bicycle tire with practical at-home tests, visual cues, and maintenance tips. Step-by-step guidance to confirm tubeless setup and keep riding smooth in 2026.

You can know if your bicycle tire is tubeless by inspecting the tire and rim for tubeless components: tubeless-ready rim, a tubeless valve, and sealant presence. Locate the tubeless valve stem, inspect bead seating, and listen for air loss during a controlled inflation. If sealant is present and the tire seats without a tube, you’re tubeless.
What tubeless means for your bike (and why you care)
Understanding how to know if your bicycle tire is tubeless starts with the basics: a tubeless system uses a tubeless-ready rim, a tubeless valve, and a sealant-filled tire that seals bead-to-rim contact without a traditional inner tube. According to BicycleCost Team, tubeless setups can reduce flats and improve ride feel, but they require correct installation and ongoing maintenance. In 2026, many road and mountain bikes ship with tubeless-ready rims, yet not every wheel is truly tubeless until the bead seats firmly and sealant is present. This guide helps you verify that your tire actually operates without an inner tube and how to spot warning signs before a ride.
What tubeless means for your bike (and why you care)
The term tubeless describes three core components working together:
- Tubeless-ready rim bed and bead seat that create an airtight seal
- A tubeless valve that locks into the rim and allows air-tight inflation
- Sealant inside the tire that seals small punctures and supports bead seating
If any of these parts are missing or incompatible, you’ll likely still rely on an inner tube. For cyclists, confirming a tubeless setup matters for performance, weight, and puncture resistance, but it also means you’ll handle sealant maintenance and occasional bead seating resets. BicycleCost’s 2026 analysis highlights that riders who verify all components before rides report fewer roadside flats and more consistent pressure. Keeping this in mind helps you decide whether to ride tubeless or convert a tube-type wheel.
Tools & Materials
- Floor pump with gauge or high-volume air compressor (safely used)(Ensure the gauge reads PSI and use gradual pressure to avoid bead damage)
- Tire levers and a bead unseating tool(Useful for reseating beads if necessary)
- Tubeless valve core tool(For removing or tightening the valve core)
- Tubeless sealant (if reseating or topping up)(Check compatibility with tire size and rim width)
- Rim tape (if converting from tubed to tubeless)(Only needed if rim tape is damaged or absent)
- Pressure gauge(Accurate measurement helps verify seal)
Steps
Estimated time: 25-45 minutes
- 1
Inspect visible components
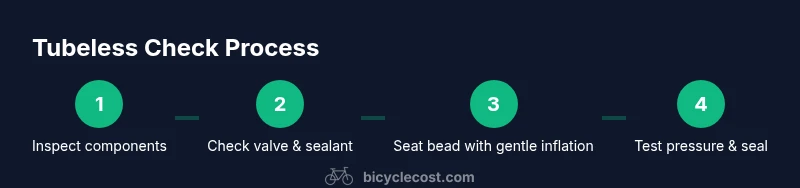
Look for a tubeless-ready rim bed, a tubeless valve, and the presence of sealant inside the tire. If you see a traditional inner tube protruding, or if there is no sealant, you may not be tubeless yet. This initial check helps you plan the next steps without removing tires unnecessarily.
Tip: If the tire bead sits unevenly at the rim, the next steps will address bead seating and sealant distribution. - 2
Locate and inspect the valve
Identify the valve stem; tubeless valves are typically larger and have a rubber grommet. Remove the valve core with the provided tool to inspect the core and ensure it’s tight and not leaking. Reinstall securely after inspection.
Tip: Tighten gradually; over-tightening can strip threads and cause leaks. - 3
Check the bead seating
Inflate by hand using a floor pump with a gauge to a conservative pressure, watching the bead seating. If the bead climbs and seals without a tube, you’re likely tubeless. If air leaks, lower pressure and try seating again.
Tip: Stand to the side when inflating to manage the force and avoid side-to-side bead damage. - 4
Look for sealant indicators
Sealed bead area should show a thin film of sealant along the rim and tire bead. If you don’t see sealant, it may be absent or depleted after prior use. Add sealant if the tire was previously tubeless and appears dry.
Tip: Inspect the tire sidewalls for signs of old sealant buildup which can clog the bead area. - 5
Perform a pressure hold test
Hold the inflated tire at the target pressure for a few minutes and observe any air loss. Minimal to no drop indicates a successful seal. If pressure drops, re-seat the bead or re-check the rim tape and valve.
Tip: If you’re unsure about the seal, perform the test on a quiet surface away from traffic. - 6
Evaluate after a ride-style check
After a short ride, recheck pressure and bead seating. Tubeless setups can shift slightly during initial rides; a redress and sealant rebalance may be needed.
Tip: Keep a small bottle of sealant for topping up after the first few rides. - 7
Decide on maintenance or conversion
If you find recurring leaks or bead unseating, consider reseating with fresh sealant, replacing rim tape, or seeking professional help for a rim that may not be tubeless-compatible.
Tip: Documentation of your wheel’s compatibility helps plan upgrades and future maintenance.
People Also Ask
What defines a tubeless bicycle tire setup?
A tubeless setup uses a tubeless-ready rim bead, a tubeless valve, and sealant inside the tire to seal gaps without an inner tube. Proper seating and sealant distribution are essential for reliability.
A tubeless setup works without an inner tube, using a special rim, valve, and sealant to seal the tire bead.
How can I confirm a tire is truly tubeless at home?
Check for a tubeless-ready rim and valve, inspect for sealant presence, and perform a careful inflation test to see if the bead seats without a tube. If air holds after seating, you’re tubeless.
Check the rim and valve, look for sealant, and gently inflate to confirm seating without a tube.
Can I convert a tubed wheel to tubeless myself?
Yes, but it requires compatible rims, tubeless tape, a tubeless-valve setup, and sealant. Proper reseating and pressure testing are essential. If you’re unsure, seek a shop’s assistance.
You can convert at home with the right kit and careful testing; if unsure, a shop can help.
What are signs a tubeless setup is failing?
Recurring flats, slow air loss, visible bead gaps, or sealant pooling outside the tire indicate a failure in the tubeless seal or seating. Re-seat or replace components as needed.
Frequent flats or air leaks suggest the seal or bead isn’t sealing properly.
Is sealant essential, and how often should it be refreshed?
Sealant is essential for puncture sealing and bead sealing in tubeless tires. Refresh sealant every 6–12 months, or sooner in warm climates where it dries faster.
Sealant helps seal leaks and should be refreshed regularly, especially in hot weather.
What safety checks should I perform before riding tubeless?
Always inspect for bead seating, sealant coverage, and valve tightness. Check tire pressure with a gauge and test the seal at a comfortable, controlled pace before venturing on rough terrain.
Check seating and pressure before you ride to avoid sudden flats.
Watch Video
Quick Summary
- Know the three core tubeless components first.
- Inspect visually, then verify bead seating with a controlled inflation.
- Sealant presence is a strong indicator of a tubeless setup.
- If in doubt, reseat or seek professional help to avoid rim damage.
- Regular maintenance keeps tubeless tires reliable.