Do Tubeless Bicycle Tires Exist? A Practical Guide
Do tubeless bicycle tires exist? Explore compatibility, installation, maintenance, and costs with practical tips from BicycleCost for riders of all levels.

Do tubeless bicycle tires exist? Tubeless-ready rims and tires are now widely produced for mountain bikes and many road setups, but you also need sealant and a tubeless valve. With proper seating, this setup can reduce flats and allow lower pressures. The BicycleCost team notes that compatibility with your rims and tires is key during the switch.
Do they make tubeless bicycle tires
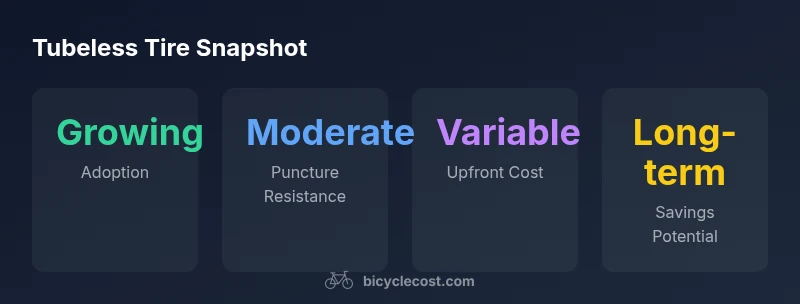
According to BicycleCost, tubeless bicycle tires have become a mainstream option for many riders. The BicycleCost team found that most modern mountain bikes and a growing segment of road bikes are shipped with tubeless-ready rims and tires, or can be converted with aftermarket parts. This makes sense given the practical benefits of tubeless setups, such as lower pinch-flat risk at lower pressures and improved traction. In this article we explore the question do they make tubeless bicycle tires and outline what to consider before you switch. If you ride gravel, XC, or enduro, tubeless tires can be particularly appealing; for casual commuters, the decision depends on rim compatibility and maintenance willingness.
How tubeless tires work
Tubeless tires create an airtight seal with the rim bead without an inner tube. A tubeless-ready rim bed, a tubeless valve, and a bead-seat surface are essential. The tire is filled with a liquid latex sealant that seals small punctures as you ride. When you mount a tubeless tire, you must ensure the bead seats evenly against the rim and that there is no leak at the valve stem or expected bead seat. Sealant thickness and the correct amount play a critical role in sealing, sealing durability, and puncture protection. Compared with traditional tubes, tubeless setups generally allow riding at lower pressures for better grip, but they require diligent maintenance and periodic sealant refreshment.
MTB vs Road: compatibility and acceptance
Mountain bikes have led the adoption of tubeless systems due to rough terrain and higher risk of pinch flats, while road bikes have been catching up with tubeless-ready rims becoming common in newer models. Compatibility hinges on rim bed design, bead type, and the presence of tubeless valves. If your road bike has tubeless-ready rims, you can usually convert with the right tires and sealant. If not, you might settle for a tubeless-ready conversion or continue with tubed tires until you upgrade rims.
Installation steps and common pitfalls
Follow these steps for a smoother tubeless setup: (1) Verify rim compatibility and remove the valve core; (2) Clean the bead seats and check for sharp edges or dings; (3) Apply rim tape if using a rim that requires it; (4) Install tubeless-ready tires and insert tubeless valves; (5) Sealant pour and inflate with a compressor or high-volume pump until the tire beads seat; (6) Spin and bounce the wheel to help sealant reach puncture-prone areas. Common pitfalls include slow bead seating, pinches around the rim tape, and insufficient sealant. If you encounter leaks, deflate, reseat, and recheck bead alignment.
Maintenance and troubleshooting
Sealant typically needs replacement every 3–6 months, depending on climate and tire use. Regularly inspect bead seating, valve stems, and rim tape for wear. If a puncture occurs, sealant may auto-seal or require a quick pump and reseating. Inconsistent pressure is often a seat-seating problem rather than a tire fault; check bead seating and ensure tires are mounted on correct rims. Carry a tubeless repair kit and a spare sealant bottle for longer trips.
Cost considerations and lifecycle
Initial costs for tubeless setups include tubeless tires, rims or rims with tubeless-ready options, sealant, and valves. Over time, many riders experience fewer flats and longer tire life, which can offset upfront costs. The overall value depends on your riding style, terrain, and willingness to perform periodic sealant refreshes and check bead seating. For heavier riders or aggressive riding, tubeless may offer more robust performance.
Riding styles and practical guidelines
Gravel and XC riders often benefit from tubeless setups due to improved grip at low pressures and reduced pinch flats. Road riders are adopting tubeless tires as rims and tires become more widely tubeless-ready. Consider your typical terrain, tubeless sealant type, and the compatibility of your current wheelset before buying. If you ride in wet conditions, choose sealants with proven performance in humidity and climate.
How to choose tubeless tires for your bike
When selecting tubeless tires, prioritize bead compatibility with your rims, tire width appropriate for your frame clearance, and the intended riding style. For rough or loose terrain, wider tires at lower pressures can improve grip. Check manufacturer notes for sealant compatibility and installation guidance. Always verify that your rims are compatible with tubeless setups and that you have the right valves, rim tape (if required), and sealant.
Quick recap
- Tubeless tires are widely available and increasingly common on both MTB and road bikes.
- Proper seating and compatible rims are essential for a successful tubeless setup.
- Sealant quality and sealant refreshment impact performance and longevity.
- The choice to go tubeless should align with your riding style, terrain, and maintenance tolerance.
Comparison of tubeless, tubed, and tubeless-ready-with-tubes options
| Tire Type | Pros | Cons |
|---|---|---|
| Tubeless | Fewer flats; better grip at low pressures | Seating can be tricky; sealant cost; rim compatibility concern |
| Tubed | Simple; lowest upfront cost | More flats; higher maintenance; punctures require tube replacement |
| Tubeless-ready with tubes | Easier seating; can still use a tube | Not true tubeless performance; limited leak protection |
People Also Ask
Do tubeless bicycle tires work on all rims?
Tubeless tires require rims that are tubeless-ready or have compatible bead seating. Some rims need adapters or tape upgrades. Always verify with the rim manufacturer before converting.
Tubeless tires need rims that are tubeless-ready or properly taped and sealed; check your wheel's specs first.
What equipment do I need to install tubeless tires?
You’ll need tubeless tires, tubeless rims, tubeless valves, rim tape if required, a suitable sealant, and a pump or compressor for seating.
Tubeless tires require tires, rims, valves, sealant, and a pump or compressor to seat.
Are tubeless tires safer for beginners?
Tubeless can reduce flats but seating and maintenance can be messier. Beginners should practice seating technique and carry a repair kit.
They can be safer if you manage setup carefully and carry repair essentials.
How often should sealant be refreshed?
Sealant typically needs replacement every 3–6 months, depending on climate and tire wear. Check bead seating during routine checks.
Refresh your sealant every few months and inspect beads during rides.
Can tubeless tires be used with inner tubes?
Some setups allow tubeless tires with an inner tube, but that negates tubeless performance and puncture protection.
You can run a tubeless tire with a tube in some cases, but it isn’t true tubeless.
What are common signs a tubeless setup isn’t sealing?
Frequent sealant loss, hissing at the bead, or repeated flats indicate seating issues. Try re-seating, cleaning beads, or replacing rim tape.
If it keeps losing air or hisses, reseat and inspect the bead.
“Tubeless setups can reduce flats and improve grip, but success hinges on rim compatibility and proper bead seating.”
Quick Summary
- Confirm rim compatibility before buying tubeless tires
- Carry the right tools for bead seating and sealant refresh
- Expect some setup time and potential reseating on first install
- Weigh upfront costs against long-term puncture protection and ride quality