How to Fix Bicycle Gears: A Complete DIY Guide for All Bikes
Learn practical, step-by-step methods to diagnose and fix bicycle gears, including derailleur indexing and cable tension. This BicycleCost guide covers tools, safety, and maintenance timing.

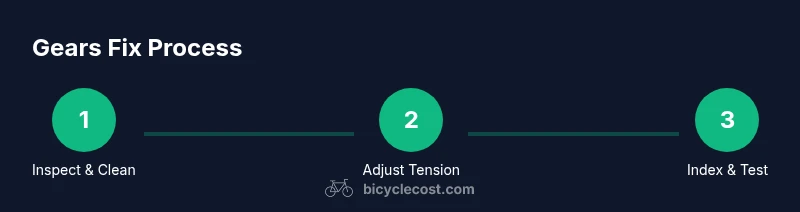
Master gear fixes with a clear, repeatable process: check symptoms, adjust indexing, balance cable tension, and verify limits. This concise guide arms you with reliable steps, safe preparation, and a checklist to ensure smooth shifting.
Understanding Bicycle Gears and How They Work
Gears on a bicycle change your leverage, making it easier to pedal uphill or faster on flats. The front derailleur moves the chain between chainrings, while the rear derailleur shifts the chain across cogs on the cassette. Shifters pull or release a cable that moves the derailleurs; the derailleur cages position the chain so it aligns with the selected gear. Over time, wear on the chain, cassette, and chainrings, plus stretched cables, can throw off this alignment, causing poor shifts, hesitations, or chain skipping. Keeping the system clean, properly tensioned, and correctly indexed is essential for smooth, reliable shifting. According to BicycleCost, a well-tuned drivetrain increases efficiency and prolongs component life. Regular checks help you spot wear early and plan replacements before more serious damage occurs.
To get the best results, understand the difference between indexing (the precise alignment between shifter movement and derailleur movement) and simple mechanical motion. Indexing becomes critical as cassette cogs get closer together; tiny misalignments can cause gears to miss or rub. With modern drivetrains, most issues boil down to cable tension, dirty components, or misadjusted limit screws. A consistent maintenance routine keeps gears synchronized across the entire range, from the smallest to the largest cog.
Common Symptoms and What They Mean
Gears that don’t fully engage or skip when you pedal under load are a sign of misalignment or wear. If the chain hesitates between gears or refuses to climb into a chosen gear, it could mean stretched cables, a worn chain, or a worn cassette/chainrings. Mud, grit, or dried lubricant can also hamper shifting. Noises like grinding or rubbing while shifting often point to misadjusted limit screws or B-tension, which controls the derailleur’s distance from the cassette. Finally, cross-chaining (using extreme big and small combinations) can accelerate wear and reduce efficiency. Regularly inspecting the chain, cassette, and derailleur pulleys helps you catch wear early and maintain precise indexing.
Understanding symptoms helps you decide whether you can fix it yourself or should seek professional help. If you notice chain slip under load, consistent skipping on a specific gear, or difficulty shifting across the full range, plan a systematic adjustment session. A well-documented tune-up preserves coil springs and pivot points in the derailleur and keeps the shifting cadence predictable over time.
Essential Tools and Safety Precautions
A stable work setup is essential before you touch the drivetrain. Gather a bike repair stand or a sturdy workbench, a set of hex wrenches (commonly 4mm, 5mm, 6mm), screwdrivers, cable cutters, a chain wear gauge, lubrication suitable for bike chains, a clean rag, and optional replacement cables/housing. Wear eye protection and gloves to shield from sharp edges and moving parts. Keep a well-lit area and avoid wearing loose clothing that could catch in the chain. Remember to shift to the smallest chainring and largest rear cog before starting, so the gears are slack and easy to adjust.
BicycleCost recommends performing adjustments with the bike off the ground and the wheels free-spinning. If you’re new to derailleur tuning, start with the rear derailleur indexing before moving to the front. Documenting the current settings helps you reset if needed and provides a baseline for future maintenance.
Cleaning, Lubrication, and Prep
Begin by cleaning the chain, cassette, chainrings, and derailleur pulleys with a gentle degreaser. Rinse and dry thoroughly before applying lubricant to the chain while it’s turning slowly on the bike or off the bike on a stand. Wipe off excess lube; a thin film is all you need to reduce wear and draw out dirt. Inspect the chain for wear with a chain checker; if it reaches wear indicators, replace the chain to prevent skipping and poor shifting.
Keep the drivetrain surface clean to ensure accurate measurements and smooth cable movement. When cleaning, avoid spraying degreaser directly into the derailleur bearings and pulleys—let the degreaser do its work and wipe away residue. A clean drivetrain is easier to tune and will extend the life of your components.
Checking Cable Tension and Derailleur Indexing
Indexing is the precision alignment between the shifter’s cable movement and the derailleur’s actual movement. To verify, shift across the gears with steady, deliberate motions and note any hesitations, rub, or slow responses. Start by checking the rear derailleur and adjust cable tension with the barrel adjuster—turning away from you to tighten (in most setups) and toward you to loosen. Make small, incremental turns and test shift after every adjustment. After you’re satisfied with the rear, repeat for the front derailleur if needed. Worn cables can stretch and require re-tensioning over time, so replace if elongation is evident.
If you have trouble aligning gears evenly, it’s often a sign the indexing is off. In this case, adjust the barrel adjuster in small steps until the shift between adjacent gears is clean and quick. Keep a note of the number of turns you make so you can reproduce (or revert) the setting if needed.
Front vs Rear Derailleur: Alignment and Adjustments
The rear derailleur handles a wider range of gears, but front derailleur alignment is equally important. Start by adjusting the high and low limit screws to prevent the chain from dropping off the smallest or largest chainring. Then adjust the B-tension screw to position the derailleur’s jockey wheel relative to the cassette. If the derailleur struggles to rise or drop when shifting, re-check both its alignment and cable tension. A properly aligned front derailleur reduces cross-chaining and improves shift precision across the entire range.
Important tips include making tiny adjustments, testing after each change, and avoiding over-tightening bolts which can bend the derailleur hanger. If your bike uses a clutched derailleur or a complex setup, consult your specific model’s service manual for the exact screw positions and recommended tolerances. A slight misalignment here can cascade into indexing issues on the rear.
Test Ride and Fine-Tuning
With adjustments complete, take a short test ride on varied terrain to evaluate shifting under real load. Shift through all gears in both directions, and note any hesitations, rub, or ghost shifts. If issues persist, return to the relevant section—tension for rear indexing or limit screws for front alignment—and re-tune in small increments. A final ride should feel smooth, with crisp shifts that require only a light touch on the shifter. If the chain rubs on the front derailleur during large gear changes, re-check the B-tension and front derailleur alignment.
Document your final settings for future maintenance and check for wear after several rides. A good tune can last for hundreds of miles if components remain within wear tolerances. If shifting remains poor after multiple attempts, consider consulting a professional technician or a bike shop with a derailleurs expertise.
Maintenance Schedule and When to Seek Help
Establish a simple maintenance cadence to extend drivetrain life. Inspect cables and housings for fraying at least every few months or after a heavy ride, and replace worn components promptly. Check chain wear and cassette/chainring wear at regular intervals, especially after long-term use or if you ride in harsh conditions. If you notice persistent misalignment, cross-chaining, or shifting irregularities despite adjustments, seek a professional service. A trained technician can diagnose subtle issues—like hanger misalignment, worn pulleys, or hidden damage—that are easy to miss at home.
Tools & Materials
- Bike repair stand(Stabilizes the bike at working height)
- Hex wrench set (4mm, 5mm, 6mm)(Common sizes for derailleur mounting and cable anchors)
- Screwdrivers (Phillips and flat-head)(For limit screws and small fasteners)
- Cable cutters(Used if you replace cables or housing)
- Chain wear gauge(Determines if the chain needs replacement)
- Lubricant (bike-specific chain lube)(Apply thin, even coat on the chain after cleaning)
- Rags or shop towels(Wipe excess lubricant and clean residue)
- Degreaser (optional)(Use as needed to remove heavy grime)
- Replacement derailleur cables and housing (optional)(Use if cables are stretched or frayed)
Steps
Estimated time: 45-90 minutes
- 1
Prepare workspace and secure bike
Position the bike on a stand at a comfortable height and ensure it cannot tip. Shift to the smallest rear cog and smallest front chainring to relax the drivetrain. Put on eye protection and organize tools within reach.
Tip: Secure the bike to avoid sudden movement during adjustments. - 2
Inspect chain and gears
Look for stretched chain, worn cassette teeth, and straightness of the derailleur pulleys. If wear is evident beyond simple tuning, plan replacement parts before continuing. Note any stiff or bent link that could hinder movement.
Tip: If you can’t identify the worn part, start with the chain and cassette as common failure points. - 3
Clean drivetrain components
Apply a small amount of degreaser to a rag and wipe the chain, cogs, and jockey wheels. Rinse with water or wipe dry thoroughly. Re-lubricate the chain after complete drying to prevent rust.
Tip: Avoid soaking the entire derailleur; target the chain, cassette, and pulleys. - 4
Check chain wear and replace if needed
Use the chain wear gauge to verify stretch. If the gauge engages between pins on the chain, replace the chain to maintain consistent shifting and prevent cassette wear.
Tip: Replacing the chain early saves costs by extending cassette life. - 5
Inspect and adjust cables/housing
Check for fraying, stiffness, or kinks in cables and housing. If necessary, cut back housing and reattach new cable. Test smooth cable movement by manually pulling the cable to ensure it moves freely.
Tip: Do not pinch the cable against sharp edges during routing. - 6
Tune rear derailleur indexing
Shift to the smallest rear cog; using the barrel adjuster, make small turns to fine-tune the alignment between shifter and derailleur. The goal is a clean shift between adjacent gears without rub or hesitation.
Tip: Make very small increments (¼ to ½ turn) and test after each adjustment. - 7
Tune front derailleur alignment
Adjust the high and low limit screws so the chain stays on the correct ring during shifts. If the chain contacts cage rails or rubs at the outer positions, recheck alignment and cage tension.
Tip: Avoid overtightening screws; it can bend the derailleur hanger. - 8
Set B-tension and verify geometry
If your derailleur has a B-tension screw, adjust so the jockey wheel sits at a comfortable distance from the cassette. This ensures smooth shifting across the largest cogs.
Tip: Too close or too far can worsen shifting; small adjustments are best. - 9
Test ride and fine-tune
Go for a ride on varied terrain; shift through every gear, noting any hesitation, rub, or misalignment. Revisit relevant adjustments in small steps until shifts are crisp.
Tip: Document final settings to reuse on future maintenances.
People Also Ask
Why is my bike skipping gears?
Skipping is usually caused by wear or misadjustment—check the chain, cassette, and cables, then re-tune the derailleur indexing. If the issue persists, inspect the derailleur pulley wear or hanger alignment.
Skipping gears is typically due to wear or misadjustment. Check the chain and cassette, re-tune indexing, and inspect pulleys and hanger alignment if needed.
Do I need to replace cables to fix gears?
Not always. Inspect cable wear and stretch; if the cable is frayed or has noticeable slack after tuning, replace it. Otherwise, proper tensioning and indexing can fix many issues.
You don't always need new cables. If cables are not frayed and still responsive, adjust tension and indexing first.
How often should I lubricate the chain?
Lubricate after cleaning or riding in wet conditions. In regular conditions, a monthly light application is common, but adjust based on riding frequency and climate. Wipe off excess to prevent dirt buildup.
Lubricate after cleaning or wet rides; roughly monthly in dry conditions, more often if you ride a lot.
Can I adjust gears without a bike stand?
A stand makes tuning easier, but you can work on a stable surface with the rear wheel off the ground. Ensure the bike is secure and the drivetrain can rotate freely during adjustments.
Yes, you can, but a stand helps you see changes clearly and keeps your bike stable.
What does indexing mean in gears?
Indexing is aligning the shifter’s cable movement with the derailleur’s actual movement so each gear aligns accurately. If indexing is off, shifts feel vague or skip.
Indexing aligns shifter movement with the derailleur; misalignment causes sloppy or missed shifts.
Is it safe to ride with a misaligned derailleur?
Riding with a misaligned derailleur can lead to chain derailment, dropped chains, or internal damage. It’s best to fix the alignment before riding long distances.
Riding with a misaligned derailleur can cause the chain to drop; fix it before riding again.
Watch Video
Quick Summary
- Document final derailleur settings for future tweaks
- Check chain wear to prevent premature wear on cassette
- Tune rear indexing before front derailleur adjustments
- Test ride and refine until shifts are crisp
- Replace worn cables or housing to restore reliability