How to Fix Bicycle Disc Brakes: A Step-by-Step Guide
Practical, step-by-step guidance for diagnosing and repairing bicycle disc brakes, covering hydraulic and mechanical systems, common issues, safety, and maintenance to keep stopping power reliable.

Goal: learn how to fix bicycle disc brakes safely and effectively. This guide covers diagnosing common issues, aligning calipers, replacing pads, cleaning rotors, and bleeding hydraulic lines if needed. You’ll need a stable work area, basic hand tools, replacement pads, brake cleaner, and a bike stand to proceed confidently. Following these steps helps restore braking performance and extend component life.
Understanding Disc Brakes on Modern Bikes
Disc brakes have become the standard on many road and mountain bikes due to consistent stopping power, especially in wet or muddy conditions. There are two main systems: hydraulic and mechanical. Hydraulic brakes use fluid pressure to actuate pistons that squeeze the rotor, delivering smooth, powerful stopping with very little lever travel. Mechanical brakes rely on a cable pulling a piston inside the caliper, which is simpler to service but can feel less linear as temperatures change. Both types require clean rotors, properly worn pads, and secure mounting. Pad materials vary (organic, sintered) and affect bite, heat management, and longevity. Rotor size and mounting standards differ by wheel and frame, so always confirm compatibility before purchasing parts. Regular maintenance—cleaning rotors with brake cleaner, avoiding oil contact, and checking bolt tightness—will keep your braking performance predictable. According to BicycleCost, disc brakes offer reliable stopping power even in challenging riding conditions, provided you follow a disciplined maintenance routine. This guide focuses on practical, hands-on steps you can perform at home and illustrates how to fix bicycle disc brakes safely.
Common Causes of Disc Brake Problems
Disc brakes can fail or feel inconsistent for several reasons. Contamination from oil or grease on pads or rotors is a very common culprit, especially after washing the bike or applying lubricants nearby. Misalignment between the caliper and rotor can cause rub or grab, while worn pads or a grooved rotor reduce braking efficiency. Hydraulic systems can introduce air if the line is opened or if there is moisture; mechanical systems can suffer from stretched cables or sticking pistons. Loose mounting bolts or a bent rotor can also cause erratic behavior. Each symptom points to a different fix, so a systematic check is essential. In this section, you’ll learn how to triage symptoms, prioritize fixes, and decide when to repair versus replace components. Based on BicycleCost research, addressing wear and alignment issues early often yields the biggest gains in braking confidence and safety.
Safety First: Prepare Your Workspace
Before touching any brakes, set the bike on a stable stand or the ground on a soft surface. Wear eye protection and gloves to guard against sharp edges and rotor bits. Work in a well-lit area and avoid working near traffic or stairs. Keep a small tray for screws and a labeled container for removed parts. Clean your tools and wipe down the rotor surface with brake cleaner to avoid contaminating pads. Secure the bike so it cannot tip, and never ride with a compromised brake system. A calm, organized workspace reduces mistakes and speeds up the repair process. Note that hydraulic brakes require extra caution when opening the system; never force fluid into the line and dispose of any waste brake fluid according to local regulations.
Diagnosing Symptoms and Priorities
Start with a visual inspection: are the pads worn down, or is there scoring on the rotor? Spin the wheel to listen for rubbing and observe if rubbing occurs on one side or both; this helps identify rotor deviation or caliper misalignment. If the lever feels spongy or goes to the bar or lever, air in the line (hydraulic) or a stretched cable (mechanical) could be the cause. Listen for squeaks or grinding noises—that usually means contaminated pads or a foreign object lodged between pad and rotor. In wet weather, brushing off mud and oil residues can improve grip. Once symptoms are identified, prioritize fixes: contamination and alignment issues are quickest to correct; worn pads or warped rotors require part replacement.
When to Repair vs Replace Components
Repairing often covers cleaning, re-centering, or returning pad contact to a fresh surface. Replacing is necessary when pads are irretrievably worn or the rotor shows deep grooves, heat haze, or warping beyond true tolerance. If the caliper pistons are sticking or the system leaks fluid, more involved service or professional help may be needed. For hydraulic brakes, if you suspect air in the line or a persistent soft lever after bleeding, you should consider a full bleed with the correct fluid type. For most riders, replacing worn pads and a slightly grooved rotor with compatible parts will restore performance and safety. Regular inspection prevents small issues from becoming dangerous braking failures.
Step-by-Step Repair Mindset
Approach every brake service with a plan: verify safety, document the current state, perform one fix at a time, and test frequently after each change. Maintain clean hands and use the correct tools for the job. If you work on a bike with multiple brakes, treat each side as a separate subsystem to avoid cross-contamination of parts. Keep a log of wear patterns and service intervals for future reference, which helps you ride smarter and longer. BicycleCost emphasizes documenting every maintenance action so you can track when to replace components and anticipate future service needs.
Fine-Tuning Caliper Alignment and Pad Position
Caliper alignment is a precise art. Start by loosening the caliper mounting bolts slightly, then squeeze the brake lever to center the caliper around the rotor, and retighten while the lever is held in. Check for even clearance on both sides of the rotor; rubbing on only one side indicates a misalignment or a bent caliper. If the pads do not fully contact the rotor when the lever is applied, adjust pad position or use a thin spacer to center the caliper. After alignment, re-check by spinning the wheel; any rubbing should be gone. Finally, bed in new pads by performing several gentle braking sessions from moderate speed to transfer a light layer of pad material to the rotor for improved bite. These steps minimize noise and maximize stopping power during real rides.
Maintenance Tips, Warnings, and Common Pitfalls
Consistency is the key to long brake life. Clean rotors and pads regularly, replace pads in a timely fashion, and avoid contaminating rotors with lubricants or oil-based cleaners. Always torque rotor bolts to the manufacturer’s specification and use the correct pad compound for hydraulic vs mechanical systems. A common pitfall is mixing pad types or using incompatible rotors; always match parts to your brake model. For hydraulic brakes, never skip bleeding if you notice spongy feel or air bubble; improper bleeding can dramatically reduce performance. Finally, store tools and parts in a dry place to prevent corrosion and ensure your setup stays true for your next ride.
Quick Recap for Quick Learners
Maintaining disc brakes is about cleanliness, proper alignment, and timely replacement of worn parts. Regular checks prevent surprises on the trail, and disciplined maintenance extends component life. For safety, always test your brakes at low speed after any adjustment. Remember to follow the steps in this guide and consult a professional if you encounter hydraulic system leaks or persistent lever issues.
Tools & Materials
- Bike stand or stable work surface(Keeps bike secure; optional but highly recommended)
- Hex keys (6 mm and 5 mm)(Caliper mounting bolts and rotor bolts)
- Torx driver (T25)(If rotor bolts use Torx heads)
- Replacement brake pads (matching your brake model)(Check pad type and compatibility)
- Brake cleaner or isopropyl alcohol(Clean rotor and caliper surfaces without leaving residue)
- Rags or lint-free wipes(For cleaning and drying parts)
- Caliper alignment tool or spacer (optional)(Helpful for centering caliper quickly)
- Torque wrench(Precise tightening of bolts and rotor screws)
- Bleed kit and correct brake fluid (hydraulic brakes only)(Use manufacturer-specified fluid type)
- Disc rotor inspection tool or straightedge (optional)(Assist rotor true checks)
- Bike-specific lubrication or grease(Lubricate sliding pins if present)
- Safety glasses and gloves(Protect eyes and hands)
Steps
Estimated time: 60-120 minutes
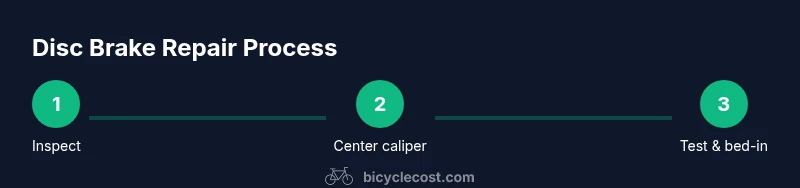
- 1
Secure the bike and prep workspace
Place the bike on a stable stand or secure it so it cannot tip. Put on safety glasses and gloves. Check that the area is well lit and clean. This setup reduces mistakes and keeps parts from bouncing away during work.
Tip: Take a photo of the initial setup to reference alignment after the fix. - 2
Remove wheel to access rotor and caliper
If you have easy access with the wheel installed, you can skip wheel removal. If needed, loosen axle/QR and remove the wheel. Ensure the rotor remains visible and free of debris.
Tip: Keep track of any bolts and spacers; place them in labeled trays. - 3
Inspect rotor and caliper surfaces
Look for warping, scoring, or heavy contamination on the rotor. Check caliper mounting bolts for tightness and inspect the pistons for smooth movement. Clean rotor and pad contact areas with brake cleaner if contamination is suspected.
Tip: Do not touch the rotor’s friction surface with dirty gloves. - 4
Check pads and replace if worn
Assess pad thickness and wear indicators. If the pads are glazed or deeply grooved, replace with a compatible pad set. Seat new pads by gently bedding them in during the first rides after reinstalling.
Tip: Always replace pads as a pair if applicable to avoid uneven bite. - 5
Center caliper and align pads
Loosen caliper bolts, center the caliper around the rotor by pulling the lever, then retighten bolts. Spin the wheel to verify even clearance. If rubbing persists on one side, adjust with a small spacer or readjust caliper alignment.
Tip: A caliper alignment tool can speed up centering, but manual centering works well too. - 6
Bleed hydraulic brakes or adjust cable tension
For hydraulic brakes with a soft lever, bleed the system using the manufacturer’s instructions and the proper fluid. For mechanical brakes, check cable tension and adjust housing stops if needed. Ensure there are no air pockets that cause lever mush.
Tip: If you’re unsure about bleeding, seek a professional service to avoid damaging seals. - 7
Test, bed-in, and finalize
Reinstall the wheel, if removed, and test at low speed in a safe area. Perform several controlled stops to bed new pads and verify stable braking. Recheck torque on rotor bolts after a short ride.
Tip: Bed-in gradually to avoid glazing pads or overheating the rotor.
People Also Ask
Can I fix disc brakes without removing the wheel?
Yes, many adjustments can be done with the wheel mounted, such as caliper alignment and pad replacement. However, removing the wheel provides better access for rotor inspection and pad changes on some bikes.
Yes, you can often fix disc brakes with the wheel in place, but removing the wheel helps with access for pad changes.
What causes brake rub on one side only?
One-sided rub usually indicates caliper misalignment, a bent rotor, or a caliper that isn’t centered over the rotor. Recenter the caliper and check rotor true to resolve the issue.
Rub on one side usually means misalignment or a warped rotor; recenter and true the rotor.
Should I replace pads before rotor if worn?
If pads are worn to the wear indicators or if the rotor shows deep grooves, replace pads or rotor as needed. In many cases, pads wear faster than rotors, so start with pads and inspect the rotor for damage.
If pads are worn or rotor is grooved, replace pads first and then inspect the rotor.
Can I mix pad types or brands?
Mixing pad compounds is not recommended because it can lead to uneven bite and noise. Always use pads recommended for your brake system and replace them in pairs if applicable.
Avoid mixing pad types; use the recommended pads for your brake system.
Is it safe to ride with braking issues?
Riding with compromised brakes is unsafe. If the lever feels soft, the pads are contaminated, or you hear grinding, stop riding and fix the brakes before resuming.
No, do not ride with braking issues. Fix them first to avoid accidents.
When should I bleed hydraulic brakes?
Bleed hydraulic brakes when there is air in the line or the lever feels spongy after basic maintenance. Use the manufacturer’s recommended fluid and follow their procedure precisely.
Bleed hydraulic brakes if you feel air in the line or a soft lever after checks.
Watch Video
Quick Summary
- Inspect rotors and pads regularly for wear and contamination
- Center calipers before riding to prevent rub
- Bleed hydraulics only when necessary and with correct fluid
- Test brakes at low speed before returning to trails