Stop a Bicycle Safely Without Falling: Braking Guide
Learn how to stop a bicycle without falling using controlled braking, body positioning, and practical drills. This guide covers technique, practice drills, safety tips, and maintenance checks for riders of all levels.

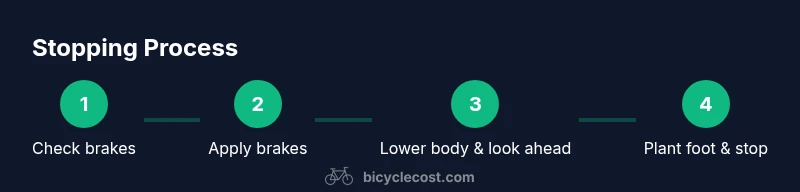
To stop a bicycle without falling, apply smooth braking using both brakes, lower your center of gravity, and shift your weight slightly backward as you slow. Look ahead, keep your eyes on your path, and practice in a safe, flat area. If you feel unstable, practice stopping in place before moving again.
Why stopping safely matters on a bike
Stopping safely is a core riding skill that protects you from falls, collisions, and equipment damage. Whether you're riding in city traffic, on a mountain trail, or on a shared path, abrupt stops can destabilize your balance and send you over the handlebars if your weight shifts incorrectly or your brakes lock. According to BicycleCost, developing disciplined braking habits reduces risk and builds confidence in stop-and-go situations. Practicing in a controlled setting is essential before riding in more complex environments. Safety gear like a helmet and gloves adds a margin of protection if a stop doesn’t go perfectly, but good technique is the foundation of safe stopping.
Core principles of stopping without losing balance
There are a few non-negotiable ideas that underpin safe stopping:
- Maintain a light grip on the handlebars and keep your wrists relaxed so you can absorb movement instead of fighting it.
- Look where you want to go; your steering instinct follows your gaze, which helps you stay straight during the pause.
- Brake smoothly and progressively; abrupt levers can lock the wheels or pitch you forward or backward.
- Lower your center of gravity by bending your elbows and knees and keeping your weight over the bike as you slow. This stance increases stability and reduces the chance of a twin-axis loss of balance during deceleration.
Prepare before you ride to stop confidently
Preparation sets the stage for safe braking. Before you roll:
- Inspect your bike for brake wear, tire pressure, and chain cleanliness.
- Choose a flat, clear area with ample stopping distance for initial practice, away from traffic.
- Wear a helmet, closed-toe shoes, and gloves to protect yourself during imperfect stops.
- Plan a simple route with predictable surfaces so you can practice braking in a controlled environment. Preparation reduces surprises and helps you respond calmly when you need to stop.
The braking technique: controlled braking with both brakes
The most reliable way to stop without falling is to brake progressively with both brakes:
- Begin with light, even pressure on both levers to reduce speed without locking a wheel.
- If you feel the front wheel starting to skid, ease the front brake slightly and re-balance with your weight.
- Increase pressure gradually as you approach the stop, never yanking the levers. Front brake provides more stopping power, but balanced use reduces nose dive and loss of control.
- As you near the stop, reduce speed to a crawl and prepare to plant a foot for stability if needed.
Consistent practice helps you tune the balance between front and rear braking for various surfaces. Remember: smooth, progressive braking beats hard, abrupt stops every time.
Weight shifting and body position to maintain balance
Body position strongly influences balance during a stop. To maintain stability:
- Keep your chest over the handlebars and your hips aligned with the bike.
- Slightly bend your knees and elbows to absorb movement, rather than staying stiff.
- Shift some weight toward the back as you slow to prevent the front wheel from lifting or the rear wheel from skidding. Your heels can stay down to aid traction, and your gaze should stay ahead to anticipate the stop path.
- If you feel your front wheel wanting to dive, ease the front brake and push your hips slightly backward to redistribute weight toward the rear.
Speed-specific stopping strategies
Stopping strategies vary by speed:
- Slow speeds (20 km/h or less): Use light, even braking with both brakes and a short, deliberate stop. Keep your weight centered and ready to plant a foot if needed.
- Moderate speeds (20–35 km/h): Begin braking early and smoothly, balancing brake pressure to prevent wheel lock. Slightly shift weight backward as you decelerate.
- Higher speeds: Start braking earlier with both brakes, applying more rear brake to manage nose dive. Keep your eyes on a straight line, and be prepared to dismount safely if stopping distance becomes critical.
Foot placement and dismount options
Foot placement matters for final stability:
- If your stop is under control, you can plant one foot down to stabilize and come to a complete stop with minimal wobble.
- When you’re comfortable, you can come to a complete stop with both feet ready to place down, which is common for beginners.
- On steep or slippery surfaces, a controlled dismount to the left or right can prevent a fall. Practice both options in a safe area so you know exactly where your foot will land.
Practice drills you can do in a safe area
Drills help embed stopping technique:
- Stop-and-go drill: accelerate lightly, then stop smoothly using both brakes. Repeat to build rhythm.
- Slow-speed balance: ride at a crawl, halt, and restart without stepping off. This improves control when balance is fragile.
- Slalom stop drill: weave slowly through cones and practice stopping between turns, maintaining balance and looking ahead.
- Braking on different surfaces: practice on dry pavement first, then add light moisture or a chalk line to simulate slick conditions.]
Common mistakes and how to fix them
Common errors during stopping include braking too hard, relying on one brake, and looking down instead of ahead. Fixes:
- Use both brakes together with gradual pressure; avoid grabbing one lever.
- Keep your head up and eyes forward; your body will follow your gaze.
- Practice on a flat, obstacle-free surface before attempting hills or crowded paths. Regular drills reinforce correct form and reduce hesitation.
When to stop using alternative methods
There are times when the safest action is to bail to the side rather than brake hard:
- On extremely slick surfaces (ice, loose gravel) where braking could cause a slide.
- When a vehicle or pedestrian enters your stopping zone unexpectedly and you cannot brake in time.
- If your brakes fail, steer to the safest escape path and dismount when you have space. In all cases, aim to maintain control rather than forcing a stop at all costs.
Tools & Materials
- Bike in good working condition (brakes, tires, gears)(Brakes should be properly adjusted and tires inflated to recommended pressure)
- Helmet(High-quality cycling helmet with a snug fit)
- Closed-toe shoes(Flat-soled shoes with good grip)
- Practice area: flat, clear space(Smooth surface, free of debris, wide enough to maneuver)
- Gloves (optional)(Adds grip and protects hands in a fall)
- Water bottle(Stay hydrated during practice sessions)
Steps
Estimated time: 25-35 minutes
- 1
Inspect bike and gear
Perform a quick pre-ride check: brakes, tires, and chain. Ensure you have a clear area to stop if needed. This reduces the chance of an unexpected stop causing a fall.
Tip: If you notice any brake drag or tire wear, fix it before attempting practice. - 2
Choose a safe practice area
Select a flat, open space with smooth pavement and ample stopping distance. Remove obstacles and set up a few cones to simulate real riding scenarios.
Tip: Start far from obstacles to build confidence before increasing complexity. - 3
Assume a balanced stance
Stand over the bike with your weight centered, knees slightly bent, and elbows relaxed. Ground your feet so you can plant quickly if needed.
Tip: Keep your eyes up and ahead; the path you see becomes the path you ride. - 4
Apply gentle, even pressure on both brakes
Begin with light pressure on both levers to reduce speed without locking the wheels. Avoid abrupt lever pulls which can cause skids or loss of balance.
Tip: If the front wheel shows any sign of skidding, ease the front brake slightly and rebalance. - 5
Modulate braking as you approach the stop
Gradually increase brake pressure as you slow, keeping the bike straight. Allow the rear wheel to bear some load to help control the stop.
Tip: Think in micro-adjustments rather than big lever changes. - 6
Lower your center of gravity
Shift weight slightly toward the back, bend your knees and elbows, and keep your chest over the handlebars to maintain stability.
Tip: A lower stance reduces pitch moments and helps you absorb movement. - 7
Look where you want to go and stay aligned
Keep your gaze forward along the stopping path. Steering cues follow your vision, helping you stay straight as you slow.
Tip: Avoid looking down at the front wheel; it invites wobble. - 8
Plant a foot as you finalize the stop
As speed reduces, prepare to place one foot on the ground for stability if needed. This is especially important on uneven surfaces or when coming to a full halt.
Tip: Practice foot placement in a controlled zone so you don’t trip when you stop. - 9
Practice a stop-and-go rhythm
Repeat braking, stop, and restart to build timing and confidence. This cadence trains your muscles to respond consistently.
Tip: Record your sessions or use a mirror to monitor form. - 10
Progress to higher speeds and different surfaces
Once you’re comfortable on smooth ground, try damp pavement or a shallow incline to learn how braking changes with traction.
Tip: Always prioritize safety; increase difficulty only after mastery. - 11
Cool-down and reflect
After practicing, take a moment to review what worked and what felt off. Note improvements and areas for further work.
Tip: Keep a practice log to track progress over time. - 12
Return to riding with a plan
Take your new stopping skills to real-world rides slowly, choosing routes with predictable conditions and avoiding high-traffic scenarios until you’re confident.
Tip: Consistency beats intensity; regular short sessions yield better balance and braking control.
People Also Ask
What is the safest way to stop a bike without falling?
Brake smoothly with both brakes, keep your weight centered, and look ahead to reduce chances of losing balance. Practice in a safe area to build confidence.
Brake softly with both brakes and stay balanced by looking ahead; practice in a calm space to build confidence.
Should I use front brake or rear brake first?
Use both brakes together with progressive pressure. The front brake provides most stopping power, but balanced use reduces nose dive and loss of balance.
Use both brakes gradually; front brake is strong but balance matters most.
How can I stop quickly on a straight path?
Apply even pressure on both brakes, shift weight back slightly, and look ahead to keep the bike stable as you decelerate.
Brake evenly, lean back a bit, and keep your eyes forward for a quick, controlled stop.
What if I feel I am going to fall?
Ease off slight braking, bend your knees, and plant a foot while maintaining balance. If needed, roll with the bike to minimize injury.
Relax your grip, bend your knees, and step to the side if needed to prevent a fall.
How can I practice stopping safely?
Choose a quiet, flat area, practice at low speeds, and gradually increase difficulty as your balance improves.
Start in a safe area at slow speeds, then progress as you gain control.
Is it okay to stop on a hill?
Stability is harder on slopes. Use both brakes, keep weight low, and if needed, dismount safely to prevent a fall.
Brake carefully and stay grounded; hills require extra awareness and slower practice.
Watch Video
Quick Summary
- Brake gradually with both levers for control
- Lower your center of gravity to improve balance
- Look ahead and steer straight during deceleration
- Practice in a safe area before real-world riding