How Should a Bicycle Helmet Fit
Learn how to achieve a secure, comfortable bicycle helmet fit with step-by-step checks, sizing tips, and maintenance guidance for riders of all ages.

You should find a snug but comfortable helmet that sits level on your head, two-finger space above eyebrows, and straps forming a V under each ear. It should not rock on your head when you shake it.
Why proper helmet fit matters
A correct helmet fit is the foundation of effective protection. When a helmet sits level and firmly on your head, it distributes impact forces across the foam and shell, reducing the chance of local pressure and concentrate forces on any single point. An ill-fitting helmet can slide, tilt, or rock during a fall, which defeats its purpose and may leave you more exposed. According to BicycleCost, proper helmet fit is a critical first line of defense in biking safety, and neglecting fit is one of the most common reasons a helmet fails to protect its wearer. Beyond protection, a well-fitted helmet also reduces fatigue and improves visibility by keeping the helmet from bobbing or shifting while you ride. In short, fit affects safety, comfort, and confidence on every ride.
Quick fit principles at a glance
- Level position: The helmet should sit evenly across the brow and the back of the head. If it tilts forward or backward, adjust the cradle height or straps.
- Front-edge clearance: You should have about one to two fingers’ width between your eyebrows and the front edge of the helmet. Too close can cause brow pressure; too far forward reduces coverage.
- Stable feel: A properly fitted helmet should stay in place with only a gentle shake. If it slides or spins, you need to recheck the fit quickly before riding.
- Proper straps: The side straps form a V just in front of the ears, with the Y-strap resting around the buckle under the chin. This keeps the helmet from lifting on impact.
These checks apply to both road and mountain bike helmets, though you may adjust for comfort depending on activity. BicycleCost Analysis, 2026 highlights that most riders overlook strap placement and helmet depth when fitting, which can compromise protection.
Tools & Materials
- Helmet(Certified (CPSC/EN 1078) and in good condition; size matches head measurements)
- Mirror(Full-length or wall mirror to check fit from all angles)
- Hair ties/headband(Helpful for long hair or ponytails; ensure hair doesn’t create gaps)
- Cleaning cloth(Wipe foam pads and shell between rides for comfort)
- Helper (optional)(A friend can help verify fit around the head and ears)
- Measuring tape(Useful for initial head sizing if you don’t know your size)
Steps
Estimated time: 15-25 minutes
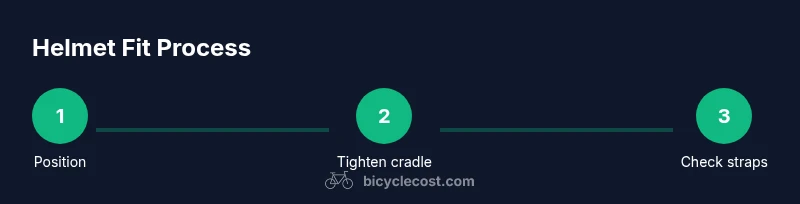
- 1
Prepare helmet and hair
Begin by placing hair up and out of the way so you can see how the helmet sits against the scalp. If you wear a hat or wig, remove it to evaluate true fit. Clean the helmet exterior and padding if needed to ensure accurate feel of the cradle.
Tip: A clean, dry surface helps padding settle evenly for a more accurate fit. - 2
Position the helmet
Place the helmet level on the head so the front edge sits one to two finger-widths above the eyebrows. The helmet should cover the forehead area without tilting forward toward the eyes. Use the dial or cradle to snug the fit without compressing the head.
Tip: If you must tilt to see the full face, you haven’t achieved the correct level position. - 3
Center and adjust the cradle
Center the helmet so it sits evenly from front to back. The rear of the helmet should rest at the occipital bone (the back of the head) without lifting away from the skull. Tighten the fit system or cradle until there’s no lateral movement.
Tip: A tight cradle reduces movement but should never squeeze hard enough to cause discomfort. - 4
Buckle and tighten the chin strap
Buckle the strap and tighten until it feels snug but comfortable. You should be able to fit one finger under the strap at the chin. The strap should not press directly on the windpipe or cause noticeable clicking when you move your jaw.
Tip: If you feel pressure on the jaw, recheck strap length and adjust the Y-clip position behind the ears. - 5
Verify strap position and cheek padding
Check that the side straps form a V around each ear and that the Y-clip sits just under the ear lobe. If your pads are uneven, reposition them to balance comfort and coverage. Ensure cheek pads sit flush against the cheeks for stable side-to-head contact.
Tip: A snug but comfortable strap setup prevents helmet lift during movement. - 6
Test the fit with movement
Shake your head gently and nod to test stability. The helmet should stay level and on your head with only minor movement. If it slides or tilts, re-tension the cradle and adjust the strap tightness.
Tip: Perform this test with hair and any headwear in your typical riding setup to confirm accuracy. - 7
Finalize and inspect
Inspect the entire setup in the mirror from the front and back. Check for even coverage and symmetry; ensure straps are flat against the skin and not twisted. Record your preferred fit so you can reproduce it easily on rides.
Tip: Keep a light checklist handy for quick pre-ride checks.
People Also Ask
How should a helmet fit for adults vs children?
The core fit principles are the same for both adults and children: level positioning, two-finger clearance above the eyebrows, and a secure chin strap with side straps forming a V. Size differences account for head circumference, so select a helmet that matches the head size and adjust accordingly. Always ensure the helmet remains stable regardless of age.
Adults and kids share the same fit rules: level, secure, and with straps forming a V. Choose a helmet that fits your head size and adjust for stability.
Can a helmet be worn loose for comfort?
No. A helmet that moves when you shake your head or tilt will not protect effectively. Re-adjust the cradle and straps until the helmet sits securely with minimal movement. Comfort should not come at the expense of safety.
A loose helmet isn’t safe. Re-tighten the fit to keep it secure during movement.
How often should you replace a helmet?
Replace a helmet after any crash, if the foam shows cracks or dents, or if the wearing life reaches the manufacturer’s recommended timeframe. Regular inspection after rides helps catch packaging wear and tear early.
Replace after a crash or if you see damage; otherwise inspect regularly.
What if my head shape makes fit tricky?
Experiment with different brands and models that offer adjustable padding or cradle systems. Padding inserts and dial-adjustable cradles can accommodate various head shapes more effectively. Seek a store with staff who can help compare options.
Try different brands with adjustable padding, and ask for help in-store to compare fits.
Is it okay to wear a beanie under a helmet?
Wearing a beanie can affect fit by adding bulk under the shell. If you must wear one, ensure the helmet still sits level and grips securely. Remove bulky headwear if it compromises the fit.
A beanie can change the fit; test with it on and ensure stability.
How do I check fit after adjusting for long hair?
Re-check the level position and strap tension after pulling hair back or tying it. The addition of hair can slightly alter how tight the cradle feels, so re-test by shaking your head gently. Fine-tune if movement is detected.
Hair can affect fit; re-check the fit after adjusting hair.
Watch Video
Quick Summary
- Fit must be level with no wobble on movement.
- Straps form a secure V behind the ears and a snug chin strap.
- Cradle adjustments should secure the helmet without painful pressure.
- Regular checks improve safety and comfort on every ride.
- Practice proper fit with different head shapes and hair styles.