How to Fit a Bicycle Helmet: A Practical Guide
Learn how to fit a bicycle helmet correctly with a practical, beginner-friendly approach. This guide covers measuring, sizing, strap adjustments, helmet positioning, and maintenance to ensure safety on every ride.

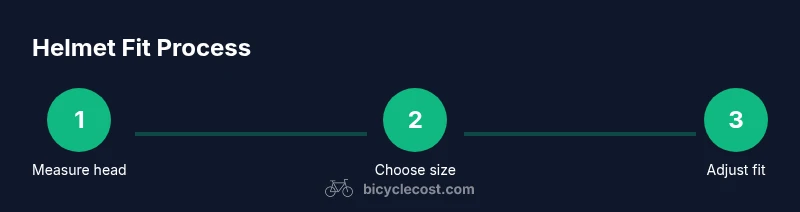
By the end of this guide, you will know how to fit a bicycle helmet correctly for safety, comfort, and performance. It covers head sizing, strap adjustments, and helmet position, plus common mistakes to avoid. This step-by-step approach helps riders of all ages ensure a secure, snug fit on every ride. According to BicycleCost, proper fit is essential for effective protection.
The why of a correct helmet fit
A proper helmet fit is the first and most important line of defense in case of a fall or collision. When a helmet fits well, it sits securely on your head, stays in place during movement, and remains positioned to shield the forehead and temples. A loose or shifting helmet can fail to protect those critical areas when you need it most. The BicycleCost team emphasizes that safety depends not just on helmet quality but on how well it stays put during all riding conditions. The goal is a snug, comfortable fit that you can forget while you ride, so you stay focused on the road, trail, or street ahead.
Along with fit, check for certifications from reputable safety standards bodies in your region. A compliant helmet is a baseline for protection, while proper adjustment turns that protection into reliable performance.
Head measurements and sizing
Your head size is the starting point for choosing a helmet that fits correctly. Use a soft measuring tape to measure around the widest part of your head, just above the eyebrows and ears. Record the circumference in centimeters or inches, and compare it to the helmet’s size chart. If you’re between sizes, try the smaller size first for a snug feel; if the helmet moves with gentle pressure, you likely need the next size up. In practice, many riders end up with the wrong size because they skip measurement or rely on the look of a helmet rather than its actual fit. Based on BicycleCost analysis, ensuring an accurate measurement reduces the chances of a helmet shifting during rides and improves overall protection.
How to choose the right helmet shape and size
Helmets come in different shapes—some are rounder, others more elongated. The shape can affect how evenly the shell sits around your head. Aim for a helmet that sits level on your head, with the front edge just above the eyebrows. The circumferential fit should feel snug but not uncomfortable. Make sure the size matches your measured circumference, then evaluate the interior padding and adjustment system. A correctly sized helmet will feel secure when you shake your head gently and will not press uncomfortably on your temples or the back of the head.
Step-by-step: adjusting the fit system
Most helmets use a dial-fit, occipital cradle, or a combination of both to tailor the fit around your skull. Start with the basic cradle or fit-system adjustment loosened. Place the helmet squarely on your head and tighten the adjustment until there is only a light, universal pressure—enough to keep the helmet from wobbling, but not so tight that it hurts. If there’s a rear dial, turn it in small increments and test by tilting your head and nodding. A good fit should feel secure without pinching or giving you headaches after a few minutes.
Securing the chin strap properly
The chin strap is essential for maintaining helmet position. Buckle the strap and tighten until only a finger’s width of space fits between the strap and your chin. The strap should lie flat and not twist. If you wear a scarf or hair ties, tuck them neatly so they don’t interfere with the strap. Avoid over-tightening, which can cause discomfort or reduce blood flow. A properly adjusted strap keeps the helmet in place during normal riding and in a minor crash.
Positioning the helmet correctly on your head
Position the helmet level on your head, with the front edge about one to two finger-widths above your eyebrows. The helmet should cover the forehead area without covering too much of the brow. The occipital pad at the back should sit snugly against the back of your head, contacting the skin without causing pressure points. If you find the helmet tilting backward or forward, readjust the fit system and strap tension. The goal is a stable, level helmet that remains in place through routine movement and wind forces on the ride.
Checking stability with movement and in real ride conditions
Test the fit by moving your head side to side, up and down, and by gently shaking your head. If the helmet slides when you nod or tilt, re-tighten the fit system or adjust the chin strap. Perform a quick ride around a safe area to confirm stability and comfort. Real-world checks help catch issues not obvious during a static fit. Remember to recheck after adjusting hairstyles, hats, or wearing winter headgear that could alter fit.
Common mistakes to avoid
Avoid relying on a snug interior or padding alone to keep the helmet in place. Don’t wear a helmet that sits too high on your forehead or sits crooked. Never ride with a helmet that rocks or slides easily. If you crash, replace the helmet—no amount of padding or tape can restore the integrity of a damaged shell. Regularly inspect the shell for cracks, dents, or faded color that may indicate material fatigue.
A mindful fit routine reduces the likelihood of improper protection and increases confidence on every ride.
Helmet care, longevity, and replacement cues
Keep your helmet clean by wiping the shell with mild soap and water, avoiding harsh cleaners that can degrade materials. Store it in a cool, dry place away from direct sunlight and heat sources. Replace the helmet after a crash or if you notice cracks, a compromised shell, or degraded straps and padding. Even without a crash, the foam’s protective properties can reduce over time, so plan periodic checks and replacement on a sensible schedule.
Tools & Materials
- Helmet(Certified by safety standards in your region (e.g., CPSC, CE).)
- Flexible head measuring tape(For accurate circumference measurement.)
- Mirror or friend for checks(Helps verify fit from different angles.)
- Soft cloth(For cleaning the helmet after rides.)
- Hair ties or headband(Keep long hair tidy without interfering with straps.)
- Pen and paper(Note sizing decisions or replacement dates.)
Steps
Estimated time: 20-30 minutes
- 1
Measure head circumference
Wrap the soft measuring tape around the widest part of your head, positioning it about one finger above the eyebrows. Record the measurement and compare it to the helmet’s size chart. If you’re between sizes, start with the smaller option and assess fit before proceeding.
Tip: Measure at the end of the day when your head is at its largest to avoid choosing a too-small helmet. - 2
Choose helmet size and shape
Select a helmet that matches your measured circumference and try on several shapes to see which sits most evenly around your head. Look for no gaps at the temples or back of the head. Verify that the helmet sits level and not tilted forward or backward.
Tip: If in doubt, pick the size that feels more secure; you can always adjust the fit system. - 3
Put the helmet on and center it
Place the helmet squarely on your head with the front edge just above your eyebrows. Adjust the internal padding to achieve a snug but comfortable contact around the entire head. Ensure the helmet does not wobble when you shake your head gently.
Tip: A proper center helps protect the forehead and distributes impact evenly. - 4
Tighten the fit system
Engage the dial-fit or cradle and tighten until there is minimal movement. The helmet should remain stable with light finger pressure but not pinch or cause headaches after a few minutes.
Tip: Make small adjustments and recheck stability after each change. - 5
Position the helmet correctly
Center the helmet and ensure it sits level on the head. The front edge should be about 1–2 finger widths above the eyebrows. Confirm the back of the helmet sits on the occipital bone without pressing into the neck.
Tip: Use a mirror to verify the angle from multiple angles. - 6
Secure the chin strap
Buckle and tighten so there’s only about a finger’s width between strap and chin. The strap should lie flat and not twist. Remove any slack that might allow the helmet to ride up during movement.
Tip: Check that the strap lies against your skin and isn’t trapping hair or fabric. - 7
Test movement and stability
Shake your head side-to-side and up-and-down to ensure the helmet stays in place. If it slips, revisit strap tension and fit-system adjustments. A quick ride in a safe area helps confirm stability.
Tip: If it moves, don’t ride; readjust and retest. - 8
Final fit check after hair/helmet changes
If you wear a hat, head scarf, or long hair, recheck fit with these items in place. Some additions alter fit, so adjust accordingly and re-test.
Tip: Hair under the strap can create a loose feel; ensure direct contact with skin where the strap sits. - 9
Care and replacement cues
Inspect the shell for cracks, padding wear, and strap integrity. Replace the helmet after a crash or if you notice any damage or degradation. Store it away from heat and sunlight when not in use.
Tip: Keep receipts or replacement reminders so you don’t miss wear-and-tear events.
People Also Ask
Do bicycle helmets come in one size or multiple sizes?
Most helmets come in multiple sizes. Use your head measurement to pick the correct size and test fit to ensure stability. If you’re between sizes, choose the smaller size and adjust the fit system as needed.
Most helmets come in several sizes; use your measurement to pick the right one and adjust the fit system for stability.
Can I wear a hat or headwear under a helmet?
You can wear a thin cap or liners, but they should not create space that lets the helmet move. If headwear causes the helmet to loosen, remove it and recheck the fit.
A thin cap is usually okay, but if it makes the helmet loose, skip it and recheck the fit.
How tight should the chin strap be?
The chin strap should be snug with about a finger’s width of space between strap and chin. It should not be so tight that it irritates or restricts breathing.
Keep the strap snug with a finger’s width of space; don’t over-tighten.
How do I know when a helmet is expired or needs replacement?
Follow the manufacturer’s guidance on expiration. Replace after a crash, if the shell or straps show damage, or if padding has compressed significantly.
Replace after a crash or if you notice damage or compressed padding.
Is it safe to wear long hair with a helmet?
Long hair should be secured under the helmet so it doesn’t pull on the straps or cause movement. Avoid loose hair that could interfere with fit.
Secure long hair under the helmet; avoid letting it affect the fit.
What impact does helmet position have on protection?
A helmet that sits too high or too far back reduces forehead coverage and protection. Keep it level and centered for optimal protection.
Positioning matters—keep it level and centered for best protection.
Watch Video
Quick Summary
- Measure head size accurately before choosing a helmet.
- Center and level positioning maximizes protection.
- Secure the chin strap properly and test stability.
- Inspect and replace after damage or expiration.