How to Know If a Bicycle Helmet Fits
Learn how to know if a bicycle helmet fits correctly with a practical, hands-on guide. Measure, adjust, and test for secure protection on every ride with clear steps and safety tips.

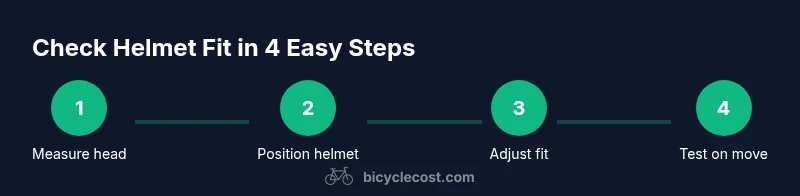
In this guide you will learn how to know if a bicycle helmet fits correctly. You'll measure your head, pick the right size, position the helmet level, tighten the straps, and test stability on movement. Key requirements are a properly sized helmet, adjustable fit system, and a snug chin strap. Follow these steps to maximize protection on every ride.
Why helmet fit matters
According to BicycleCost, proper helmet fit is essential for maximizing protection and comfort during rides. A helmet that shifts or tilts reduces energy absorption in a crash and can cause peripheral vision or hearing disruption. The question of how to know if a bicycle helmet fits isn’t just about size; it’s about whether the internal fit system can hold the shell steady without pinching or slippage. When a helmet fits well, it stays level, the strap sits comfortably around the jawline, and you feel confident while riding. This section frames the core reasons fit matters and sets the foundation for practical checks you can perform at home or in a shop. As you read, remember that a precise fit is a combination of size, adjustability, and correct positioning. The BicycleCost team emphasizes practical, repeatable checks you can perform on every ride.
Understanding helmet sizing and adjustability
Helmet sizing is not one-size-fits-all. Most helmets use a sizing system based on head circumference and an adjustable fit system (dial, wheel, or occipital strap). Start by measuring your head with a flexible tape measure just above the eyebrows and around the widest part of the back of the head. Use the helmet’s internal sizing chart to choose a size that places the shell roughly two finger-widths above the eyebrows. The adjuster, whether a dial or a cradle, should allow you to snug the helmet without creating pressure points. Remember that comfort is not the same as compression—if you leave marks or feel pins, re-fit or try a different size. This section helps you interpret sizing labels and set up the base fit so you can focus on fine-tuning.
Step 1: Measure your head and choose a size
The first step toward knowing how to know if a bicycle helmet fits is to measure your head circumference accurately. Place the measuring tape about one inch above the eyebrows and wrap around the largest part of the head, keeping the tape comfortably snug but not tight. Compare the measurement to the helmet’s size chart and select a size that aligns with your circumference. If you’re between sizes, aim for the smaller size with the fit system tightened rather than the larger size with excess slack. This measurement also informs whether you need a specific helmet model with a more generous interior). BicycleCost analysis shows that choosing the correct size dramatically reduces movement during a crash, which improves overall protection.
Step 2: Position the helmet correctly on your head
Place the helmet level on top of your head, about one to two fingers width above the eyebrows. The front edge should be just above the eyebrows, and the back should cover the occipital bone without tilting backward. The helmet should feel balanced with the shell resting evenly. If the helmet sits high or tilts forward, you may need to adjust the straps or try a different size. A properly positioned helmet remains stable when you shake your head gently. The goal is to keep the shell level and stable during typical riding movements.
Step 3: Adjust the fit system and cheek straps
Most helmets offer a fit system (dial, cradle, or internal tensioners). Tighten the system so the helmet sits snugly but comfortably on the head—there should be no gaps between the head and the liner. Next, position the cheek straps so they form a V under and slightly in front of the ears. The straps should be snug enough that you can slide only a finger or two between the strap and your chin. The goal is secure stability without constricting movement of the jaw or causing itchiness. If you feel pressure points, readjust the fit system or consider a different model with better interior padding.
Step 4: Fasten the chin strap and test for comfort
Buckle the chin strap and tighten it gradually until the strap lies flat and close to the skin without pulling the helmet forward. A snug chin strap should prevent the helmet from lifting off when you nod or shake your head. You should be able to open your mouth slightly and still feel the strap against your skin with minimal slack. If the strap sits too high or too loose, tighten or reposition the connector to ensure the strap remains in contact with the jawline. This step is critical to ensure the helmet won’t slip during a crash or rough terrain.
Step 5: Test the fit with movement and real-world checks
With the helmet on, perform a few gentle head movements—look up, down, and side-to-side—to ensure the shell stays level. Try bending forward slightly as if looking at the ground and notice whether the helmet remains in place. Do a quick shake test to see if the helmet shifts on the head. Finally, perform the two-finger test: place two fingers between the chin and strap, sliding to confirm the right amount of slack. If you cannot maintain a snug fit with these checks, revisit the sizing or strap routing. In practice, a properly fitted helmet should stay centered and feel comfortable for both short commutes and longer rides.
Step 6: Re-check fit after hair and temperature changes
Hair volume, sweat, and temperature can affect helmet fit. If you recently changed hairstyles, wore a cap, or rode in hot conditions, re-check the fit using the same steps. A slight change in hair padding can alter the overall fit, so verify that the helmet remains level and secure. Store your helmet away from direct sunlight to prevent liner degradation that could alter fit over time. Re-checking fit at least every few weeks or after a crash ensures ongoing protection and comfort.
Common fit issues and fixes
Common fit problems include a helmet that sits too high on the forehead, straps that are too loose, and a rear adjustment that won’t hold steady. If the helmet tilts forward, you may need to tighten the rear dial or move the occipital strap slightly higher. If the helmet shifts when you shake your head, check the cheek straps and adjust the tension. If you feel pressure points or hot spots, swap the padding for a model with different padding thickness or consider a different model with a more comfortable interior design. Remember: the fit must stay consistent across different riding positions and speeds. BicycleCost recommends trying different helmets in a store to identify the best fit for your head shape.
Helmet care and rechecking fit over time
Even a well-fitted helmet can loosen over time due to padding compression. Regularly inspect the foam liner, chevron straps, and buckle for wear. If you notice cracks, deformation, or significant padding compression, replace the helmet promptly. After a crash, even if there’s no visible damage, replace the helmet as foam can crack internally and reduce protection. Store your helmet in a cool, dry place away from direct sunlight. These maintenance steps help ensure your helmet continues to fit correctly and perform as intended.
Replacing a helmet after damage or age
Helmets do not “recover” from impact. If you’ve taken a hard knock or the shell shows cracks or dents, replace immediately. The integrity of the shell and liner can be compromised without visible signs, so err on the side of caution. Most experts recommend replacing a helmet every 3-5 years, depending on usage, exposure to sun, and storage conditions. Regularly inspect the helmet for wear and consider replacement sooner if you notice any change in fit or comfort. This practice keeps your head protected on every ride.
What to do if you have a non-standard head
Some riders have head shapes that don’t fit common helmet molds. In this case, focus on models with adjustable internal fit systems, multiple padding thickness options, and a wide range of sizes. It may take trying a few different brands to find a helmet that aligns with your head shape. Don’t force a helmet into a poor fit; instead, seek models designed for round, long, or oval head shapes. Always test fit in-store and request padding adjustments if needed.
Tools & Materials
- Helmet (try-on in-store or own model you plan to buy)(Must be certified for bicycle use (e.g., CPSC, EN 1078).)
- Measuring tape(Flexible tape to measure head circumference.)
- Mirror or helper(To check positioning and strap alignment from all angles.)
- Padded cap or hair ties(Helpful when testing fit with different hairstyles.)
- Notebook and pen(Record fit notes and padding preferences for future tweaks.)
Steps
Estimated time: 15-25 minutes
- 1
Measure head and choose size
Use a flexible tape to measure around the widest part of your head, just above the eyebrows. Compare the measurement to the helmet’s size chart to pick the closest size. If you’re between sizes, start with the smaller one and use the fit system to tune.
Tip: Write down your measurement for quick future reference. - 2
Position helmet level on head
Place the helmet so that it sits level and covers the forehead about 2 finger-widths above the eyebrows. The occipital bone at the back should be protected without the shell tipping backward.
Tip: If you can see too much of your forehead, adjust downward or toward a smaller size. - 3
Adjust the fit system
Turn the dial or tighten the internal cradle until the helmet feels snug but not painful. Check that there are no gaps between the head and liner and that the shell stays centered during movement.
Tip: If the dial doesn’t hold, try padding adjustments or a different model. - 4
Set the cheek straps
Pull the cheek straps so they form a V under the ears and sit about 1-2 cm from the jawline. The straps should be snug but not pinching. Ensure the buckle sits flat against the chin.
Tip: If the straps rub against your chin, re-route them around the ears or try a different strap length. - 5
Buckle and test the fit
Buckle the chin strap and tighten until the helmet stays in place when you nod or move, without choking you. The helmet should not rotate forward or backward when you shake your head.
Tip: Test with a light tug on the helmet; if it slides, adjust further or re-check size. - 6
Real-world fit checks
Wear the helmet for a short ride or simulate riding motions to verify stability. Re-check fit after changes in hair style, temperature, or helmet padding to maintain protection.
Tip: Keep a small routine: level position, strap tension, and stability after every ride.
People Also Ask
How tight should a helmet be?
A helmet should feel snug but comfortable. It should not press hard on the temples or cause discomfort, and it should stay in place during movement without the chin strap being overly tight.
It should be snug but comfortable, staying in place during movement without pinching or pain.
Can a helmet be stretched to fit?
Most helmets do not stretch meaningfully. If your helmet is too tight, try a different size or model with adjustable padding rather than forcing a too-tight fit.
Stretching a helmet isn’t reliable; choose a different size or model instead.
Is it okay to wear a hat under my helmet?
Thin cycling caps or hair under a helmet can be fine, but they can alter fit. Ensure the helmet remains level and straps still sit correctly after adding any headgear.
A thin cap is usually fine, but check fit afterwards to ensure stability.
How do I know if a helmet is safe after a crash?
If you crash or notice cracks, dents, or significant padding compression, replace the helmet. Internal damage can occur without visible signs.
After a crash, replace it even if it looks okay.
How often should I replace my helmet?
Replace helmets every 3-5 years or sooner if exposed to sun, heat, or wear. Regular checks help ensure continued protection.
Most helmets last a few years; replace sooner if you see wear or sun damage.
What if my head shape is unusual?
Look for models with adjustable fit systems and a variety of padding options. It may require trying several brands to find a compatible fit.
If your head shape is unusual, test different brands with adjustable padding.
Watch Video
Quick Summary
- Measure accurately before choosing a size
- Keep the helmet level and secure with snug straps
- Test fit with movement and real-world checks
- Replace after damage or age