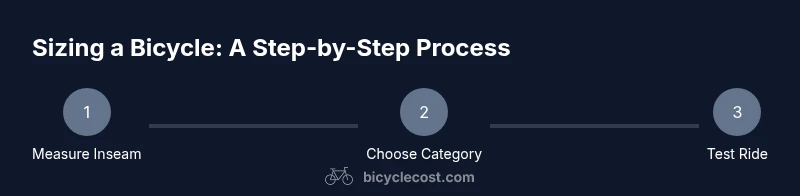
What Bicycle Size Do I Need? A Practical Guide
Learn how to measure inseam and reach, compare bike types, and choose the right size for road, mountain, or kids. This BicycleCost guide walks you through sizing basics, fit tests, and adjustments for comfort and safety.

You need a bicycle size that lets you stand over the frame with a comfortable clearance and reach to the handlebars. Size is usually given as frame size (cm/in) or by category (XS-XL or Small/Medium). Start with your inseam and riding style, then verify fit with stand-over height and reach during a test ride.
Why Size Matters for Comfort and Safety
Getting the right bicycle size is not just about aesthetics; it directly affects your comfort, efficiency, balance, and safety. When a bike is too large, you’ll feel stretched and rigid, which can strain the lower back, shoulders, and wrists. If it’s too small, you’ll crouch awkwardly, leading to knee and hip discomfort and reduced control. Proper sizing supports a natural pedal stroke, better weight distribution, and quicker, safer handling in traffic or on trails. According to BicycleCost, proper sizing reduces fatigue, improves balance, and makes pedaling feel natural over longer distances. By starting with a solid sizing foundation, you’ll enjoy better handling, smoother gear changes, and a safer, more confident ride. Size is typically described as a frame size (in cm or inches) or as a category (XS-XL or Small/Medium). Your inseam, torso length, arm length, and riding goals all influence the right size. If you’re between sizes, aim for the size that gives you comfortable stand-over clearance and a natural reach to the bars.
How to Measure Your Inseam and Reach
Precise measurements are the backbone of good sizing. Begin by measuring your inseam while wearing thin-soled cycling shoes if you ride with them regularly. Stand with your feet about 6-8 inches apart and measure from the floor to the top of your inner thigh where the leg meets the hip. Record this measurement in centimeters or inches. Next, estimate your torso length and arm reach by noting the distance from your sternum to your shoulder and your arm length from shoulder to fingertip when your arm rests at your side. These measurements help determine whether you’ll prefer a longer top tube or a shorter stem for a comfortable riding position. Finally, check stand-over clearance by placing the bike’s frame between your legs with you standing flat-footed; you should see a few centimeters of clearance around the top tube for confidence and movement. Keep a small notebook handy to compare against manufacturer charts and to track any adjustments you make later on.
Road, Mountain, and City: How Sizing Differs by Category
Riding category affects recommended frame geometry and size. Road bikes emphasize a longer reach and a lower, more aggressive stance, so you may size down slightly for a compact feel if you have a short torso. Mountain bikes favor shorter stems and slacker angles to improve stability on technical terrain, which can translate to a slightly different sizing approach than road bikes. City or commuting bikes often prioritize upright comfort with a taller head tube and shorter top tube, which may change your ideal size even if your inseam is similar to a road rider’s. If you ride across multiple surfaces, a versatile all-road or gravel frame can offer a balanced fit that adapts to both performance and comfort. Remember to check the manufacturer’s charts for each category, because sizing is not universal across brands.
Women, Men, and Body Proportions: Finding a Good Fit
Bike sizing isn’t strictly about gender labels. Some brands offer women-specific frames with different geometry to accommodate typical pelvic angles and hip width, while many riders use unisex frames with great results. If you’re between sizes, consider trying a slightly larger frame with a shorter stem or a smaller frame with careful saddle and handlebar adjustments. Your goal is a neutral posture where your hips, shoulders, and wrists align naturally, with comfortable knee clearance and a smooth pedal stroke. Don’t assume your height alone will dictate size—inseam, torso length, and arm reach are equally important. A professional bike fitter can assess your proportions and recommend the best geometry for your riding style.
Kids and Youth Sizing: Growing Bikes and Growth Guides
Children’s bikes are sized by wheel diameter rather than frame size. Start with your child’s inseam and leg length, then select the largest wheel that allows safe stopping and control. Check that the child can touch the ground with both feet when seated, and ensure there’s room to grow as they gain strength and confidence. If your rider is between wheel sizes, prefer the smaller wheel with clear stepping-stone upgrades as they mature. Many brands provide sizing charts and growth charts; use these as a guide but always test ride to confirm confident handling and brake reach.
Test Ride and Fit: How to Confirm a Size Feels Right
A test ride is the most reliable confirmation of size. On a short loop, pay attention to stand-over clearance, saddle height, and reach to the handlebars. You should be able to place your heel on the pedal at the bottom of a pedal stroke with a slight knee bend; if you must rock forward or back excessively, the size may not be right. During the ride, monitor your back, neck, and shoulder comfort, and check that there’s no excessive knee bend or overextension at the knee or hip. If you feel cramped or overextended, return to the shop to try the next larger or smaller size, or ask to adjust saddle position and stem length to fine-tune fit.
Sizing Online: How to Shop with Confidence
Shopping online requires extra diligence. Always compare your measurements to the brand’s size chart, and look for charts that show inseam, rider height, and recommended frame size for your category. Check the return policy and ensure you can exchange sizes if the fit isn’t right after a first ride. Favor retailers that offer in-store fittings or virtual consults, so you can verify fit before you buy. If you’re between sizes, order both sizes if the retailer allows easy returns, and test ride in a local shop before making a final decision.
Tools & Materials
- Measuring tape (cloth or metal)(At least 150 cm (60 in) long)
- Flat wall space or stand(For accurate stand-over checks)
- Pen and paper or note-taking device(Record inseam, height, reach, and category)
- Bike size charts or sizing calculator(Optional for cross-brand checks)
- Assistant or mirror for posture checks(Helpful for accurate measurements)
Steps
Estimated time: 45-60 minutes
- 1
Gather measurements
Collect your inseam, overall height, torso length, and arm reach. Use a helper to ensure you measure from the correct points and record each value. Keep notes about your riding style and any flexibility limitations to reference later.
Tip: Having a friend hold the tape improves accuracy. - 2
Identify your bike category
Decide whether you’ll primarily ride road, mountain, city, or a mix. Category informs which size charts to consult because geometry varies by frame design. If you ride multiple surfaces, choose a versatile frame with comfortable geometry.
Tip: Category choice strongly influences where size sits on the spectrum. - 3
Check stand-over clearance
Stand over the bike with both feet flat on the ground and the frame between your legs. Ensure a safe clearance so you can move your hips freely and plant your feet for stability when stopping.
Tip: Aim for a small, comfortable clearance; too little is a red flag. - 4
Compare to size charts
Match your inseam and height to the brand’s frame size chart for your chosen category. If you’re near the top end of a size, check how stem length and saddle height affect reach and comfort.
Tip: Use multiple sources to confirm consistency. - 5
Test ride
Take a short ride to assess reach, saddle height, and overall comfort. Note how your knees feel through the pedal stroke and whether your back, neck, or wrists feel strained.
Tip: Ask shop staff for a longer test ride if needed. - 6
Make adjustments
If you’re between sizes, start with the larger frame and adjust saddle height, saddle setback, and handlebar reach. Small changes can dramatically affect comfort.
Tip: Even a small change in saddle position or stem length can improve fit. - 7
Confirm and plan for future growth
Decide on a size that feels natural now and allows for growth, especially for youth riders. Keep a log of measurements and notes for future bike upgrades.
Tip: If between sizes, choose the option that lets you ride comfortably today.
People Also Ask
How do I know if I'm between sizes?
If measurements place you between two sizes, start with the larger frame and fine-tune with saddle height and a shorter or longer stem. Test rides in both sizes help confirm the best choice.
If you’re between sizes, try the larger frame first and adjust with saddle height and stem length. A test ride will decide the best fit.
Does height alone determine bike size?
Height is just a starting point. Inseam, torso length, and arm reach are equally important to determine frame size and overall comfort.
Height is only part of the picture. Inseam, torso, and arm reach matter as much for a good fit.
What is stand-over height and why does it matter?
Stand-over height is the clearance between the top tube and your inseam when standing over the bike. Sufficient clearance reduces the risk of knee injury and allows confident mounting and dismounting.
Stand-over height is the clearance under the top tube; you want a clear margin for safe mounting and dismounting.
Should I get a professional bike fitting?
A professional fitting can optimize comfort, performance, and efficiency, especially for long rides or when sizing between options. It helps tailor saddle height, reach, and cockpit setup to your body.
Yes, a professional fitting can fine-tune your setup for maximum comfort and efficiency.
How do kids’ bikes get sized?
Kids’ bikes are sized by wheel diameter and inseam. Ensure they can touch the ground with the ball of their foot and grow into the bike as they improve riding skills.
Kids’ bikes use wheel size and inseam to guide fit; ensure they can touch the ground and grow into it.
Can I size a bike by height alone?
Height is a helpful starting point, but inseam, torso length, and arm reach ultimately determine a comfortable and efficient fit.
Height helps as a starting point, but other measurements decide the real fit.
Quick Summary
- Measure inseam accurately and reference category charts
- Stand-over clearance matters for safe mounting/dismounting
- Test ride to confirm fit before purchase
- Adjust saddle height and reach to optimize comfort
- Consider a professional fit if between sizes