How to know if a bicycle fits you: A practical guide
Learn how to determine if a bicycle fits you with step-by-step checks on frame size, saddle height, reach, and riding posture. Practical tips from BicycleCost help cyclists of all levels ride more comfortably and safely.

How to know if a bicycle fits you: a practical, step-by-step check you can perform before every ride. You’ll verify frame size, saddle height, reach, and handlebar position, then test-ride for comfort. According to BicycleCost, a proper fit reduces strain and improves pedaling efficiency, making longer rides safer and more enjoyable.
How to know if a bicycle fits you: essential concept
The fit you need is the intersection of frame geometry, saddle position, knee alignment, and riding posture. Knowing how to know if a bicycle fits you means applying a small set of checks that work across bike styles. According to BicycleCost, a well-fitted bike reduces knee and back strain and improves pedaling efficiency. In this guide, you'll find a repeatable workflow you can use when shopping, renting, or evaluating your current bike. We'll cover frame size, standover clearance, saddle height, reach, handlebar position, and practical test rides. Whether you ride a road bike, mountain bike, or hybrid, the same principles apply.
Frame size and standover clearance: the first checks
Choosing the right frame size starts with the rider's inseam, torso length, and flexibility, then cross-checks with standover clearance. On a test ride, you should feel stable when standing over the top tube with a small gap between you and the frame. If you cannot clear the frame with a comfortable stance, the bike is likely too small or tall. Use sizing charts as a baseline, then verify with a brief ride to ensure you don't pinch hips or feel cramped.
Saddle height and reach: the core of pedal efficiency
Saddle height sets leg extension at the bottom of the pedal stroke. A saddle that is too high or too low creates knee or hip strain and reduces pedaling efficiency. When seated, your knee should have a gentle bend; your hips should remain level through the pedal stroke. Reach refers to how far you are from the handlebars; too much reach can force you to overextend your back and shoulders.
Fore-aft saddle position and knee tracking
Fore-aft saddle position affects how your knees track above the pedals. With the crank at roughly the 3 o'clock position, your knee should align roughly over the pedal axle. Make tiny adjustments and re-check your knee tracking to avoid over- or under-pedaling. A slight weight shift on the saddle can help you find balance and power.
Handlebar height and reach: posture and control
Handlebar height and stem length influence your spine angle, shoulder tension, and wrist comfort. A rider with a tall saddle and low bars will feel stretched, while overly high bars can reduce steering precision. Aim for a neutral spine and relaxed shoulders, with wrists comfortable on the hoods or bars. Small changes in bar height can have a big effect on comfort.
Test ride strategies to confirm fit
Take a 5–10 minute loop that includes a climb, a flat section, and a corner. Pay attention to knee and back comfort, hand numbness, and breathing ease. If you notice friction, pinching, or fatigue early, revisit saddle height, reach, and bar position. Document what felt right and what caused strain for later adjustments.
Common fit pitfalls by bike type
Road bikes typically require more aggressive reach and a lower bar height, whereas mountain bikes may benefit from a taller stance and longer reach to accommodate rough terrain. Gravel bikes sit between these extremes. Always check bike-specific geometry and adjust with caution, especially if your riding style shifts seasonally.
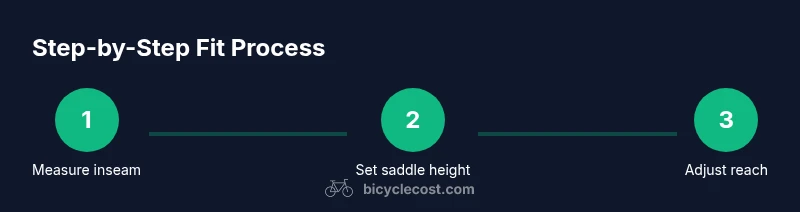
Home measurement checklist: quick, repeatable checks
Keep this list handy: measure inseam, test standover clearance, set saddle height, dial in saddle fore-aft, align handlebars, and perform a short ride. Use a friend to help hold the bike steady while you measure. Log changes so you can compare current fit against your baseline and plan future adjustments.
Tools & Materials
- Tape measure(Flexible, metric and imperial units)
- Allen wrench set(For saddle clamp and stem bolts)
- Saddle height gauge or plumb line(Marks precise vertical measurement)
- Notebook and pen(Record measurements and settings)
- Bike stand or stable support(Keeps bike steady during fit checks)
- Ruler or caliper(Helpful for precise reach checks)
- Bike-specific level or smartphone inclinometer(For verifying level saddle and bars)
Steps
Estimated time: 60-90 minutes
- 1
Gather tools and prepare the bike
Collect all tools and find a stable space to work. Inspect the bike for loose bolts and ensure the bike is at a comfortable height on a stand or in a bike rack. This foundation helps ensure accurate measurements.
Tip: Organize your workspace; a recipe-style setup reduces errors. - 2
Measure inseam and estimate frame size
Have the rider stand straight and measure from the floor to the crotch to estimate inseam. Use this to approximate the frame size and starting point for adjustments. Remember, geometry varies by brand, so treat the measurement as a baseline.
Tip: Ask a friend to hold the bike steady while you measure. - 3
Set saddle height for a slight knee bend
With the pedal at the 6 o'clock position, adjust the saddle height so the knee is not fully straight but has a comfortable bend when the foot is at the bottom of the stroke. This reduces knee strain and improves power transfer.
Tip: Make small adjustments and test ride before finalizing. - 4
Adjust saddle fore-aft for knee alignment
Slide the saddle forward or back until your front knee tracks roughly over the pedal axle when the crank is horizontal. This balances weight between the hands and seat and improves pedal efficiency.
Tip: Use a plumb line or your finger width to guide alignment. - 5
Set handlebar height and reach
Adjust the stem or spacers to place the bars at a comfortable height that keeps your spine neutral. If you feel excess pressure on the hands or wrists, raise the bars or shorten the reach.
Tip: Keep wrists straight and avoid hyperextension. - 6
Check posture and hip rotation
During a short ride, observe whether hips rotate excessively or twist. A stable core and relaxed shoulders usually indicate a good fit. If your hips swing, revisit saddle height and bar position.
Tip: Ask a friend to watch your pedal stroke for symmetry. - 7
Test ride with a planned loop
Ride a mixed course (climb, flats, turns) to confirm fit in real conditions. Note comfort, breathing, and control. Stop and reassess if you feel numbness or pain.
Tip: Take your time; rushed adjustments lead to mistakes. - 8
Make micro-adjustments and re-test
If there is discomfort, adjust saddle height in small increments, then re-test for 5 minutes. Recheck knee tracking and reach after each change.
Tip: Only change one variable at a time to isolate effects. - 9
Document and plan next steps
Record each measurement and setting that felt best. Schedule follow-up checks after a few rides to confirm stability.
Tip: A simple log helps track progress over time.
People Also Ask
What is a proper saddle height?
A proper saddle height allows a slight bend in the knee at the bottom of the pedal stroke. This position minimizes knee strain and optimizes power transfer without locking the knee.
A good saddle height gives a slight knee bend at the bottom of the pedal stroke, reducing knee strain.
How do I know if the frame size is right?
Frame size should allow you to stand over the bike with a clear, comfortable gap. From there, you verify by test riding and ensuring you can reach the handlebars and pedals without overreach or crowding.
Stand over with a clear gap and test ride to confirm reach and pedal clearance.
Can a DIY fit replace a professional fit?
A DIY fit works for many riders, especially beginners. If you experience persistent pain, numbness, or inefficiency, a professional bike fit is recommended.
A DIY fit helps, but persistent issues should be addressed by a pro.
What if my hands go numb during rides?
Numbness often points to excessive reach or pressure on nerves. Check saddle position, handlebar height, and hand position; consider padding or gloves, and adjust gradually.
Numb hands usually mean you need to adjust reach and bar height and check hand position.
Are road and mountain bike fits the same?
Core fit principles apply to both, but road bikes typically require shorter reach and lower bars, while MTBs favor a taller, more upright stance for control.
The basics are the same, but geometry differs by bike type.
How often should I re-check fit?
Re-check fit whenever you change components, ride style, or begin experiencing discomfort. A new saddle, stem, or tires can shift the fit slightly.
Re-check fit whenever you change components or feel different.
Watch Video
Quick Summary
- Know your baseline fit before riding
- Test ride to validate posture and comfort
- Adjust one variable at a time
- Log changes for future reference