Why Is My Bike Not Starting? Essential Troubleshooting Guide for Riders
Urgent, practical guide to diagnose why your bike won't start, with safe checks, step-by-step fixes, and preventive tips to keep you riding.

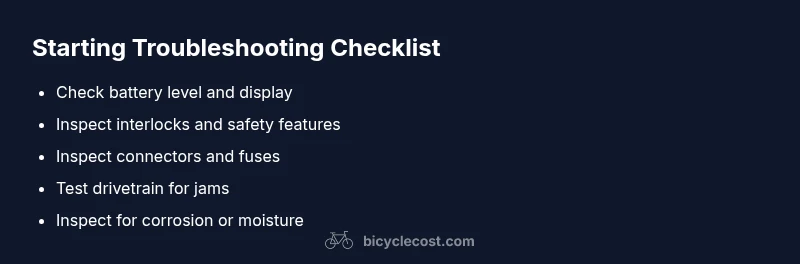
If your bike won't start, the most common causes are a dead battery (electric assist), a safety interlock engaged, a loose or corroded connection, or a jammed drivetrain. Start with safety checks, then inspect the battery, fuses, and wiring, and try a simple restart before moving to deeper diagnostics. If the issue persists, seek professional help.
Why is my bike not starting: Common culprits
Understanding why is my bike not starting begins with recognizing two broad categories: electrical faults and mechanical blockers. The BicycleCost team notes that many starting problems originate from simple, non-technical issues. In urban riding, a dead battery in an electric-assist bike, a misaligned safety interlock, or a loose connector in the harness is a frequent trigger. On non-electric bikes, a stuck kickstand switch, a seized derailleur, or a clogged chain can also prevent the drivetrain from engaging. By framing the problem as either electrical or mechanical you can narrow down the fixes quickly. The goal of this guide is to give you a practical, step-by-step approach that you can apply to most common starting problems without specialized tools. If you maintain your bike and perform small checks regularly, you’ll catch issues before they escalate into costly repairs. The BicycleCost analysis, 2026, shows that routine checks dramatically reduce downtime and extend component life.
Quick checks you can do safely
Before you dive into more involved fixes, run through a few quick checks that cover the most common starting issues. First, ensure the bike is in the correct gear and the brakes are fully released. If you ride an electric bike, confirm the battery gauge shows a usable charge and the display isn’t indicating a fault code. Check the main power switch or button is firmly on and that the throttle (if present) isn’t engaged unintentionally. Inspect visible connections for corrosion or loose plugs, especially around the battery, controller, and motor cables. If the kickstand is down or the bike is in a safety interlock position, correct the stance and retry starting. Do not ride if any wiring looks damaged or if you smell burning; power down immediately and seek help. Regularly cleaning and reseating connectors can prevent intermittent faults.
Electrical system overview: battery, fuse, and wiring
The electrical system is the most common starting point for troubleshooting. A weak or dead battery is a frequent culprit, particularly in colder weather or after long periods of non-use. Check the battery voltage with a multimeter if you have one, and compare it to the manufacturer’s recommended range. Look for blown fuses or tripped circuit breakers, then inspect wiring for signs of wear, pinching, or moisture ingress. Corrosion on terminals can create high resistance that blocks the flow of power. If you use a charger, ensure it is compatible with your battery chemistry and that the charging indicator lights indicate proper charging. Trace the main power feed from the battery to the controller and motor, reseating any connectors you can access safely. If you notice any damaged wires, cracks in insulation, or burnt smells, terminations should be replaced and protected.
Mechanical obstacles: drivetrain, interlocks, and safety features
Mechanical issues can also prevent starting. A stuck derailleur, a seized chain, or a drivetrain that’s out of alignment can stall the system before it engages. Safety interlocks, such as kickstand interlock switches or brake-lever interlocks, are designed to prevent starts when the bike is unsafe or in motion. Ensure that all safety interlocks reset correctly when the bike is stationary, and that the kickstand is fully up before attempting a start. Inspect cranks, bottom bracket, and pedals for smooth rotation without gritty feel or wobble. If you hear grinding or feel resistance when turning pedals, stop and inspect the chainrings, cassette, and derailleur alignment. In many cases, cleaning and lubricating the chain and cassette, plus correcting derailleur tension, resolves the issue.
When to call a professional and preventive care
Some cases require professional assessment, especially when the battery is integrated into the frame, the motor is part of a complex system, or you notice electrical burn smells or heat. If you have attempted safe checks, charged the battery, and reseated connectors without success, contact a qualified bike technician or the manufacturer’s service center. Prevention is easier than repair: perform a quarterly inspection of cables, connectors, and fuses; keep the battery and charging contacts clean and dry; store the bike in a dry place and avoid exposing it to moisture for extended periods; and schedule regular maintenance for bearings, drivetrain, and the electrical system. Regular checks catch problems early and save downtime.
Quick-start recap and next steps
If you walk through the checks above and still can’t start the bike, reference the diagnostic flow to decide if the problem is primarily electrical or mechanical. Take notes on what you’ve tested, any fault codes, and the observed behavior. This record will help a technician diagnose the issue faster and prevent recurrence. Remember, basic repairs can often be performed with common tools, but never improvise on high-voltage components. The key is methodical testing and safe handling.
Steps
Estimated time: 60-90 minutes
- 1
Power off and perform safety checks
Begin by turning off the bike and removing any external power sources. Confirm the bike is stationary on a level surface, the brakes are released, and the safety interlocks are not engaged in a way that prevents starting. This step prevents accidental movement and ensures you can safely reach all components.
Tip: Wear gloves and use a flashlight to inspect connectors without bending wires. - 2
Check battery charge and display
If you have an electric assist, inspect the battery level with the display and check for fault codes. Try charging the battery for at least 15-20 minutes and then attempt a restart. If the display shows errors, consult the manual or manufacturer support before proceeding.
Tip: Check the battery contacts for corrosion; clean gently with a dry cloth. - 3
Inspect connections, fuses, and weather exposure
Walk the accessible harnesses from the battery to the controller and motor. Reseat connectors, look for loose plugs, and check for water or moisture intrusion near exposed wiring. If your bike has fuses, locate the fuse block and verify none are blown.
Tip: Work with the battery disconnected when handling connectors. - 4
Test power to the motor/electrical system
With the power off, gently perform controlled checks of power continuity along the main lines using a multimeter if available. If readings are inconsistent or show open circuits, replace the affected wiring or module. If you’re unsure, skip to professional service.
Tip: Document readings to compare after fixes. - 5
Check safety interlocks and gear selection
Verify that all safety features reset after any adjustment and that the bike is in a safe gear for starting. If a kickstand interlock exists, ensure the stand is fully retracted and not triggering the switch.
Tip: A misadjusted interlock is a common but fixable issue. - 6
Check drivetrain for jams and alignment
Inspect the chain, cassette, and derailleur for obstructions or binding. Spin cranks manually to feel for resistance and verify the derailleur returns to the proper position. Clean and lubricate if needed, and adjust tension if the drivetrain feels tight or loose.
Tip: Avoid forcing components that feel stiff; you may worsen the issue. - 7
Final test and maintenance plan
Reconnect the battery, power on, and perform a controlled start in an open area. If it starts, log the checks you performed for future reference and schedule preventive maintenance. If it still won’t start, prepare a report for a professional diagnosis.
Tip: Set up a maintenance reminder to prevent recurrence.
Diagnosis: Bike won't start when turning on power or pressing the start switch, with no motor activity or error codes
Possible Causes
- highBattery discharged or faulty
- highSafety interlock engaged or misaligned
- mediumLoose, corroded, or unplugged connections
- mediumBlown fuse or damaged wiring
- lowMechanical jam or interlock in drivetrain
Fixes
- easyCharge or replace the battery; verify display readings and fault codes
- easyReset safety interlocks; ensure kickstand is up and brakes are released
- easyInspect and reseat connectors; clean corrosion with contact cleaner; ensure secure plugs
- easyCheck fuses and replace if blown; inspect wiring for wear or moisture
- mediumCheck drivetrain for jams; realign derailleur and lubricate chain if needed
People Also Ask
What should I check first if my bike won't start?
Start with safety interlocks and battery level; ensure the power switch is on and that there are no obvious loose connections or damaged wiring. If faults appear on the display, note them for reference.
First check safety interlocks and battery level, then verify the power switch is on and look for loose connections. Take note of any fault codes shown.
Can weather affect starting performance?
Yes. Cold temperatures reduce battery efficiency and can slow chemical reactions inside the cells. Moisture can also cause corrosion on connectors. Keep the bike in a dry, moderate environment when possible and allow the battery to warm before charging.
Cold weather and moisture can reduce battery performance and cause connection problems.
Is it safe to bypass safety interlocks if I’m in a hurry?
No. Interlocks are there to prevent accidents. Bypassing them can cause sudden starts or movement. If an interlock is faulty, have it inspected by a professional.
No, don’t bypass safety interlocks. They protect you from unexpected starts.
What if the battery is dead and I can’t charge it?
If you can’t charge the battery, consider a replacement or temporary backup solution if your bike supports swappable packs. Verify charger compatibility and safety standards before attempting a replacement.
If the battery won’t charge, you may need a replacement battery or a compatible charger.
When should I service my bike to prevent starting problems?
Schedule regular maintenance for your drivetrain, electrical system, and battery. Annual checks are ideal for most riders, and more frequent checks are wise for high-mileage or weather-exposed bikes.
Regular maintenance helps prevent starting problems before they happen.
What if my bike still won’t start after basic checks?
If basic checks fail to resolve the issue, contact a certified bike technician or the manufacturer’s service center. Prepare a summary of tests and observations to speed up diagnosis.
If it still won’t start after basic checks, seek professional help.
Watch Video
Quick Summary
- Identify root cause quickly and methodically
- Check safety interlocks early in the process
- Prioritize battery health and electrical connections
- Know when to escalate to a professional