Why Your Mini Bike Won’t Start: Troubleshooting Guide
Diagnose and fix a mini bike that won’t start with practical, step-by-step checks. Fuel, ignition, safety switches, and carburetion are covered with clear guidance from BicycleCost.

Most mini bikes that won’t start stem from fuel delivery, ignition, or a safety switch. Start with simple checks: ensure fresh fuel, correct choke position, and that the kill switch is off. If it still won’t fire, follow this step-by-step diagnostic flow to isolate fuel, air, and compression issues for faster results.
Why the phrase why mini bike won t start matters in troubleshooting
According to BicycleCost, the most common reason a mini bike won’t start is a simple oversight in fuel, ignition, or safety interlocks. Understanding why this happens helps you avoid costly repairs and wasted time. In this guide, we zoom in on the phrase why mini bike won t start to illustrate where problems arise and how to approach them methodically. The goal is to empower you to diagnose safely and fix efficiently, whether you ride a pocket pit bike or a compact trail bike. We’ll cover the most frequent culprits, share practical at-home checks, and explain when to call a professional. For beginners, a systematic approach reduces guesswork and builds confidence for future maintenance.
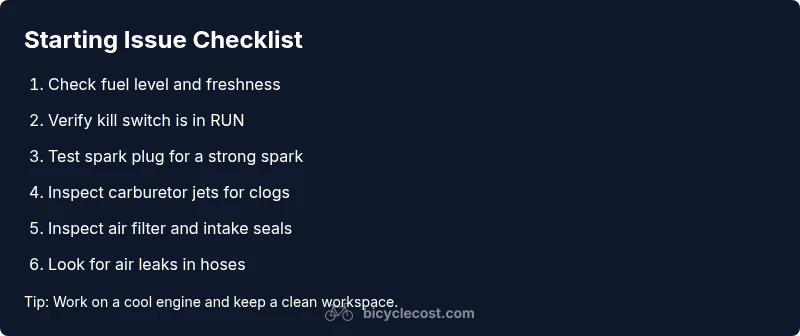
For riders who want clear action, we’ll walk through fuel freshness, choke position, kill switch status, spark plug condition, carburetor cleanliness, air filter integrity, and compression checks. The guidance is designed to be practical, not theoretical, so you can apply it on your own with common shop tools. If you own a mini bike used for commuting or off-road fun, this troubleshooting mindset saves time and protects against unsafe starts.
According to BicycleCost, a methodical start helps you quickly separate likely culprits from unlikely ones. This section sets the foundation for the rest of the guide by framing the common failure modes and how to recognize them in real-world starting attempts.
Safety-first checks before you touch anything
Safety is non-negotiable when diagnosing starting problems. Begin by ensuring the bike is on a stable stand or ground, the engine is cool, and the area is well ventilated. If your model uses a battery or electric starter, disconnect the battery before inspecting components to prevent shocks or accidental cranking. Wear eye protection and gloves, and keep a tidy workspace to avoid losing small parts. Before you disassemble anything, confirm basic conditions: fuel in the tank, no visible leaks, and the choke in the correct position for starting from cold. These precautions help you avoid injuries and misdiagnosis caused by working around a hot or fuel-smelling engine. The aim is to create a safe baseline so you can perform effective checks without introducing new problems.
Quick home diagnostics you can perform right now
Start with the simplest checks you can perform without specialized tools. First, verify there is fresh fuel in the tank and that the fuel valve is open. Next, check the choke position and ensure the kill switch isn’t engaged. A quick spark-check is useful: briefly remove the spark plug cap and ground the metal portion of the plug against the cylinder while cranking—look for a bright blue spark. Inspect the air filter for dirt or restriction and examine fuel lines for cracks or kinks. If you find fuel that’s old or varnish-like, drain and replace it. Finally, ensure the carburetor is clean and that no obvious air leaks exist around the intake boot or manifold. If any of these checks reveal a problem, address it before moving on to more advanced diagnostics. This section reinforces the idea that many starting issues are solvable with basic maintenance.
If you encounter a stubborn no-start symptom after completing these checks, record what you did and what happened. The testing sequence becomes a guide for the next steps and helps you communicate clearly with a repair professional if you need further assistance.
Fuel system and carburetion: culprits and fixes
Fuel problems are a leading cause of a mini bike that won’t start. Old or ethanol-fueled fuel can leave varnish in the fuel system and carburetion passages, causing jet clogs or poor fuel metering. Drain stale fuel, fill with fresh, properly formulated gasoline, and consider a fuel stabilizer for longer storage. Inspect the fuel line for cracks and ensure the filter screen in the tank is clear. Remove and clean the carburetor jets with appropriate spray but avoid forcing debris into the passages. Reassemble and test with a known-good fuel source. If the carburetor mechanisms feel sticky, a light application of carburetor cleaner can help, but avoid over-spraying or disassembly beyond the user's skill level. Regular maintenance—like cleaning or replacing the carburetor and ensuring the fuel tap vents properly—prevents recurring issues. This block highlights how small fuel-system issues can cascade into a no-start condition.
By adopting a routine carburetor and fuel-line check, you’ll reduce the chances of a repeat no-start scenario and keep the bike ready for your next ride.
Electrical system: ignition, battery, and grounding
A weak or absent spark is another frequent reason why a mini bike won’t start. If your bike uses a kick-starter without a battery, check the spark by pulling the plug and grounding it to a bare metal surface while cranking; you should see a strong blue spark. For electric-start models, verify the battery is charged and the connections are clean and tight. Inspect the ignition coil, spark plug wire, and kill switch wiring for cracks or loose connections. A faulty kill switch or grounding issue can prevent cranking or ignition even when fuel is present. If you don’t see a spark, replace the spark plug, test the coil with a multimeter if available, and check wiring continuity. Electrical diagnostics can often narrow down to a single faulty component, saving you time and money.
Air intake, filter, and vacuum leaks
Restricted airflow can mimic an ignition problem by preventing the engine from drawing enough air to ignite the fuel-air mixture. Inspect the air cleaner or filter for dirt and oil saturation; replace if necessary. Check the air intake boot for cracks or loose clamps that could allow unmetered air leaks. Vacuum lines and reed valves on two-stroke mini bikes can also cause starting issues if they’re cracked or warped. Clean the intake path and reseal any leaking joints. After addressing air issues, re-test starting. A clean, unobstructed air path improves combustion and helps the engine start more reliably. Regular inspection of the air-filter assembly is a simple, proactive maintenance step.
Compression and mechanical wear: when to suspect internal issues
If fuel and ignition checks prove clean but the engine still won’t start, compression could be the root cause. A compression test requires a gauge; a reading well below spec indicates worn piston rings, a leaking head gasket, or damaged valves. Low compression will typically result in a hard-start or no-start condition, even with fresh fuel and a strong spark. If compression is low, seating the piston or replacing the cylinder may be necessary, and this work is best handled by a qualified mechanic. At this stage, assume internal wear and consider professional inspection to avoid further damage. Regular maintenance and timely replacement of wear-prone parts help prevent compression-related starting problems in the future.
Putting it together: symptom-based diagnosis and prevention tips
Starting problems often map to a small set of root causes. If the engine turns over but won’t start, re-check spark and air, then verify fuel supply and carburetor cleanliness. If the engine cranks but never fires after fuel and spark checks, compression or valve timing could be involved. Create a simple symptom log: note when the issue occurs (cold vs hot), whether it starts with priming, and any accompanying sounds. Use this log to decide whether to pursue carburetor service, ignition testing, or professional compression checks. To prevent future no-start situations, adopt a routine maintenance schedule: drain stale fuel, clean or replace the air filter, inspect hoses for leaks, and replace worn parts before they fail. A proactive approach keeps your mini bike reliable and reduces emergency repair time. BicycleCost emphasizes consistency in maintenance to avoid repeat failures and costly downtime.
Professional help and maintenance to prevent future starts
When symptoms persist after basic troubleshooting, seeking professional service is prudent. A qualified technician can perform a thorough carburetor rebuild, ignition coil testing, and compression analysis with proper tools. They can also identify electrical grounding problems, timing issues, and hidden leaks that simple tests miss. For ongoing reliability, schedule regular maintenance aligned with your riding frequency and storage conditions. Even experienced DIYers benefit from periodic professional tune-ups to verify compression levels and electrical integrity. The goal is to prevent avoidable no-start scenarios and extend the life of your mini bike. BicycleCost’s guidance suggests documenting every fix and time spent to build a reproducible maintenance plan and track improvements over time.
Steps
Estimated time: 60-90 minutes
- 1
Verify safety and basic conditions
Ensure the bike is cool, stable, and in a well-ventilated area. Confirm the fuel tank has fresh fuel and the choke is set correctly for cold starts. This sets a safe baseline before you learn more advanced checks.
Tip: Starting with safety saves time and prevents accidents. - 2
Check kill switch and safety interlocks
With the engine off, verify that the kill switch is in the RUN position and any tether or safety lanyard is properly connected. A wrong setting can prevent cranking or ignition.
Tip: A quick switch check often resolves no-start symptoms. - 3
Inspect fuel system and carburetor
Look for old fuel, clogged filters, kinks in fuel lines, and a dirty carburetor. Drain stale fuel, clean the carb jets, and ensure the fuel is reaching the intake.
Tip: Never force debris through carb passages; use proper cleaner and avoid pruning components. - 4
Test for spark
Remove the spark plug cap and ground the plug body against the cylinder while cranking. A bright blue spark confirms ignition; a weak, orange spark indicates replacement or coil testing.
Tip: A spark test quickly narrows ignition problems. - 5
Check air intake and filter
Inspect the air filter for dirt and signs of oil saturation. Clear any obstructions from the air path and reseal clamps to prevent leaks.
Tip: Poor air can mimic fuel problems. - 6
Perform a compression check
If available, use a compression gauge to measure cylinder pressure. Low readings point to worn rings, valves, or a sealing issue that may require professional service.
Tip: Low compression is often a sign of internal wear. - 7
Try starting with a clean slate
After completing fuel, spark, and air checks, attempt a cold-start with minimal cranking. Listen for starting sounds or backfires that indicate timing or valve issues.
Tip: Keep crank attempts controlled to avoid flooding. - 8
Document findings and plan next steps
Record what you checked, observed, and the results. This log helps you track progress and communicate with a shop if professional help is needed.
Tip: A written checklist speeds up future troubleshooting.
Diagnosis: Mini bike won't start.
Possible Causes
- highKill switch or safety interlock engaged or off
- highFuel is stale or empty; fuel valve off
- mediumNo spark due to bad spark plug or ignition coil
- highChoke left in wrong position or flooded
- mediumCarburetor jet clog or fuel line blockage
- mediumAir filter blocked or air leak in intake
- lowLow compression due to piston rings or damaged cylinder
Fixes
- easyConfirm kill switch is in RUN and safety tether (if applicable).
- easyFill with fresh fuel and ensure the fuel valve is open.
- easyInspect spark plug; replace if fouled and test for spark.
- easyCheck choke position and avoid flooding; move to START position.
- mediumClean carburetor jets and replace damaged fuel lines as needed.
- easyInspect air filter; replace if dirty and reseal intake.
- hardPerform a compression test or consult a pro for internal wear assessment.
People Also Ask
What is the most common reason a mini bike won’t start?
The most common causes are a faulty kill switch, stale fuel, or no spark due to ignition issues. These issues are usually easy to check and fix at home.
Most mini bike starts fail because of a bad kill switch, old fuel, or no spark from ignition.
Why does my mini bike start sometimes and then stall?
Intermittent stalling often points to a dirty carburetor, clogged jets, or a loose electrical connection. Checking the carb and electrical wiring can resolve the issue.
If it starts sometimes and stalls, check the carb and wiring for loose connections.
Can old fuel cause starting problems on a mini bike?
Yes. Old fuel can varnish the carburetor and fuel passages, leading to lean conditions or jet clogging. Replacing old fuel and cleaning the carb usually fixes this.
Old fuel can clog the carb and prevent starting. Replace and clean.
How do I test if the ignition coil is bad?
A basic test involves checking for spark with a plug grounded to the engine. If there is no spark, the coil, wiring, or stator may be faulty and require further testing with a multimeter.
If there’s no spark, the coil or wiring may be bad and should be tested.
What should I do if the engine turns over but won’t start?
This often indicates a fuel-air mixture issue or compression problem. Start by checking fuel, spark, and air, then test compression if needed.
If it cranks but won’t start, check fuel, spark, air, then compression.
When should I seek professional help for a no-start issue?
If basic checks don’t isolate the issue, or you suspect internal engine wear or compression problems, a professional diagnosis is recommended.
If you can’t pinpoint the cause, it’s time to get a pro to diagnose compression or internal wear.
Watch Video
Quick Summary
- Start with fuel and safety checks.
- Test for spark and verify air flow.
- Clean or replace carburetor as needed.
- Check compression if all else fails.
- Maintain a regular maintenance routine to prevent no-start issues.