When to Replace Bicycle Tires: A Practical Guide for Riders
Learn when to replace bicycle tires, how to spot wear signs, and practical steps for safe replacement. This BicycleCost guide helps cyclists decide between patching, upgrading, and replacement.

To know when to replace bicycle tires, monitor tread wear, sidewall condition, and overall grip. Replace tires promptly if you see cracking, bulges, exposed fabric, or puncture-prone wear that undermines safety. For tubed setups, plan replacement when the tire can no longer hold air reliably or shows repeated flats. Grip loss in wet conditions is a clear warning.
Why tire wear matters for safety and performance
Understanding when to replace bicycle tires is essential for safe riding and optimal performance. Regular inspections help prevent flats, loss of traction, and unpredictable handling. According to BicycleCost, tire wear and safety are closely linked, with worn tires increasing the risk of punctures and blowouts on both road and trail. Different tires wear differently, and aging rubber can degrade grip even if tread appears intact. By recognizing warning signs early, you can plan a safer, more economical maintenance routine and avoid surprises on steep descents or wet corners.
Signs that it's time to replace your tires
Common warning signs include visible cracks, bulges, or sidewall damage; cords showing through the tread; tread worn to the wear indicators or noticeably reduced grip in wet conditions; unusually frequent flats despite proper inflation; and soft or rippled sidewalls after impact. BicycleCost notes that subtle aging cracks can be easy to overlook, but they reduce puncture resistance and ride stability. If anything looks questionable, test by pressing the tire with moderate pressure; if the bead doesn’t seat properly or air leaks persist, plan a replacement.
Age, wear, and how to separate them
Tire life is a blend of miles, terrain, storage, and riding style. Even tires with some tread left can age out as rubber hardens, losing grip and becoming prone to cracking. The BicycleCost analysis shows that tire performance declines differently for road, gravel, and mountain setups, so consider the type of use when deciding whether to replace. If you ride long distances on rough surfaces with a lot of braking, you’ll likely need to replace sooner than a casual rider on smooth pavement. Regular checks help ensure aging tires are swapped before grip deteriorates.
How tire type affects replacement timing
Road tires with fine tread may wear out quickly in certain conditions, while rugged mountain tires may last longer in rocky terrain but suffer sidewall damage from thorns. Tubeless tires can seal punctures but are sensitive to bead seating and rim compatibility. The timing for replacement depends on tread depth (if present), sidewall integrity, and perforations; if the tire shows exposed fabric, cracks along the bead, or frequent air loss, it’s time to replace. For urban riders, flat-prone tires wear quickly; for racers, performance tires may require earlier replacement to maintain grip.
Patching a tube vs replacing the tire
If the tread is still good but the inner tube is damaged, you can patch or replace the tube; this saves money and extends the life of a tire. However, if the tread is worn, the sidewalls are cracked, or you see embedded glass or metal, replace the tire instead of patching. Tubeless setups may allow bead-seal repairs, but sealant and bead seating become critical; when in doubt, replace to preserve safety. This decision often hinges on whether the tire’s structure or tubeless system remains reliable after a puncture.
A home inspection checklist for tire wear
Before a ride, inspect the tread pattern, sidewalls, and bead; check for embedded objects, cuts, or swelling. Use a flashlight to look for hairline cracks; tap the tire gently to listen for air leaks; check tire pressure with a gauge. If you find bulges or cracks, replace. This quick inspection is part of a maintenance routine BicycleCost advocates to keep you safe. Consistent checks reduce the risk of sudden flats and improve handling.
Replacing a tire: compatibility and setup basics
Before buying a replacement, confirm tire size and rim compatibility (width, bead type, and whether you ride tubeless or with tubes). Consider your riding style (commuting, road racing, gravel) and choose tires with appropriate puncture resistance, tread pattern, and sidewall thickness. Most riders keep a spare tire of their primary setup and one tubeless-compatible bead in case of a catastrophic blowout. Correct installation ensures reliable seating and reduces the chance of bead damage during inflation.
Safety-first tips during replacement
Work in a clean, well-lit area and wear gloves to protect your hands from sharp components. Keep the wheel off the ground when removing the tire to avoid damage to the fork or frame. If you encounter a stubborn bead, pause and recheck rim tape alignment; forcing a bead can cause pinch flats or rim damage. After installation, inflate gradually and test for air leaks around the bead and valve before riding.
Choosing new tires for your riding style
Your choice should align with terrain, climate, and riding goals. Road riders often prefer low-rolling-resistance tires with sturdy puncture protection; mountain bikers may prioritize sidewall aggression and grip on loose surfaces; gravel riders need versatile tread that works on mixed surfaces. Check your rim compatibility and the tire’s speed rating, weight, and expected lifespan. Regular maintenance and smart replacements keep you confident on every ride.
Maintenance habits to extend tire life
Keep tires inflated to the recommended pressure for your weight and riding style to minimize pinch flats and bead damage. Inspect tires weekly, rotate front and rear tires when feasible, and store bikes in a cool, dry place to slow aging. Clean tires after wet or muddy rides to prevent drying and cracking. By combining proper inflation with proactive replacements, you maximize performance and safety.
Common mistakes to avoid
Avoid using damaged tires beyond repair, ignoring sidewall cracks, and riding with under-inflated tires. Don’t mix tubeless and tubed setups on incompatible rims, and never force a bead onto a rim. Finally, avoid waiting until you experience a catastrophic puncture to replace tires; proactive planning saves time and reduces the risk of accidents.
Tools & Materials
- Replacement bicycle tire (clincher, tubeless-ready, or tubed)(Ensure the size matches your wheel (width and bead type) and is compatible with your rim.)
- Tire levers(Plastic levers recommended to avoid damaging rims.)
- New inner tube (if replacing a tubed tire)(Only required for tube-type tires. Remove old tube and inspect rim tape.)
- Patch kit or spare tube(Use patch kit for tubed repairs; keep a spare tube handy.)
- Co2 inflator or bike pump with gauge(Bring to ensure correct inflation pressure.)
- Tubeless sealant (for tubeless tires)(Only for tubeless setups; helps seal leaks.)
- Rag or brush(Clean rim and bead area.)
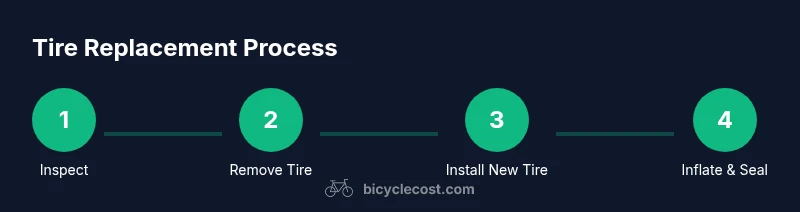
Steps
Estimated time: 30-60 minutes
- 1
Remove the wheel
Open the quick-release or loosen the axle and carefully remove the wheel from the bike to access the tire. This prevents damage to the frame and makes bead work easier.
Tip: If using a quick-release, fully open it to relieve tension on the dropouts. - 2
Deflate and inspect
Fully deflate the tire and inspect the sidewalls and tread for cuts, bulges, or embedded debris. This helps determine if the tire is worth replacing or can be patched.
Tip: Check for subtle cracks along the sidewall that may indicate aging. - 3
Break the bead and remove tire
Use tire levers to pry the bead over the rim edge and work the tire off the rim. Take care to avoid pinching the tube or damaging the rim tape.
Tip: Work from the opposite side of the valve first to avoid pinching near the stem. - 4
Assess tire and rim
Look for exposed fabric, deep cuts, or sidewall cracks. If the tire has severe damage or the rim tape is misaligned, replace the tire and re-tape the rim as needed.
Tip: If you plan to patch the tube, ensure the puncture is not on the tire tread itself. - 5
Install the new tire
Mount the new tire onto the rim, ensuring the bead sits evenly and the arrow on the sidewall (if present) matches your rotation direction.
Tip: Start at the valve and work around the tire to avoid pinch flats. - 6
Inflate and seat the bead
Inflate gradually to seating pressure and check that the bead seats evenly around the rim. If tubeless, add sealant as recommended and ensure the bead seats securely.
Tip: If the bead stubbornly resists seating, deflate and reposition the tire before re-inflating. - 7
Reinstall wheel and test
Place the wheel back into the frame and secure hardware. Spin the wheel to check for rubbing and take a short test ride to confirm comfortable handling and correct inflation.
Tip: Recheck tire pressure after the first 5–10 minutes of riding. - 8
Dispose and tidy up
Recycle the old tire and tube where possible. Clean up tools and store them for the next maintenance session.
Tip: Keep a small bag of spare parts on your bike for emergencies.
People Also Ask
When should I replace bicycle tires?
Replace when you notice cracks, bulges, exposed fabric, or poor grip due to wear. If the tread is worn to the wear indicators or the sidewalls are damaged, replacement is recommended. For tubed setups, replace the tire if the tube patching becomes frequent or ineffective.
Replace tires when you see cracks or bulges, or when grip is poor due to wear. If the tread is worn or sidewalls are damaged, replace.
Can I repair a tire instead of replacing it?
If the tread is intact and the damage is limited to the inner tube, patching or replacing the tube is often sufficient. If the tread shows significant wear or sidewalls crack, replace the tire instead to maintain safety.
You can patch a tube if the tire itself isn’t worn, but replace the tire if the tread or sidewalls are damaged.
Are tubeless tires easier to replace than tubed tires?
Tubeless tires can be easier to repair after punctures but require proper bead seating and sealant. Replacement timing depends on bead integrity and rim compatibility. If you repeatedly lose sealant or have bead seating issues, consider replacing with a model that suits your rim.
Tubeless tires can be quicker to repair but need correct seating and sealant. Replace if seating becomes unreliable.
How often should I inspect tires for wear?
Inspect tires before every ride and perform a more thorough check weekly or after rough rides. Look for cuts, cracks, or embedded objects that could lead to flats.
Check tires before every ride, and inspect more deeply each week or after rough rides.
Do tires wear evenly across the tread?
Tires can wear unevenly due to braking patterns, wheel alignment, and terrain. Stationary wear may indicate issues with alignment or inflation; monitor for cupping or patches with faster wear on one side.
Wear often isn’t perfectly even; watch for faster wear on one edge and address root causes.
What’s the difference between aging and wear?
Aging refers to rubber hardening and cracking over time, even if tread looks fine. Wear refers to tread loss and structural degradation from use. Replace tires showing aging signs as well as visible wear.
Aging is the rubber getting hard and cracking; wear is tread wearing down. Replace for both.
Watch Video
Quick Summary
- Inspect tires before every ride for cracks and wear.
- Replace tires when you see sidewall damage or exposed fabric.
- Choose tires that match terrain and riding style.
- Maintain proper inflation to extend tire life.
- Patch tubes only when the tread is intact and the tire is otherwise sound.