How to Tell If Bicycle Tyre Needs Replacing: Practical Guide
Learn to spot wear, assess safety, and replace bicycle tyres confidently. This practical guide from BicycleCost covers signs of wear, when to repair vs replace, and step-by-step tyre replacement.

To tell if a bicycle tyre needs replacing, inspect tread wear, sidewall cracks, and bead seating. Look for bald or missing tread, cuts deeper than a few millimeters, bulges, or exposed cords. Check for frequent flats or a tyre that moves freely on the rim. If you notice any of these signs, replace the tyre promptly to maintain grip and safety.
Why tyre wear happens and when to start paying attention
Tyre wear is a normal part of cycling life. The BicycleCost team notes that tyres are among the most frequently replaced parts, and proactive checks save flats and prolong wheel life. Wearing is influenced by miles ridden, road conditions, and riding style. High-speed descents, aggressive braking, and frequently riding on rough surfaces accelerate tread loss and damage the tyre sidewalls. Age matters too; even unused tyres can deteriorate if stored improperly. By establishing a simple routine—visual inspection before each ride and a periodic deeper check every few weeks—you can catch issues early and avoid unexpected flats on the road. This proactive habit not only boosts safety but also reduces the risk of rim damage from a sudden tyre failure. According to BicycleCost, a consistent maintenance mindset pays off in reliability and cost efficiency over time.
In practice, set a quick mental checklist: look for obvious tread wear, inspect the sidewalls for cracks or bulges, and confirm that the tyre beads seat firmly on the rim when inflated. If any signs raise doubts about integrity or performance, treat it as a replacement candidate rather than a repair-only concern. The goal is to ride with tyres that provide predictable grip, consistent inflation, and a stable bead that won’t unseat under load. This approach aligns with general tyre maintenance best practices and helps riders stay safe across seasons.
Visual signs of tyre wear you can spot by eye
Most tyre damage is visible with a careful inspection. Start with the tread: if the central ridges are smooth and bald, or if there are wide cuts and deep gashes, replacement is usually warranted. Inspect the sidewalls for cracks, chalky disintegration, or bulges that form under pressure—these are signs of weakened structure and potential blowouts. Look for cords showing through the rubber near any cut; exposed cords almost always mean the tyre has reached the end of its life. Check the tyre for uneven wear or date-coded marks that indicate old stock or time-based deterioration. Finally, confirm there are no foreign objects embedded in the tread that could pin a new puncture. Regularly comparing both tyres helps; if one shows wear earlier than the other, plan a tyre replacement to maintain even performance and handling.
Additional indicators: punctures and bead seating problems
Beyond tread wear, recurring punctures can indicate a compromised tyre or rim setup. If you notice frequent flats from small punctures, inspect the tyre for embedded glass, thorn-like debris, or micro-cuts that border the sidewall. Bead seating problems, where the tyre bead fails to seat evenly on the rim or lifts away during inflation, signal possible tyre or rim damage. A tyre that refuses to seat after multiple attempts may be incompatible with the rim’s bead seat or could have a faulty tyre bead. In tubeless systems, repeated bead seating issues can lead to slow leaks or air loss. When you see consistent bead misalignment, it’s usually time to replace the tyre or inspect the rim for sharp edges that could nick the tyre.
How to measure tyre health at home
A practical at-home check uses both visual inspection and simple tools. Start by inflating to the recommended pressure and inspecting the tyre while pressing gently around the surface. If you can feel cords through the rubber or hear unusual creaks when flexing, replace the tyre. Use a tread depth gauge (or even a coin in some systems) to assess tread depth; if the tread no longer covers the indicator lines, replace the tyre. A clean, smooth wear pattern across the circumference is ideal; uneven wear suggests alignment or inflation issues that should be corrected to prevent premature tyre failure. Checking the sidewalls for cracks or signs of aging, such as stiffened rubber or drying, is essential. Finally, inspect the valve area for leaks or swelling, which can accompany an ageing tyre.
Remember that a tyre nearing the end of its life often shows a combination of signs rather than a single defect. Regular home checks help you plan replacements before a dangerous failure occurs.
When to replace vs repair: inner tube vs tyre
If the tyre itself is worn but still intact, you might be tempted to patch a puncture or repair the run-flat area. However, most punctures in the tread area are repairable if the tyre has adequate material surrounding the puncture and no internal damage. Sidewall cuts, bulges, or cords visible through the rubber typically require tyre replacement rather than repairs. In tubeless systems, you can sometimes seal small punctures, but persistent leaks or larger tears demand tyre replacement. If you ride a lot on rough roads or at high speeds and notice frequent flats, replacing both tyres at the same time can provide balanced performance and handling. Always check for rim damage, as a battered rim can compromise the tyre’s integrity and sealing capability.
From a cost and safety standpoint, replacing tyres when they show multiple signs of wear is generally the wiser choice. BicycleCost’s guidance emphasizes prioritizing reliable grip and predictable performance over patching a compromised tyre.
Safety implications of worn tyres
Worn tyres dramatically affect safety, particularly in wet conditions or on loose surfaces. Reduced tread depth lowers grip, increasing the risk of sliding on corners or during braking. Sidewall cracks can lead to sudden tyre failure, which can cause loss of control. A tyre with a loose bead might unseat under cornering or rapid acceleration, which jeopardizes rider safety. Ensuring tyres are properly inflated helps maintain shape and resistance to pinch flats. When tyres become highly worn or show structural damage, your braking distance can increase, especially on steep descents. Regular inspection and timely replacement reduce these risks and support safer riding across all weather conditions.
This emphasis on safety aligns with BicycleCost’s commitment to practical, safety-first maintenance advice for cyclists.
How to choose a new tyre: size, type, and compatibility
Selecting a replacement tyre involves understanding size, width, and the tyre type that matches your rim. Read the sidewall marks on your current tyre to confirm diameter (e.g., 700c, 27.5
29er) and width (e.g., 25mm, 38mm). Wider tyres offer more comfort and grip on rough roads but may require careful clearance checks on smaller frames. Decide between clincher, tubeless, or tubed tyres based on your rim setup and preferred ride characteristics. Foldable tyres are generally lighter and easier to mount, while reinforced tires can survive rough conditions. Consider riding style and terrain: road cyclists prioritise low rolling resistance; mountain bikers opt for durability and puncture resistance. Finally, ensure the new tyre’s bead is compatible with your rim’s bead seat. brands and models vary, so read user reviews and manufacturer notes for fit guidance.
A well-chosen tyre improves efficiency, grip, and puncture resistance, extending the time between replacements.
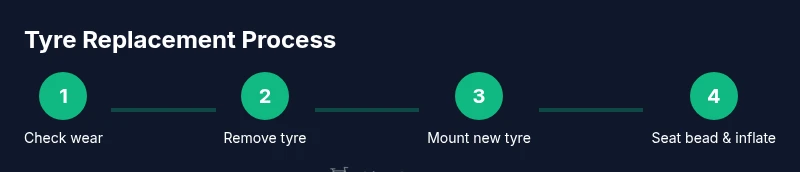
Step-by-step guide to replacing a bicycle tyre
This section provides a practical overview; the detailed, step-by-step process is covered in the dedicated STEP-BY-STEP block below. The core idea is to remove the wheel, deflate and free the bead from the rim, remove the old tyre, insert the new tyre (and inner tube, if applicable), fatten the tyre to seating pressure, and reinstall the wheel. Always inspect the rim for burrs or sharp edges that could nick the new tyre. Make sure the tyre is oriented correctly (arrow direction) and ensure the bead sits evenly around the rim before final inflation. After installation, re-check the tyre for proper seating, and perform a short test ride to verify there are no leaks or abnormalities.
If you’re new to tyre replacement, practice with a spare wheel or a trainer rim to gain confidence before working on your bike. This reduces the risk of pinching the tube or damaging the rim.
Maintenance and long-term care to extend tyre life
To extend tyre life, maintain consistent inflation, rotate tyres if you train on evenly worn rims, and store tyres away from direct sunlight and chemicals. Inspect tyres regularly for aging, especially if they’ve been stored for a long period. Clean the wheel rims and remove debris after each ride to prevent embedded objects from re-entering the tyre. Keep a simple maintenance routine: quick weekly checks for tread wear and sidewall condition, and a deeper bi-monthly inspection for signs of aging. These practices reduce the likelihood of sudden tyre failure and help you ride farther with confidence. The result is improved safety and longer tyre life, which aligns with BicycleCost’s focus on practical, data-informed bike maintenance.
Tools & Materials
- Tire levers(Plastic levers; have at least two for stubborn beads)
- New bicycle tyre (tyre)(Check size on sidewall (width x diameter))
- Spare inner tube(Choose the correct valve type for your rim)
- Patch kit or tubeless repair kit(Patches for tubed tyres; plugs for tubeless)
- Floor pump or CO2 inflator(With gauge if possible; ensure accurate inflation)
- Tire bead lubricant (optional)(Makes bead seating easier on stubborn tyres)
- Rim tape and repair items (optional)(Use for tubeless setups or if rim tape is damaged)
- Multitool or wrench (if needed to remove wheel)(Some bikes require hex keys or wrenches)
Steps
Estimated time: 45-60 minutes
- 1
Remove the wheel
Loosen the axle or quick-release; remove the wheel from the bike. If necessary, shift to the smallest cog to ease wheel removal. Inspect the brake track and rubbing areas to ensure nothing blocks the wheel. This step sets up safe access for tyre work.
Tip: If you’re unsure about brake type, take photos before removal to reassemble correctly. - 2
Deflate and break the bead
Fully deflate the tyre. Use the tyre levers to pry the bead away from the rim on one side. Work slowly to avoid pinching the inner tube. If your tyre is stubborn, apply a small amount of lubricant along the bead.
Tip: Patience prevents tube pinch flats and rim damage during removal. - 3
Remove the tyre and inner tube
Slide the tyre off the rim on one side, then remove the inner tube. Check the rim for sharp edges or embedded debris that could puncture the new tyre. If needed, patch the tube or replace it entirely.
Tip: Keep the tube and tyre together if you’re replacing a flat; this helps you compare wear quickly. - 4
Inspect and prepare the rim
Examine the rim bed for sharp edges, cracks, or corrosion. If present, repair or replace the rim before mounting a new tyre. Clean the rim to remove dust, grit, and residue that could damage the tyre bead.
Tip: A clean, smooth rim bed helps bead seating and prevents future punctures. - 5
Mount the new tyre
Place one bead on the rim, then fit the other bead over the rim. Ensure the tyre sits evenly and that any directional arrow is aligned correctly. If using tubeless, confirm the tyre seat and bead seal.
Tip: Start at the valve and work your way around for even seating. - 6
Install the inner tube (if applicable)
Lightly inflate the inner tube just enough to give it shape, then tuck it inside the tyre. Ensure the tube isn’t twisted and that the valve lines up with the valve hole.
Tip: Avoid over-inflating during installation to prevent pinch points. - 7
Inflate to seating pressure
Inflate gradually, checking that the tyre bead seats evenly all around the rim. When the tyre seats, you should not hear continuous hissing. Recheck for any bulges or mis-seated beads.
Tip: Stop as soon as the bead seats—overinflation can cause blowouts. - 8
Reinstall the wheel and test
Mount the wheel back on the bike, reinstall brakes, and spin to check for rub or wobble. Check the tyre pressure again after mounting. Take a short test ride to verify performance and confirm no air leaks.
Tip: If the wheel rubs brakes after reinstall, readjust the brake alignment before riding again. - 9
Final safety check
Inspect the tyre surface for embedded debris and ensure the valve stem is centered. Confirm the tread pattern is uniform and the wheel remains true. This final check helps avoid surprises on the road.
Tip: Always carry a spare tube and patch kit on longer rides for quick fixes.
People Also Ask
How often should I replace a bicycle tyre?
Replacement frequency varies with mileage and conditions. Inspect for bald tread, cracks, bulges, or exposed cords; replace when signs accumulate or performance degrades. Regular checks help you ride safely and avoid sudden flats.
Replacement frequency depends on wear; inspect for bald tread and cracks and replace when signs accumulate.
Is it safe to continue riding on a worn tyre?
Riding on a worn tyre is risky, especially in wet or rough conditions. Grip decreases, and the chance of a blowout increases with age and wear. Replace worn tyres promptly to maintain control and safety.
Riding worn tyres is risky—replace them to stay safe, especially in rain or rough surfaces.
Can a puncture be repaired instead of replacing the tyre?
Punctures in the tread area can sometimes be repaired if the tyre has enough material around the damage and no sidewall compromise. However, sidewall cuts or structural damage usually require tyre replacement.
Tread punctures may be repairable if there’s enough material and no sidewall damage.
How can I tell if the tyre bead is damaged?
Bead damage shows as beads that won’t seat properly, constant bead leaks, or visible deformities along the bead line. If you notice persistent bead issues, replace the tyre and inspect the rim.
Bead damage means the tyre won’t seat properly; replace tyre and inspect the rim.
Should I replace both tyres at the same time?
If both tyres show wear or you want balanced performance, replacing both at once can be wise. If only one shows excessive wear, you can replace just that tyre, but monitor handling and wear on the other side.
Replacing both tyres at once can ensure even performance; otherwise replace the worst one and monitor the other.
What size tyre should I buy for my bike?
Pick tyres that match your rim diameter and fit within your frame clearance. Check sidewall markings for width and diameter; wider tyres require more clearance but offer comfort and grip on rough roads.
Match tyre size to your rim and frame clearance; wider tyres offer more comfort but need space.
Watch Video
Quick Summary
- Inspect tyres before every ride for obvious signs.
- Choose tyres that match your rim and riding conditions.
- Replace tyres with visible sidewall damage or deep tread wear.
- Proper tyre installation prevents flats and improves safety.
- Maintain correct tyre pressure to extend life and performance.