When to Change Bicycle Disc Brake Pads: A Practical Guide
Learn when to change bicycle disc brake pads, how to inspect wear, and a practical maintenance routine to keep braking safe and reliable for riders. A BicycleCost guide with clear signs, timing, and step-by-step instructions.

Scheduling a pad replacement hinges on wear and performance. Inspect pads every 2–4 weeks of riding, and replace when the pad material is worn to the minimum thickness or when you hear rubbing, squealing, or reduced braking power. Riding style, weather, and rotor condition influence life, so use these signs to time changes.
What disc brakes are and why pad wear matters
Disc brake systems use a rotor attached to the wheel and a caliper that clamps pads onto the rotor to slow or stop the bike. Pad material wears away with use; as it gets thinner, stopping power declines and heat builds up. This is normal wear, but it requires timely replacement to avoid metal-to-metal contact, which can damage the rotor and compromise safety. The BicycleCost approach emphasizes proactive maintenance: check pad thickness and caliper behavior regularly, and choose pads compatible with your rotor size and caliper type. In this guide, we’ll differentiate wear indicators, explain how to inspect pads, and outline a reliable replacement workflow. We’ll also cover how pad compounds influence wear under different weather and terrain, and how to time changes to match riding goals. According to BicycleCost, regular brake system checks help riders maintain braking confidence and avoid unexpected failure on the road.
Signs you need to replace your brake pads
Pad wear is most obvious when you can see the backing plate through the pad material or when the pad thickness is visibly reduced. Other telling signs include a noticeable drop in braking power, a longer lever travel, or a high-pitched squeal that persists after bed-in. If you notice gritty or oily contamination on the pad surface, this can indicate debris or oil on the rotor, which erodes braking performance. Uneven wear across pads or rotor scoring are warnings that the caliper or rotor may be compromised. When in doubt, err on the side of safety and inspect more frequently rather than waiting for a failure. Regular checks help maintain predictable braking performance in all conditions.
Factors that affect pad life
Pad life is influenced by riding style (aggressive braking vs. smooth deceleration), terrain (hilly routes demand more stops), and weather (rain or mud accelerates wear and contaminant buildup). Pad compound also matters: resin/organic pads tend to wear slower on dry roads but can wear faster in wet conditions, while metallic or sintered pads resist heat better but can be harsher on rotors and quieter in some setups. Rotor condition, caliper alignment, and cleanliness all play a role too. Regularly cleaning the rotor with isopropyl alcohol and ensuring caliper alignment reduces unnecessary wear. By understanding these factors, you can anticipate changes and choose pads that fit your riding goals and climate.
How to check pad wear without removing the wheel
You can quickly assess wear from the outside in many cases. With the wheel in place and the brake lever engaged (caliper released), look through the caliper opening and observe the pad thickness. If you can see more than a small strip of metal or backing plate, wear is substantial. For deeper checks, you may need to remove the wheel to inspect the pad backing and determine pad life accurately. Always compare both sides of the brake to ensure even wear. If you feel increased lever travel or hear rubbing, stop riding and remove the wheel to inspect thoroughly.
How to choose replacement pads
Choose pads that match your brake system type (mechanical vs hydraulic, resin vs metallic), rotor size, and mounting style. Read the manufacturer’s compatibility chart for your caliper and rotor. If you ride in wet, muddy environments, or require long-lasting performance, consider sintered pads for durability; if you ride mainly dry conditions and want quieter operation, organic pads may be preferable. When in doubt, pick a drop-in replacement pad from a reputable brand and verify rotor compatibility and thickness limits. Remember that pad life also depends on rotor condition and caliper cleanliness.
Step-by-step replacement overview
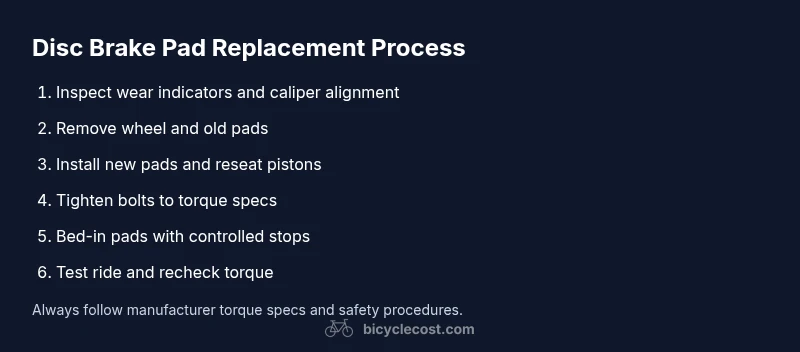
This section provides a concise workflow you can follow when you’re ready to replace pads. First, gather the right pads and tools. Then, remove the wheel to access the caliper, release the pistons, and take out the old pads. Clean the caliper cavity and inspect the rotor for wear or glazing. Install the new pads, re-seat the pistons, reassemble the caliper, and finally bed-in the pads by a controlled riding routine. Finish with a test stop in a safe area and re-check torque specs on all fasteners.
Tools and safety precautions
You’ll need a selection of hex keys, a torque wrench, replacement discs, isopropyl alcohol, clean rags, and possibly a pad spreader or caliper tool. Always wear eye protection and gloves. Work in a well-lit area with a stable bike. Degrease the rotor and caliper surfaces, and avoid touching the pad surfaces with dirty fingers to prevent contamination. If you’re unsure about torque values, consult the manufacturer’s spec and use a torque wrench to avoid over-tightening.
Common mistakes to avoid
Avoid mixing pad compounds, mismatching pad types to rotors, or installing old pads back into service. Do not leave caliper pistons extended without pads, as this can damage the rotor. Misaligned calipers can cause rubbing and uneven wear. Skipping the bed-in process can leave you with poor initial braking performance. Finally, avoid riding aggressively immediately after pad replacement; give the system a gentle bed-in period.
Maintenance practices to extend pad life
Keep your drivetrain clean and free of oil or grease near the braking surface, and inspect rotors for scoring or glazing. Regularly check pad thickness and rotor wear, and replace routers when necessary. Store your bike in a dry area to prevent corrosion, and maintain proper alignment of calipers. A proactive maintenance schedule helps you ride with confidence and extend pad life.
When to service rotors and calipers
If the rotor shows deep grooves, glazing, or heat-caused discoloration, it should be resurfaced or replaced. Calipers that stick, leak, or exhibit uneven pad wear should be serviced by inspecting seals, pistons, and mounting hardware. If you notice persistent rubbing after replacing pads, re-check caliper alignment and rotor runout. Regular inspection minimizes costly repairs and preserves braking performance.
Quick reference checklist
- Inspect pad thickness and caliper operation every ride week or two.
- Replace pads when material is thin or signs of wear appear.
- Check rotor for wear and contamination; clean before reassembly.
- Use the correct pad type for your caliper and rotor.
- Bed-in new pads properly and test ride in a safe area.
Authoritative sources
- How to replace disc brake pads | Park Tool: https://www.parktool.com/blog/repair-help/brake-pad-replacement-disc-brakes-guide
- How to change disc brake pads on a bicycle | Bicycling Magazine: https://www.bicycling.com/repair/a20042106/how-to-change-disc-brake-pads/
- Bicycle safety and maintenance overview | National Highway Traffic Safety Administration: https://www.nhtsa.gov/road-safety/bicycles
Tools & Materials
- Disc brake pads (compatible with rotor and caliper)(Check thickness and compatibility with rotor size and caliper type)
- Allen/Hex wrenches (typical sizes 5mm, 6mm)(Essential for caliper bolts and pad retention pins)
- Torque wrench(To tighten bolts to manufacturer specs)
- Isopropyl alcohol or degreaser(Clean rotor and caliper surfaces)
- Clean rags or lint-free wipes(Wipe surfaces without leaving fibers)
- Brake grease (for back of pads or mounting hardware)(Only apply where the manufacturer recommends)
Steps
Estimated time: 45-60 minutes
- 1
Prepare workspace and tools
Set up a clean, well-lit area and gather all required tools and pads. Remove the wheel if you need better access, and ensure the bike is stable. This initial setup reduces mistakes and speeds up the replacement.
Tip: Lay out tools in the order you’ll use them to keep the workflow smooth. - 2
Remove the wheel and inspect the brake area
Loosen the axle quickly and remove the wheel. Wipe down the caliper and rotor with isopropyl alcohol to remove dirt and oil. A visual check at this stage helps you spot issues like rotor glazing or pad contamination.
Tip: Keep track of the rotor orientation to avoid reassembly errors. - 3
Release caliper pistons and remove old pads
Carefully push back or open the pistons to make room for new pads. Remove the old pads, noting their orientation and any hardware such as springs or pins. This step prepares you for clean pad insertion.
Tip: Avoid letting dirty pads touch the rim or frame. - 4
Clean and inspect the caliper and rotor
Clean the caliper cavity and inspect the rotor for wear, scoring, or glazing. If the rotor shows significant wear or damage, consider rotor replacement in addition to pad change.
Tip: If rotor surfaces are rough, consider light sanding or replacement per manufacturer guidance. - 5
Install new pads and re-seat pistons
Insert new pads into the caliper, ensuring correct orientation and that any springs/pins are properly seated. Re-seat pistons evenly so the pads sit flat against the rotor when you apply the brake.
Tip: Check pad alignment before tightening any bolts. - 6
Tighten hardware to spec and reassemble
Reassemble the caliper, reinstall the wheel, and torque bolts to the recommended values. Spin the wheel to confirm smooth rotation and absence of rub.
Tip: Torque specs prevent overtightening that could damage components. - 7
Bed-in the new pads
Take a short, calm ride and perform several controlled stops from moderate speed to transfer a thin layer of pad material onto the rotor. This improves initial bite and prevents glazing.
Tip: Avoid hard, repeated stops on a cold rotor right after installation. - 8
Test ride and final checks
Return to a safe area and test braking under light, then progressively higher loads. If you notice rubbing, recheck caliper centering and rotor runout.
Tip: If rubbing persists, recheck alignment before longer rides.
People Also Ask
How often should I inspect brake pads?
Check pads during routine maintenance and before long rides. Look for thinning material, uneven wear, or noise. If you notice any of these signs, inspect sooner to prevent failure.
Check pads during routine maintenance and before long rides. If you hear noise or see wear, inspect sooner to stay safe.
Can I ride with worn pads?
Riding with worn pads reduces stopping power and increases the risk of rotor damage. Replace pads as soon as wear signs appear.
Riding with worn pads isn't safe; replace them as soon as wear signs appear.
What’s the difference between organic and metallic pads?
Organic (resin) pads are quieter and offer good initial bite in dry conditions but wear faster in wet or dusty weather. Metallic (sintered) pads resist heat and last longer but can be louder and may wear rotors faster.
Organic pads are quiet and good in dry weather; metallic pads last longer but can be louder.
Do I need to bleed hydraulic brakes when changing pads?
Pad replacement usually does not require bleeding hydraulic brakes. If the system shows air or spongy feel after pad replacement, consult a brake service guide for your model.
You generally don’t need to bleed hydraulics just for pad changes, but check your system if the lever feels spongy.
Should I replace rotors at the same time as pads?
If the rotor is worn, scored, or warped, replace it along with pads for consistent braking. Otherwise, pad replacement alone is fine.
If the rotor is damaged, replace it with the pads for consistent braking.
How do I know if my rotor is worn?
Look for deep grooves, scoring, or a noticeable reduction in rotor thickness. If in doubt, have a professional measure rotor runout and thickness.
Check for grooves or discoloration; if in doubt, have a pro measure rotor wear.
Watch Video
Quick Summary
- Inspect pad thickness regularly and replace before metal contact
- Choose pads compatible with your caliper and rotor; consider conditions you ride in
- Bed-in new pads properly for best performance
- Keep rotors clean and calipers aligned to extend pad life
- Follow torque specs to avoid component damage